Step 2. Run Automated Evaluation
In an Evaluation Set, all evaluation settings are configured sequentially in a single modal, and the evaluation runs immediately upon completion of the Set creation.
The entire flow proceeds in a 4-step sequence:
Select Metric → Set Evaluation Model → Enter Eval Set Name → Select evaluation target dataset (Response Set).
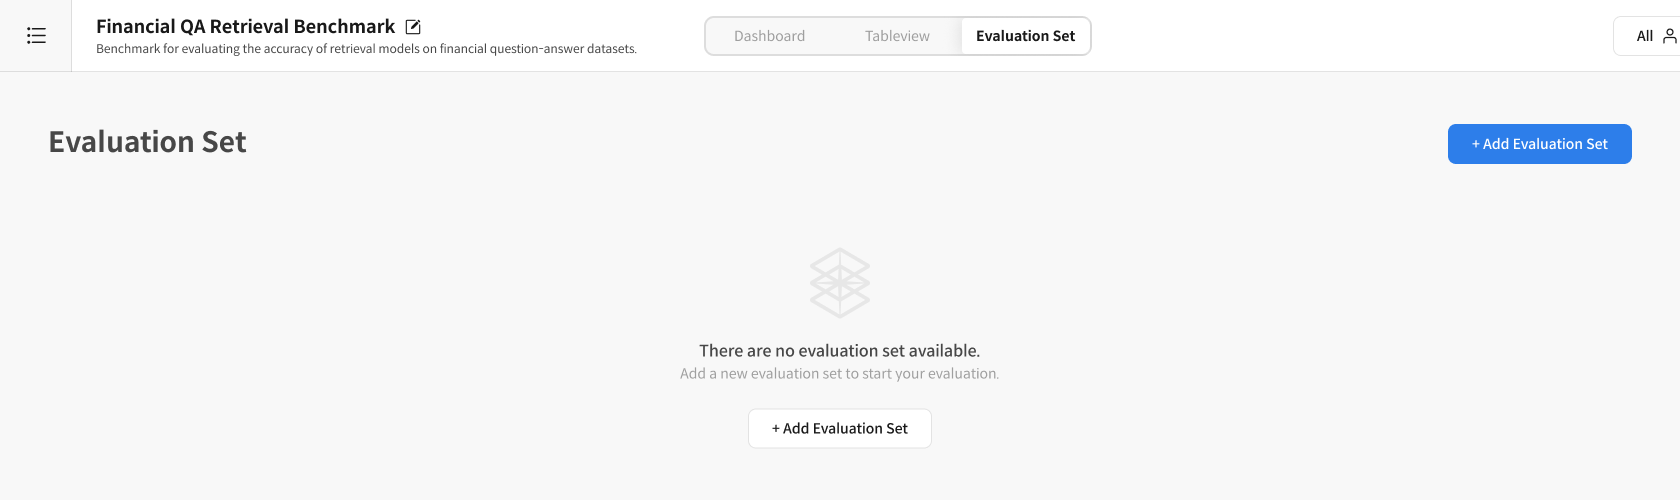
2-1. Start Creating Eval Set
① Click the Add Evaluation Set button
- After creating the Task, click the 「Add Evaluation Set」 button
- The Evaluation Settings Modal will open
2-2.Eval Set Evaluation Settings
① Select Evaluation Metric
Select the Metric to be used for the evaluation:
- Select Metric Category: Once selected, only Metrics from the same category can be selected.
- The selected Metric determines the compatible models and Response Sets.


② Select Evaluation Model
Select an evaluation model that supports the selected Metric:
- Show compatible models only: Only models compatible with the selected Metric are displayed.
- Select Judge Model: GPT-4o, Claude 3.5, etc.
- A notice of potential errors will be given if a non-compatible model is selected.

③ Set Name
Set a name to identify the evaluation:
- Evaluation Name: Enter the name of the evaluation set.
- Description: Describe the purpose or features of the evaluation (optional).
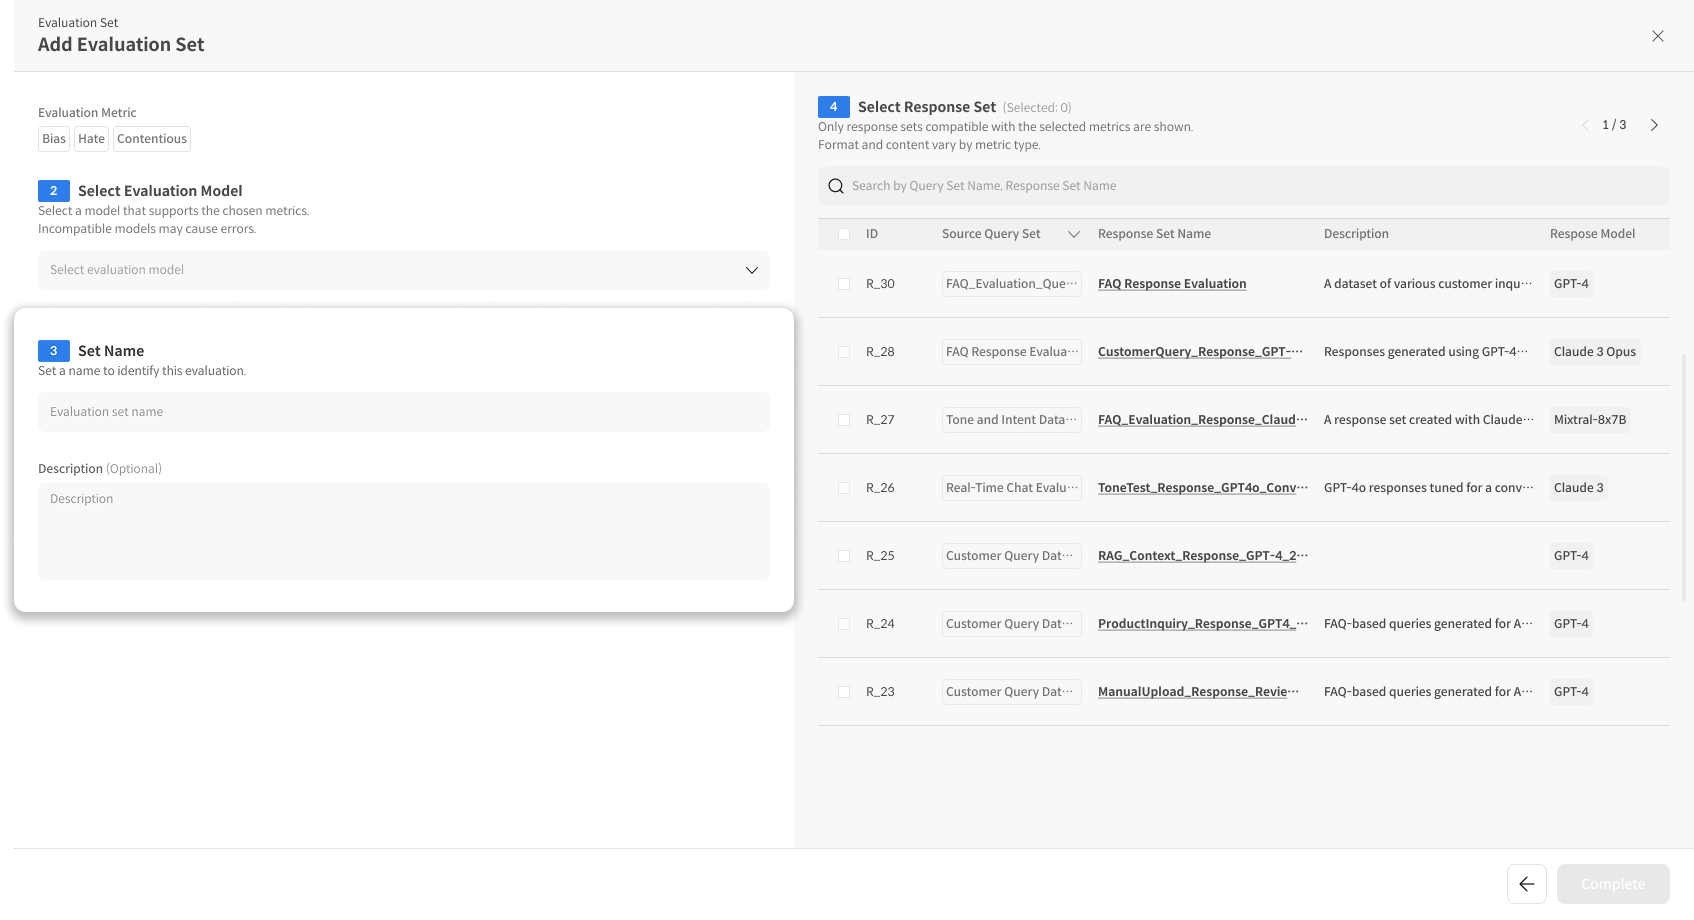
④ Select Response Set
Select a Response Set that is compatible with the selected Metric:
- Show compatible Response Sets only: Only Response Sets compatible with the selected Metric are displayed.
- The number of currently selected Response Sets can be checked at Selected: 0.
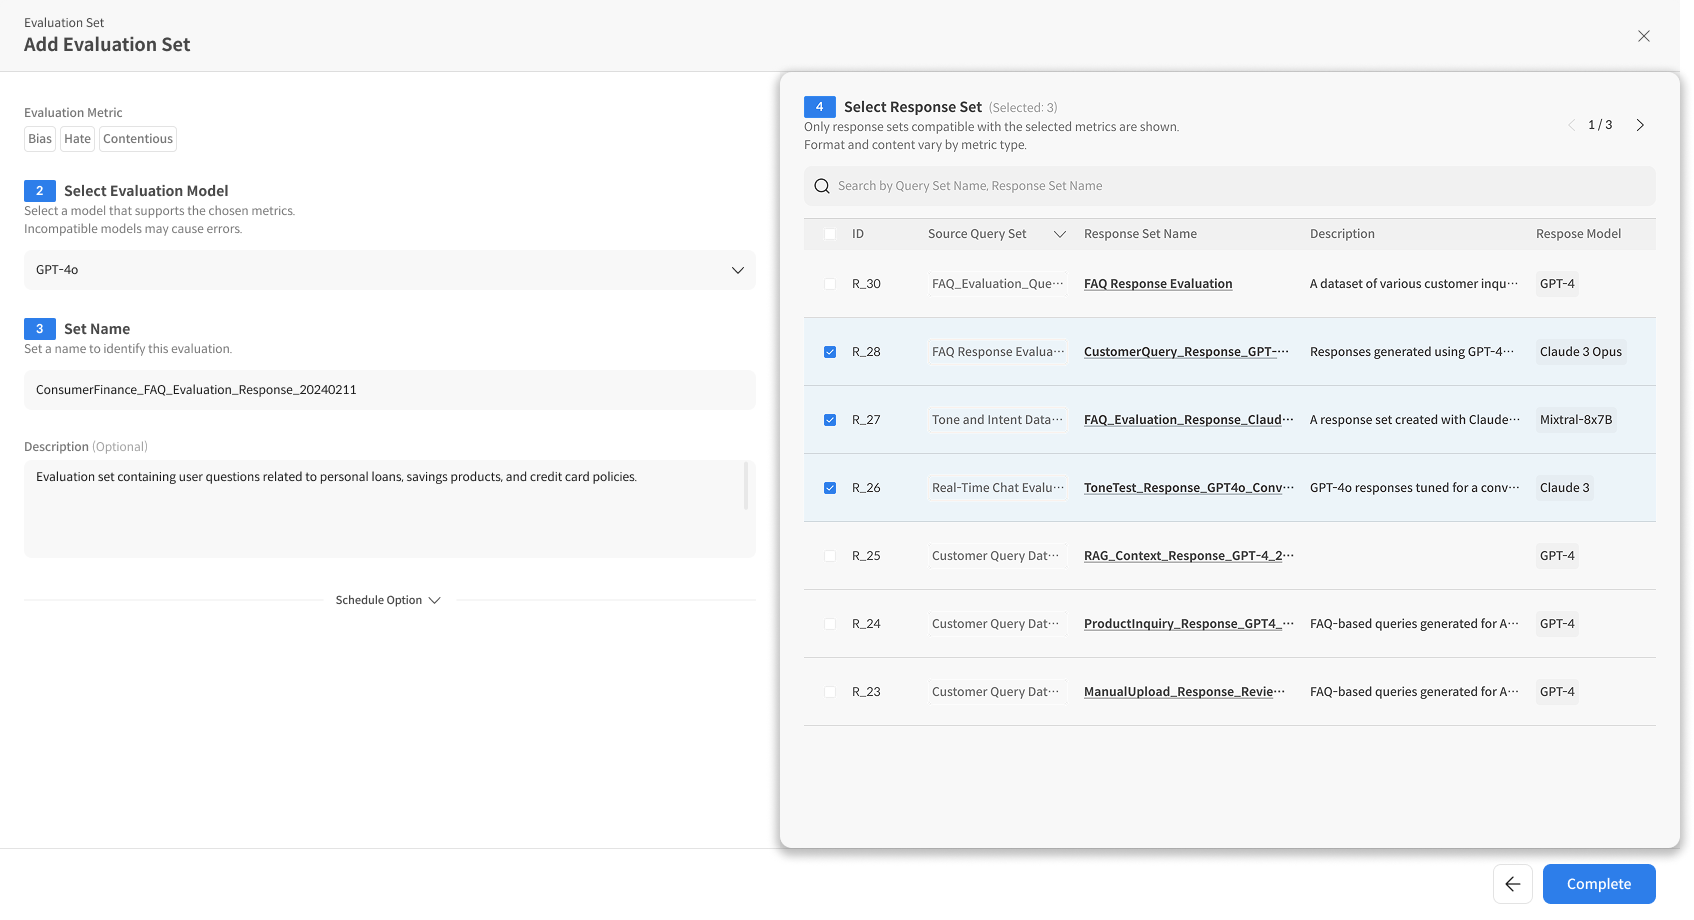
⑤ Run Complete
After all settings are complete:
- The evaluation starts immediately upon clicking the Complete button.
- You will be automatically redirected to the Eval Set Detail Page, where you can check the evaluation progress in real time.
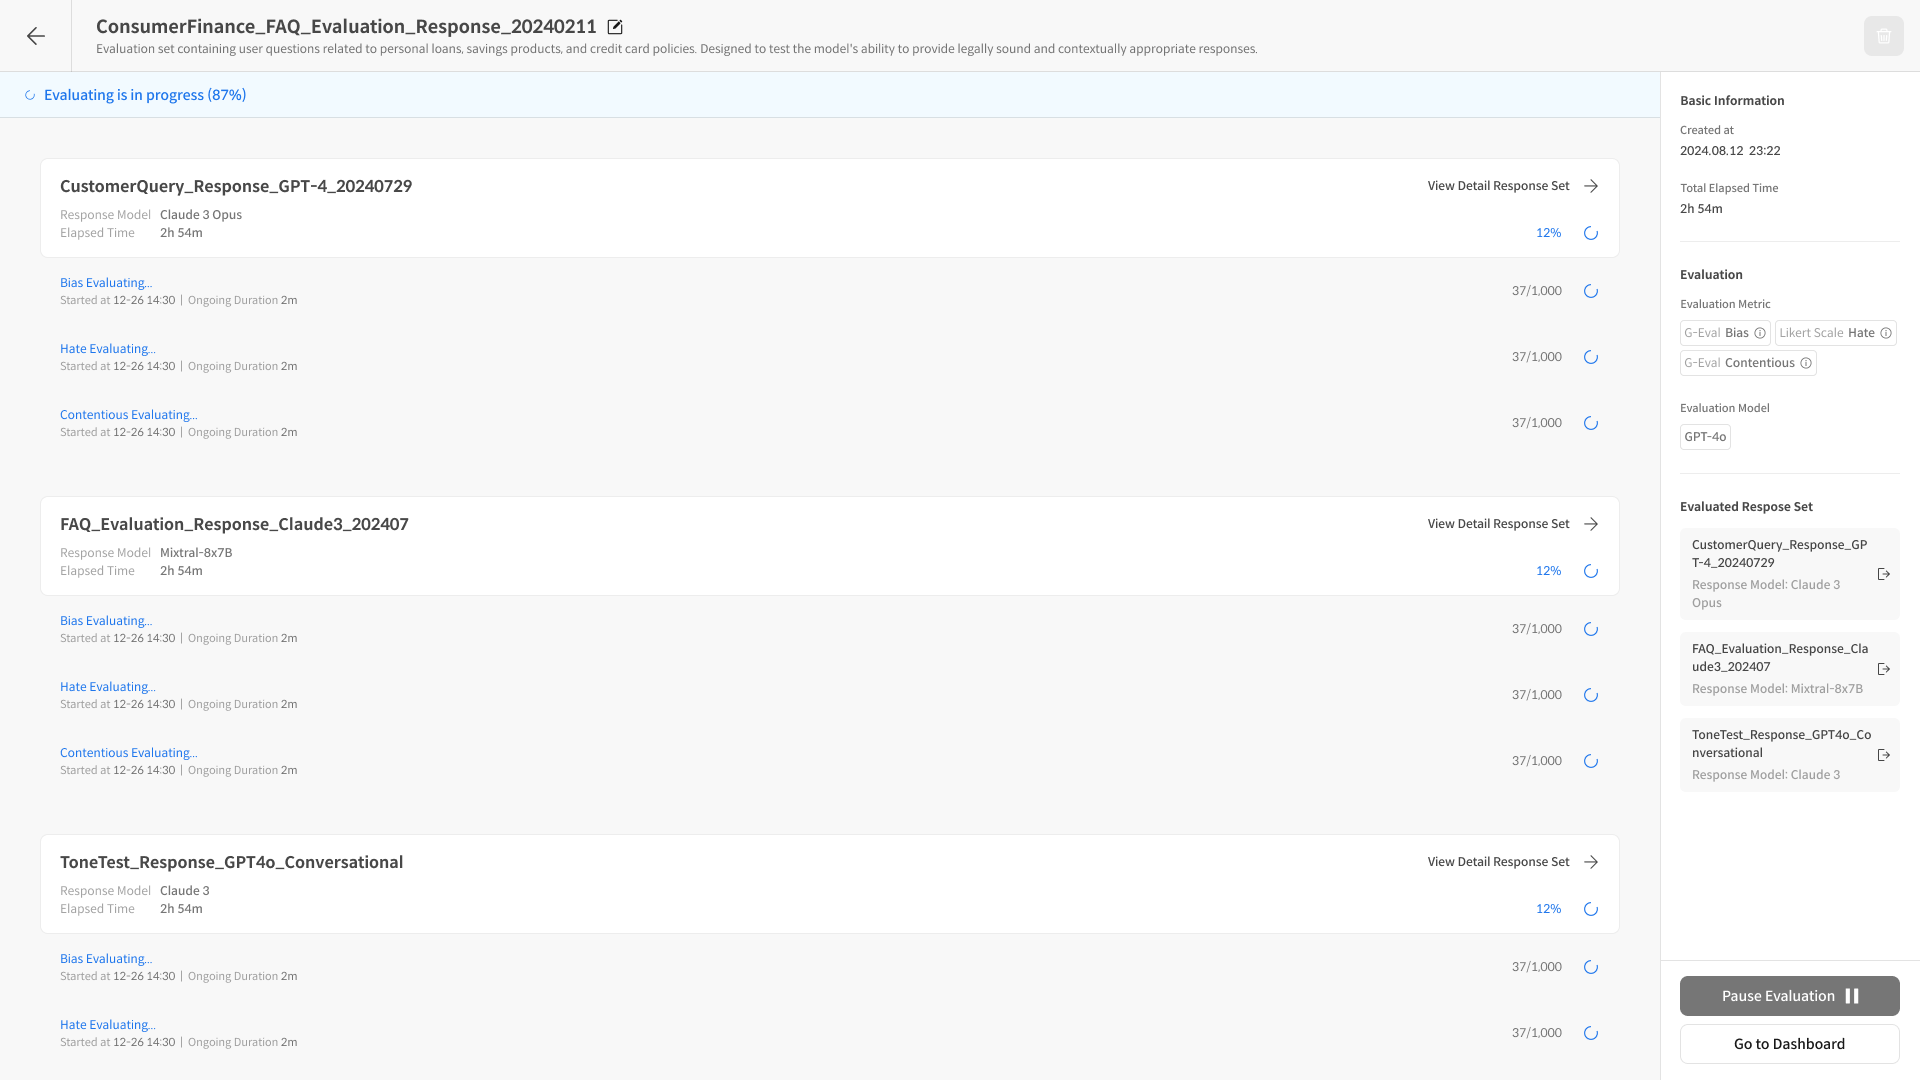
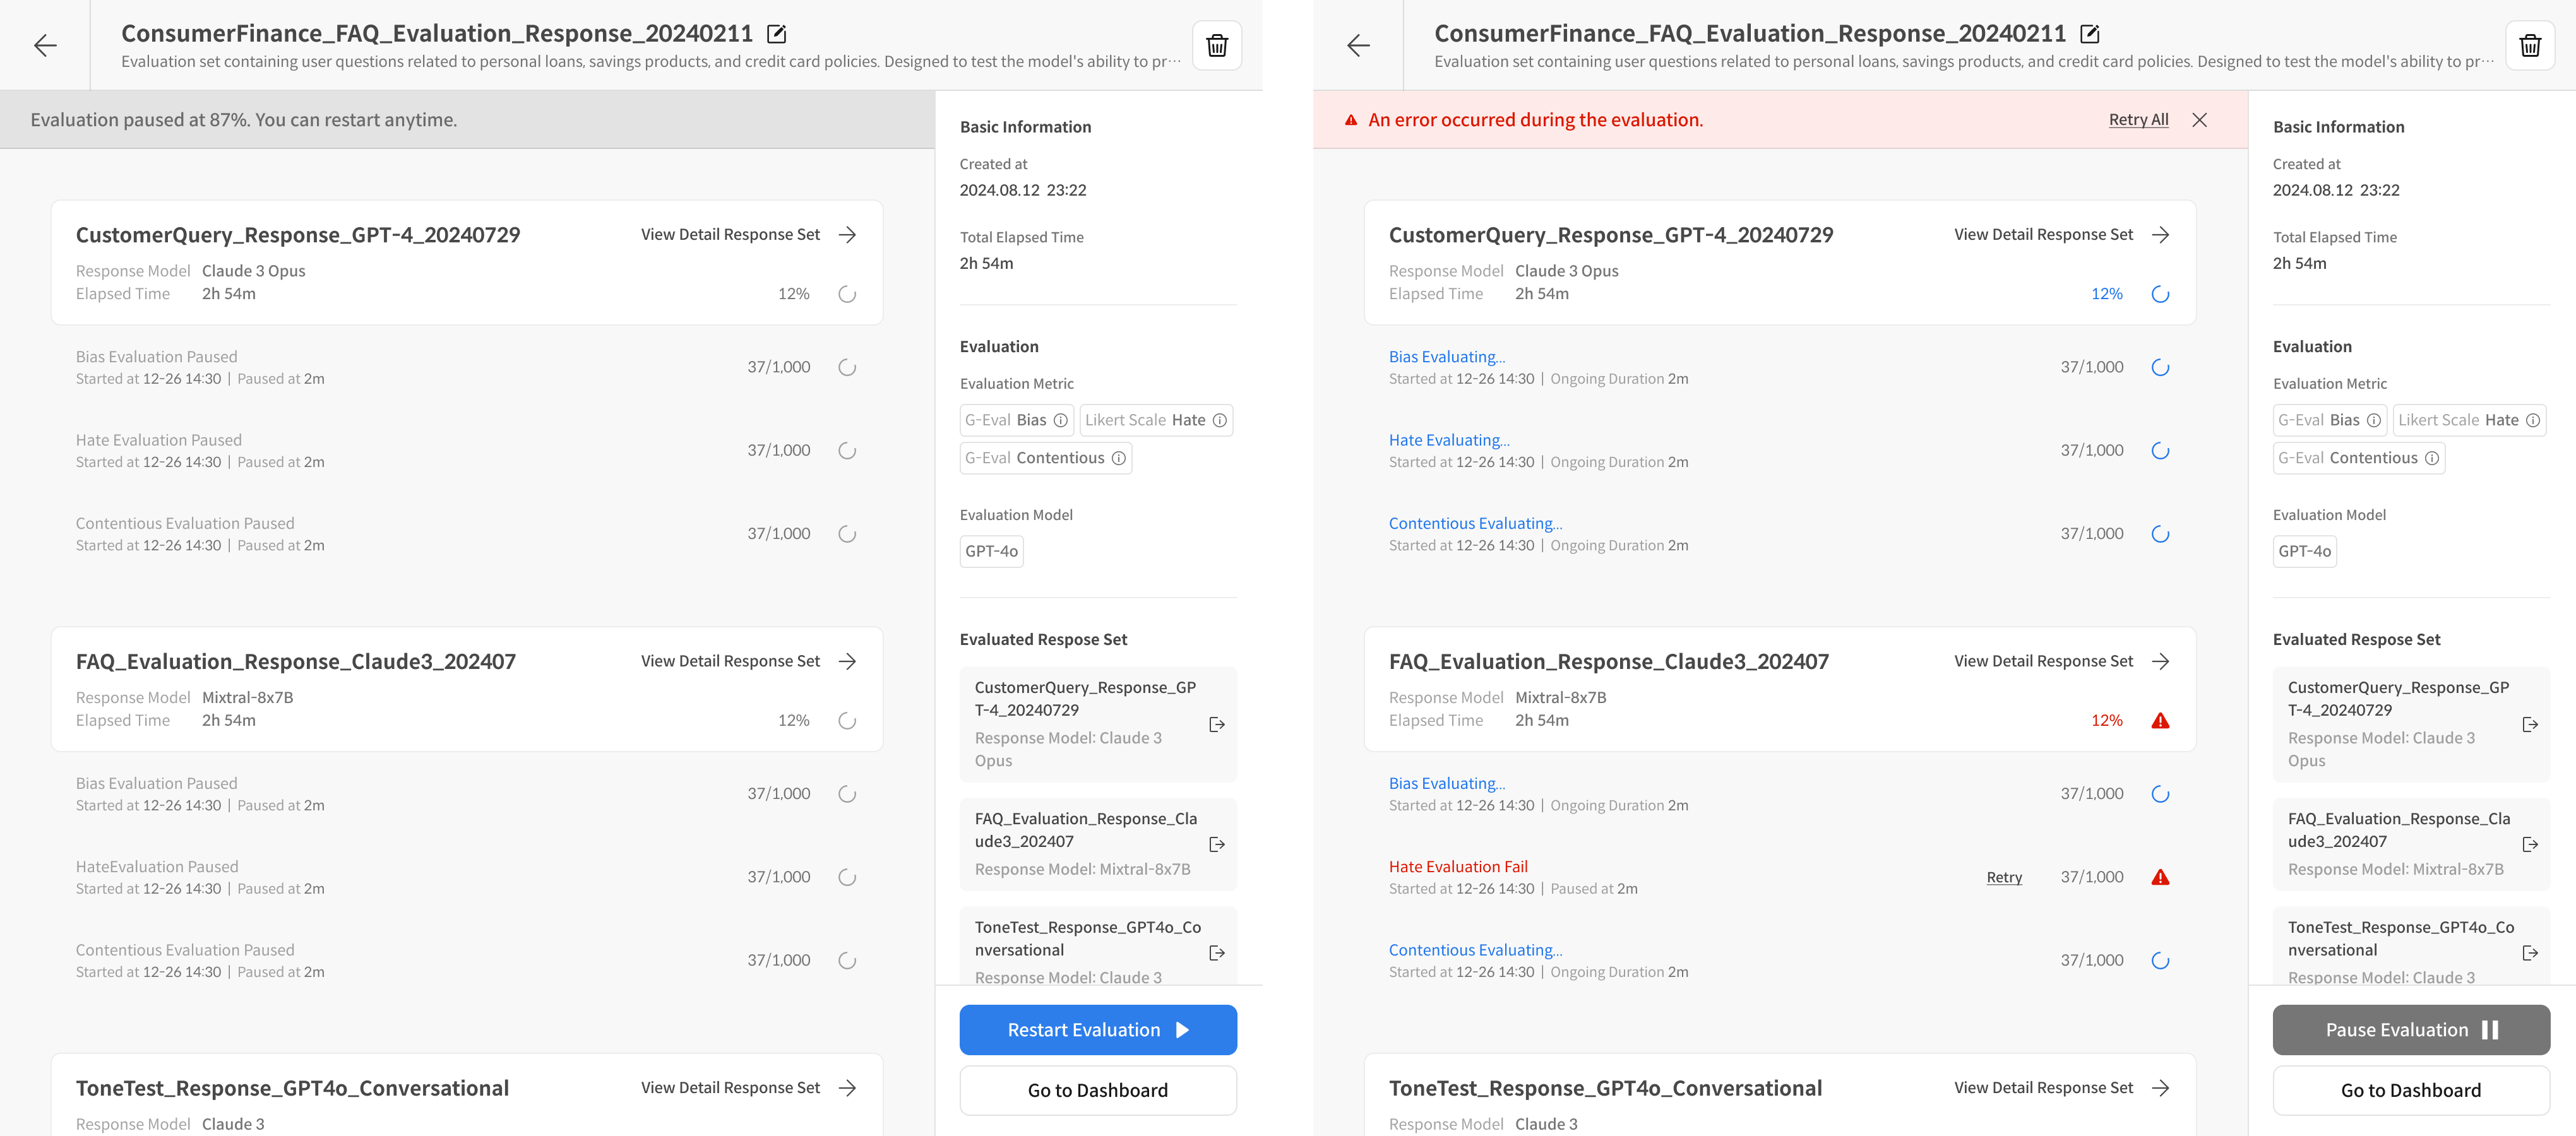
You can manage the evaluation in the Evaluation Set.
- Paused: You can pause the evaluation via the pause button and restart it from the point where it was stopped.
- Error: If an error occurs during the evaluation, you can retry the evaluation for only that data. Data other than the erroneous data can be checked in the evaluation results.
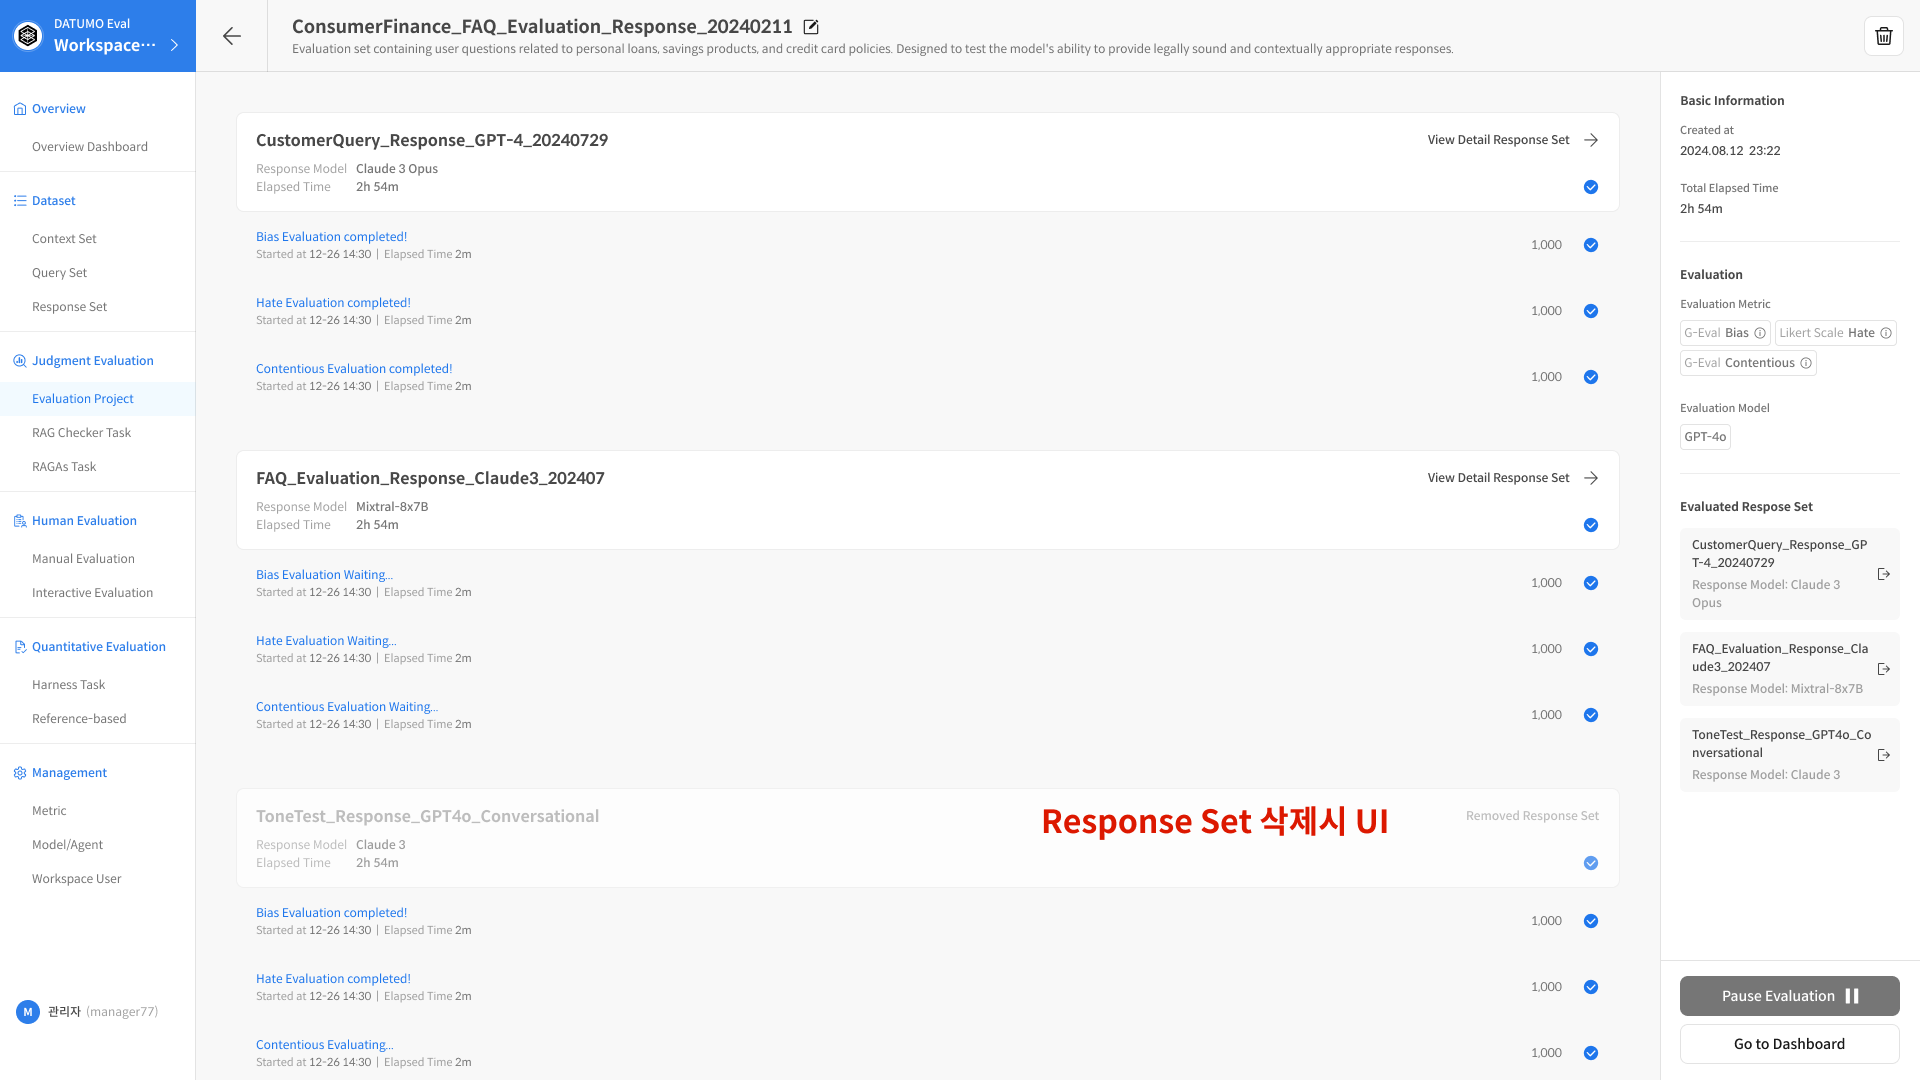
2-3. Evaluation Complete
① Evaluation Complete
- When the evaluation is complete, you can check it directly on the dashboard, and you can also check the overall completion rate and time taken.
💡 Evaluation Progress Tips
1. Review Dataset Quality
- Be sure to check the quality of the Context and Query before evaluation.
- Check that the question composition is appropriate for the purpose of the evaluation.
2. Optimize Metric Settings
- Select a Metric that is appropriate for the purpose of the evaluation.
- Check compatibility: Compatibility of the selected Metric with the model and Response Set.
- Consider the performance and cost of the Judge Model.
3. Efficient Evaluation Execution
- Run a small-scale test first, then run the full evaluation.
- Adjust the batch size to balance stability and speed.
- If an error occurs, immediately identify and resolve the cause.
❓ Frequently Asked Questions (FAQ)
Q. What happens if I stop during the evaluation?
A. Even if you stop during the evaluation, the results that have already been completed are preserved.
You can restart from the point where you stopped, and you can also check the partial results on the dashboard.
Q. Can I use Metrics from different categories together?
A. Once you select a Metric category, you can only add Metrics from the same category. To use a different category, you must create a new Evaluation Set.
Q. Can I edit the evaluation results?
A. After the evaluation is complete, you can manually edit the individual results. This allows a person to correct any parts that were missed by the automated evaluation or where the judgment was ambiguous.