RAG Checker
The RAG Checker page allows you to upload documents and automatically evaluate whether responses are grounded in the given context.
This feature utilizes two models:
- A Decomposition Model breaks the response into individual claims.
- An Entailment Model checks whether each claim is supported by the retrieved documents.
This tool is helpful for analyzing RAG accuracy, detecting hallucinations, and comparing model performance.
Create a Project
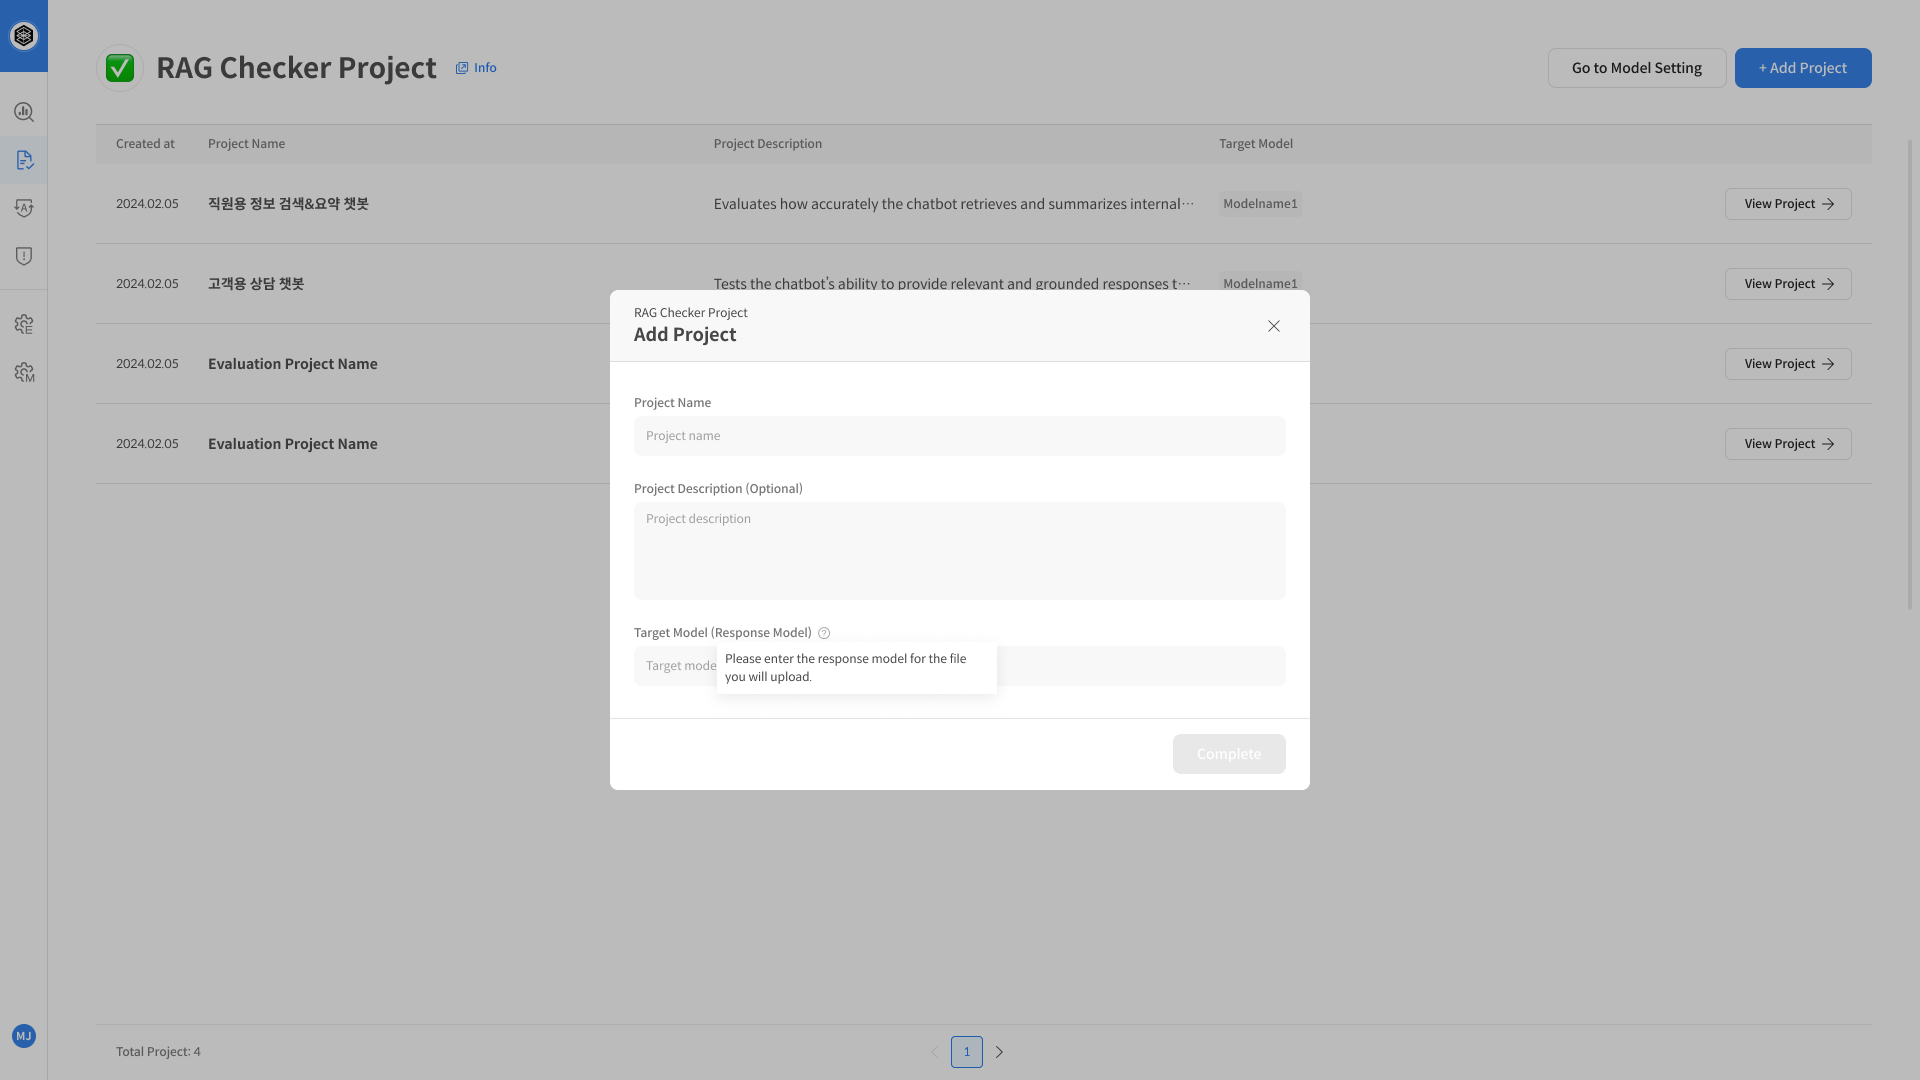
① Create RAG Checker Project
Click on the [RAG Checker] item in the left sidebar to open the evaluation screen.
You'll see a list of existing projects and can click on any project to view its details.
To create a new project, click the RAG Checker icon on the right and then select + Add Project.

On the project creation page, enter the project name, description, and target LLM model name.
Then click [Create] to finish setting up the project.
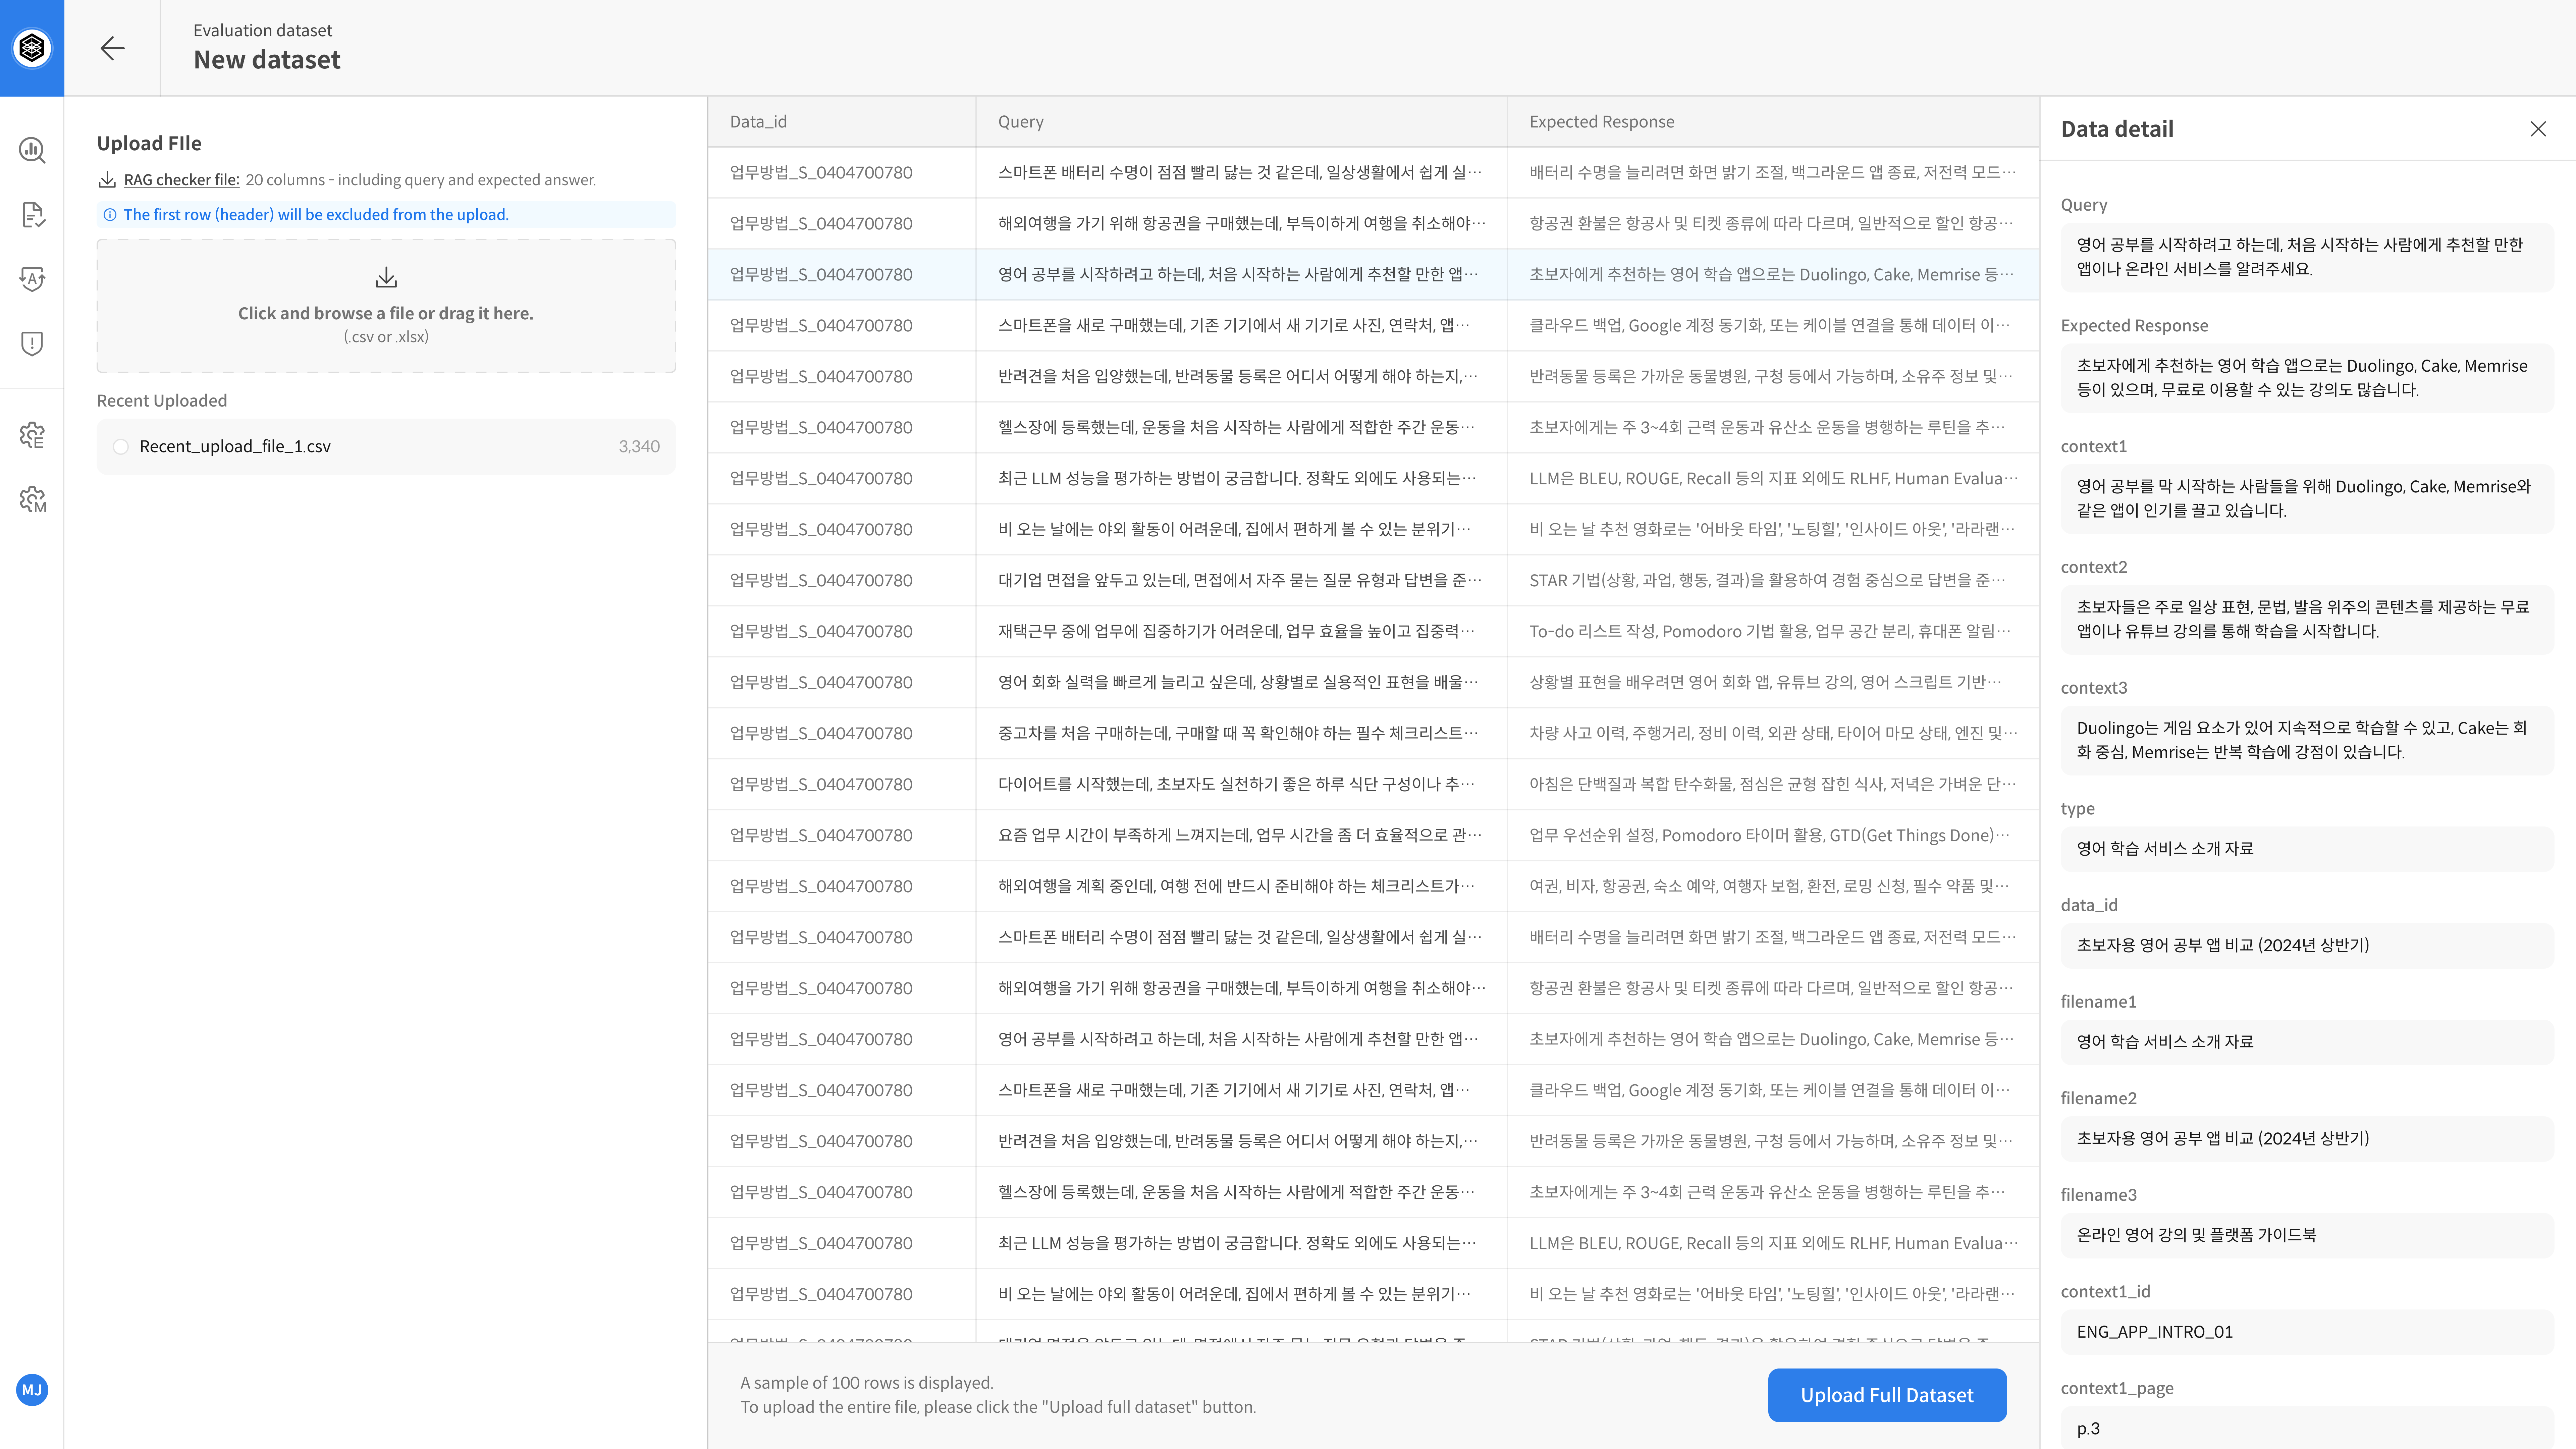
New Dataset
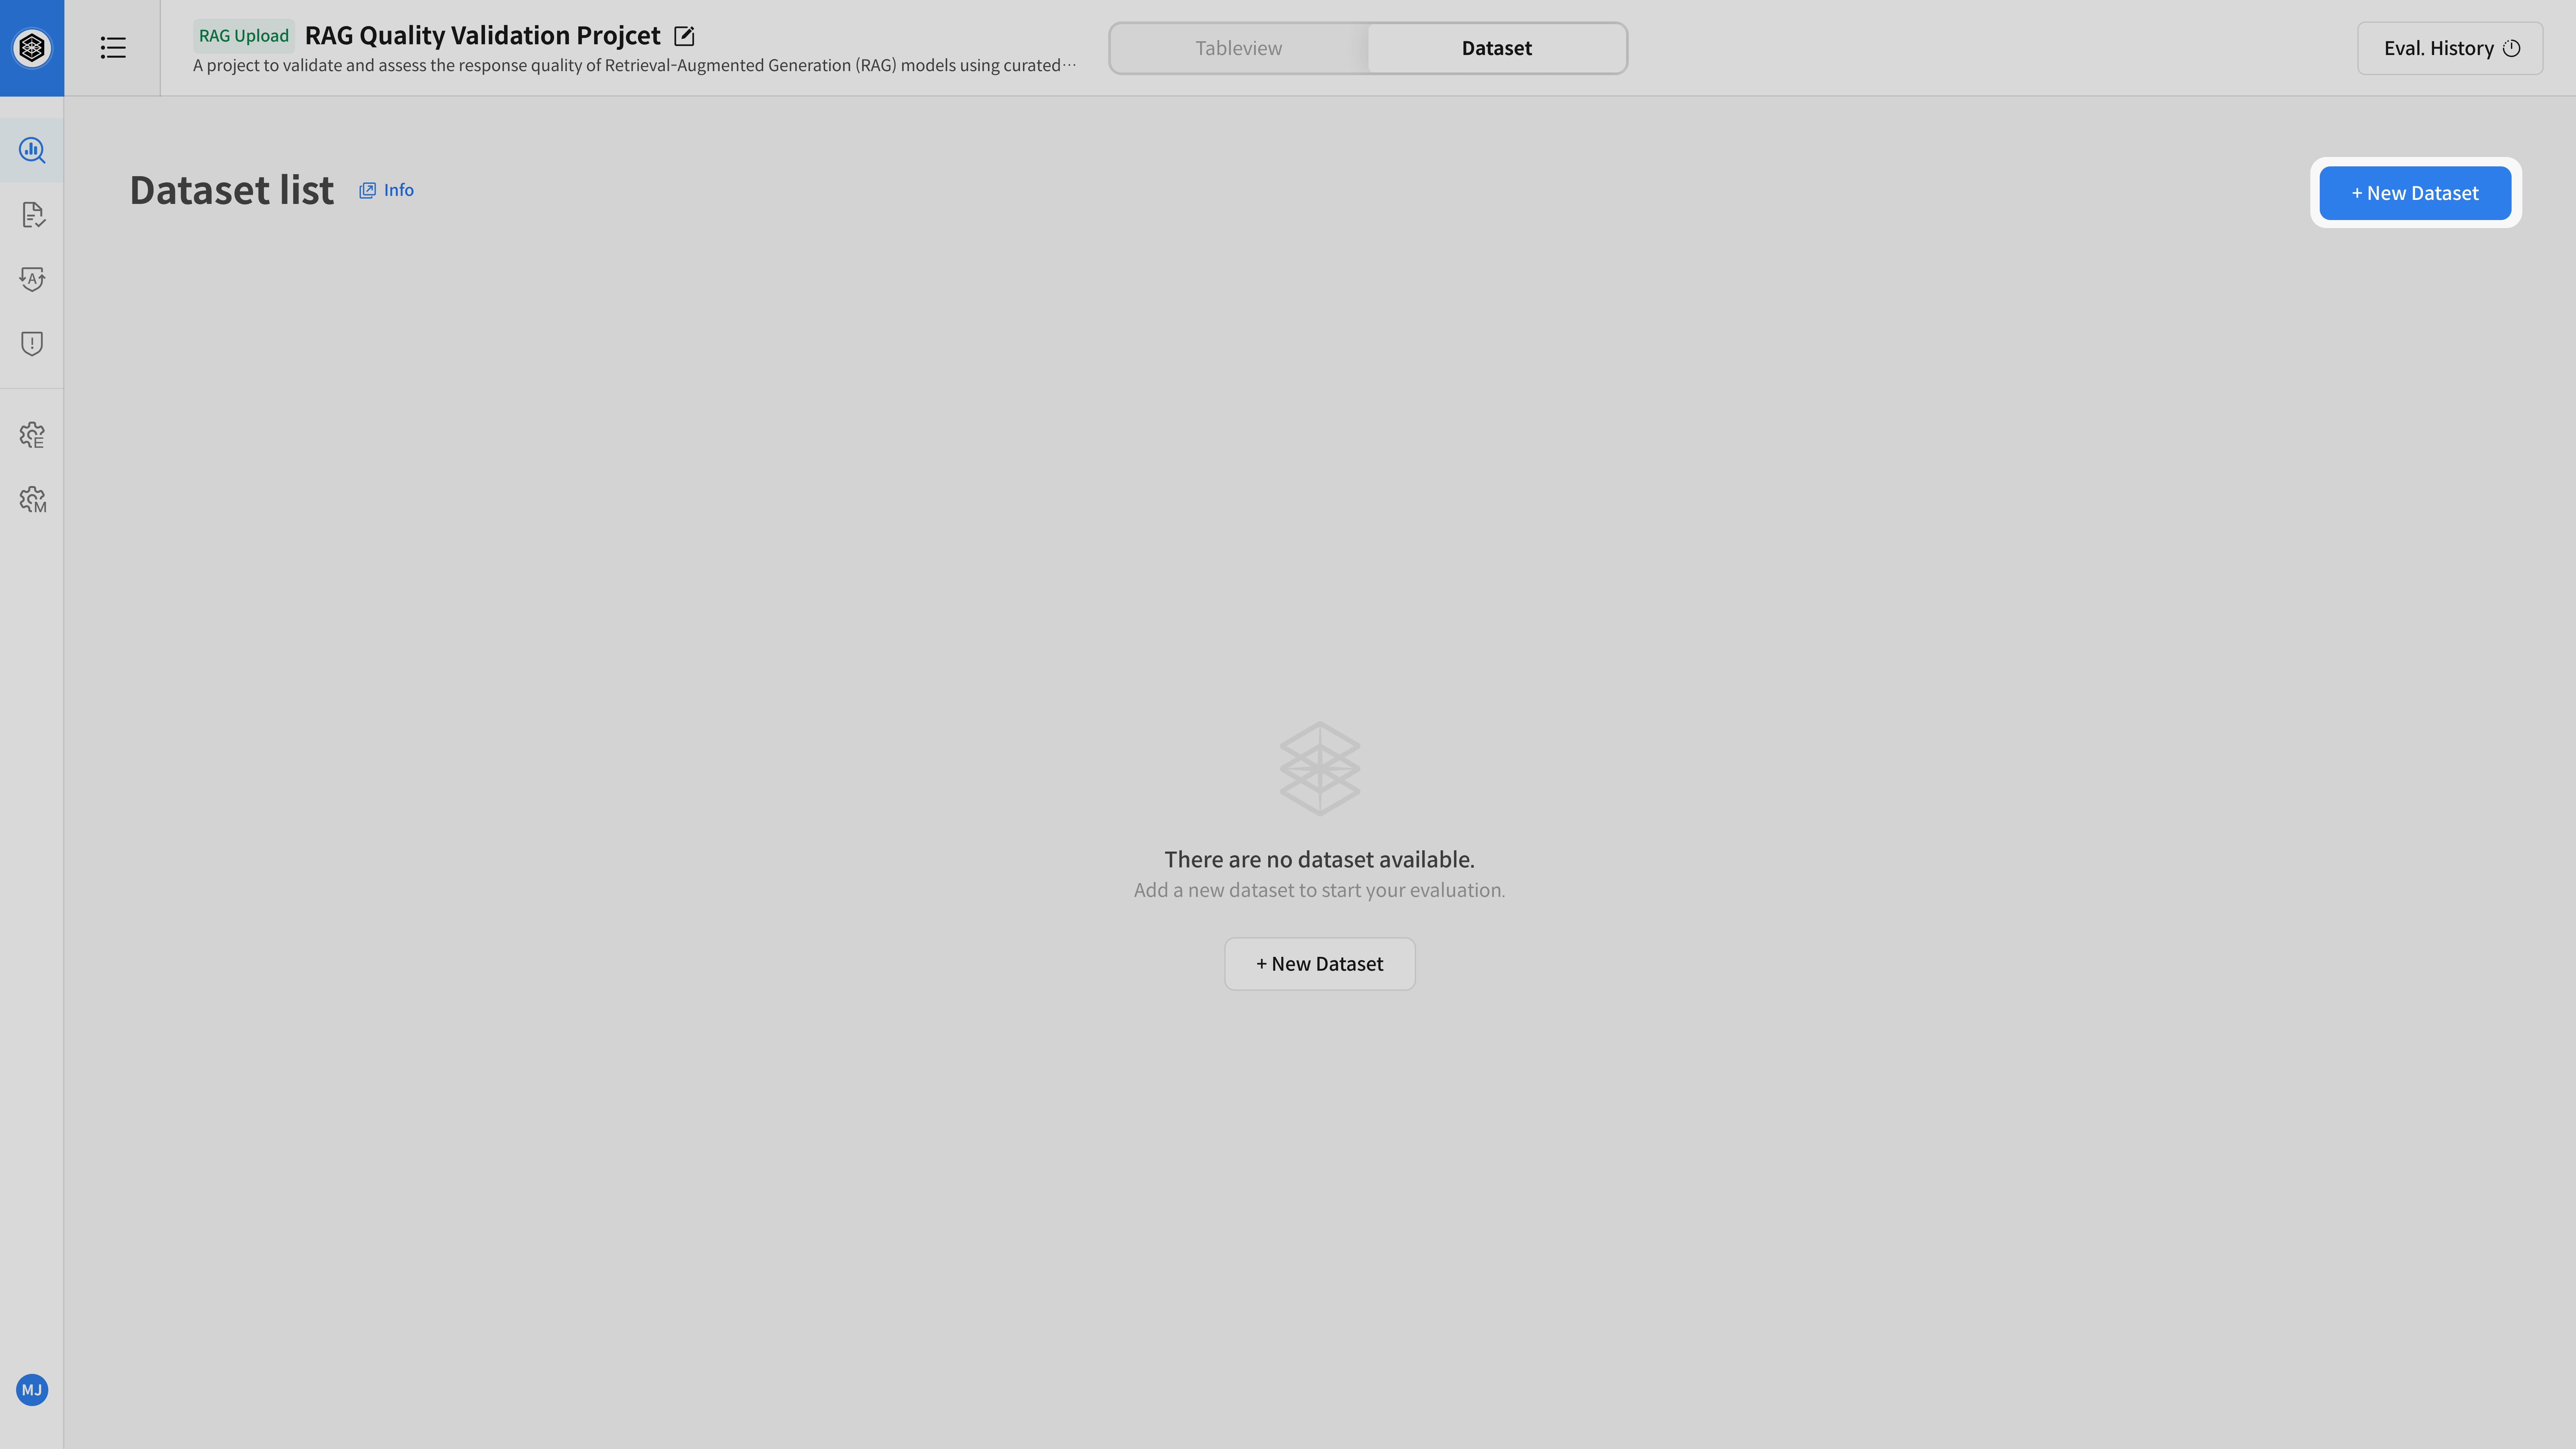
Step 2. Upload Evaluation Dataset
② Open Dataset Creation Screen
After selecting the project, go to the [Dataset] tab at the top,
then click the [New Dataset] button on the top right to begin creating your dataset.
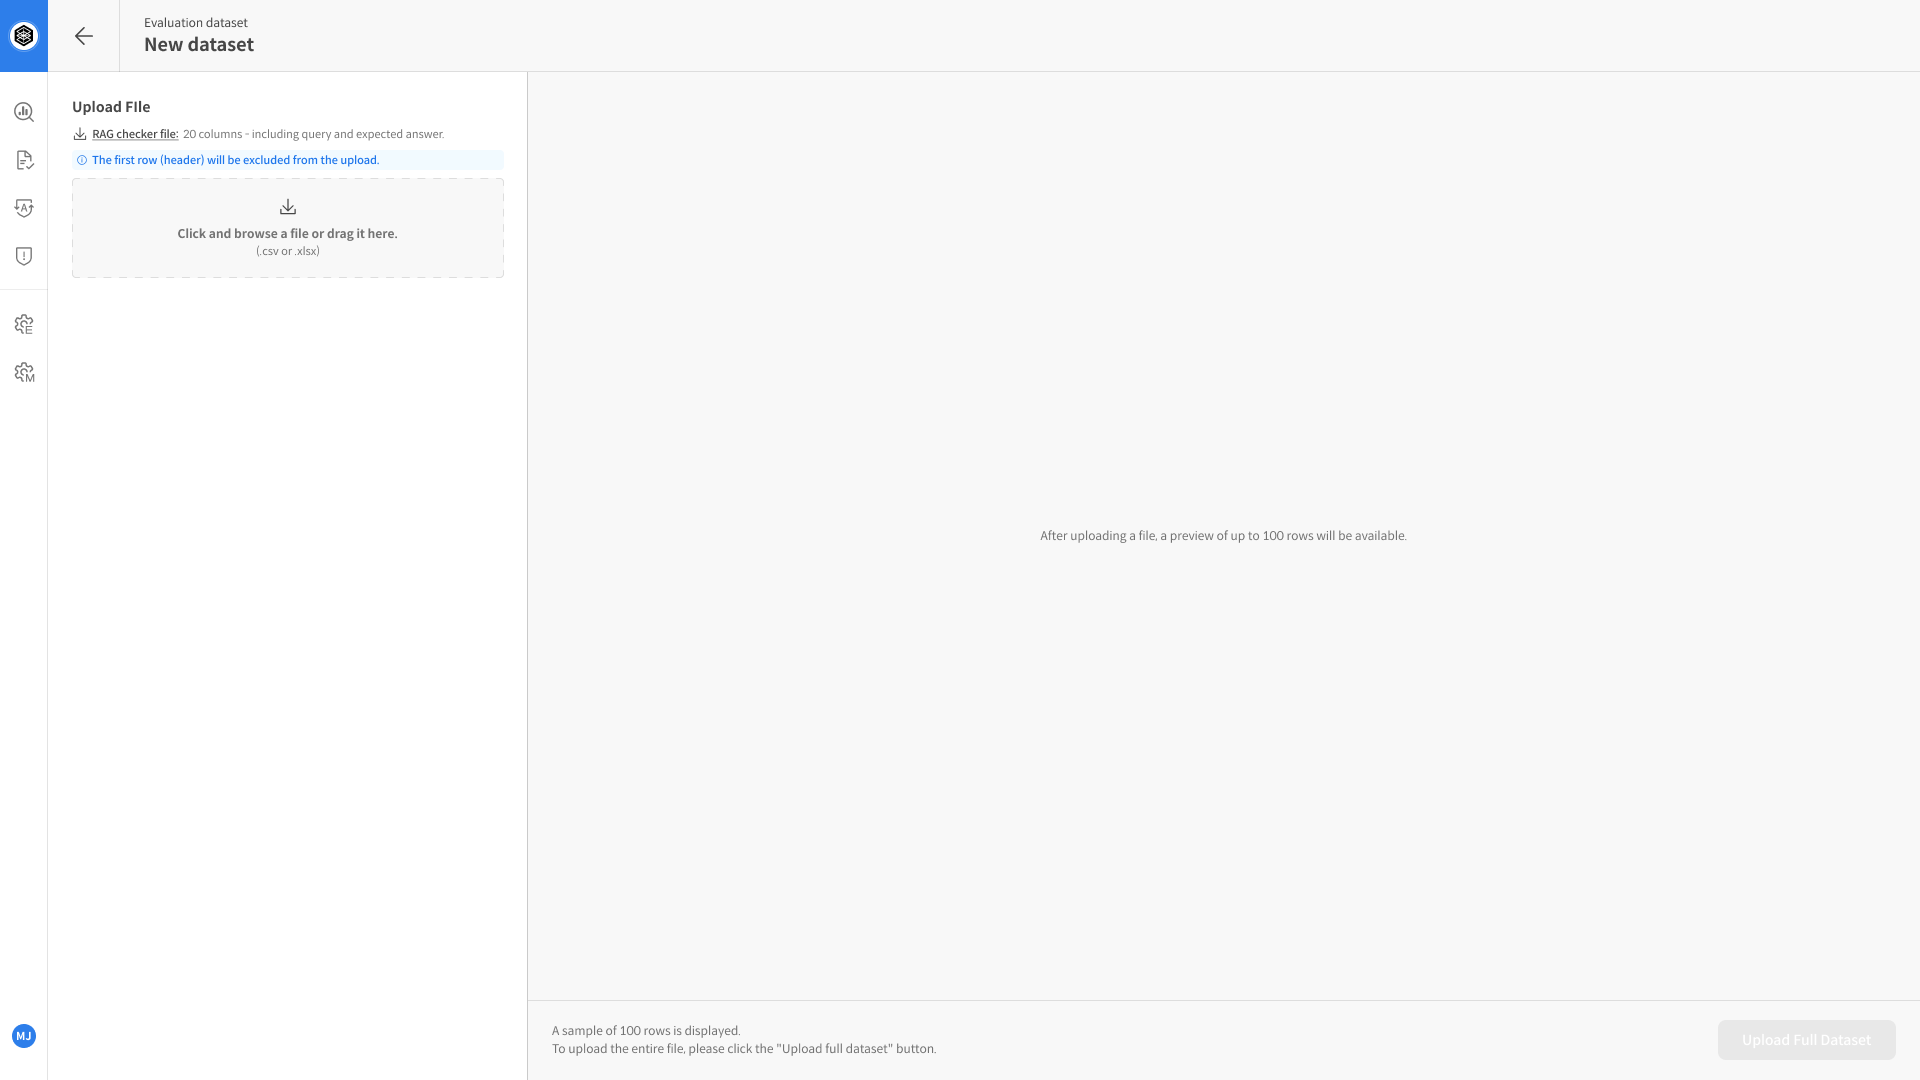
③ Upload Documents
Upload the evaluation document file in the Upload File section.
If you’re unsure of the format, download a sample and fill it in accordingly.
- Supported formats:
.csv,.xlsx - Required columns:
query,expected_response,target_response,retrieved_context1
Dataset Detail & Evaluation
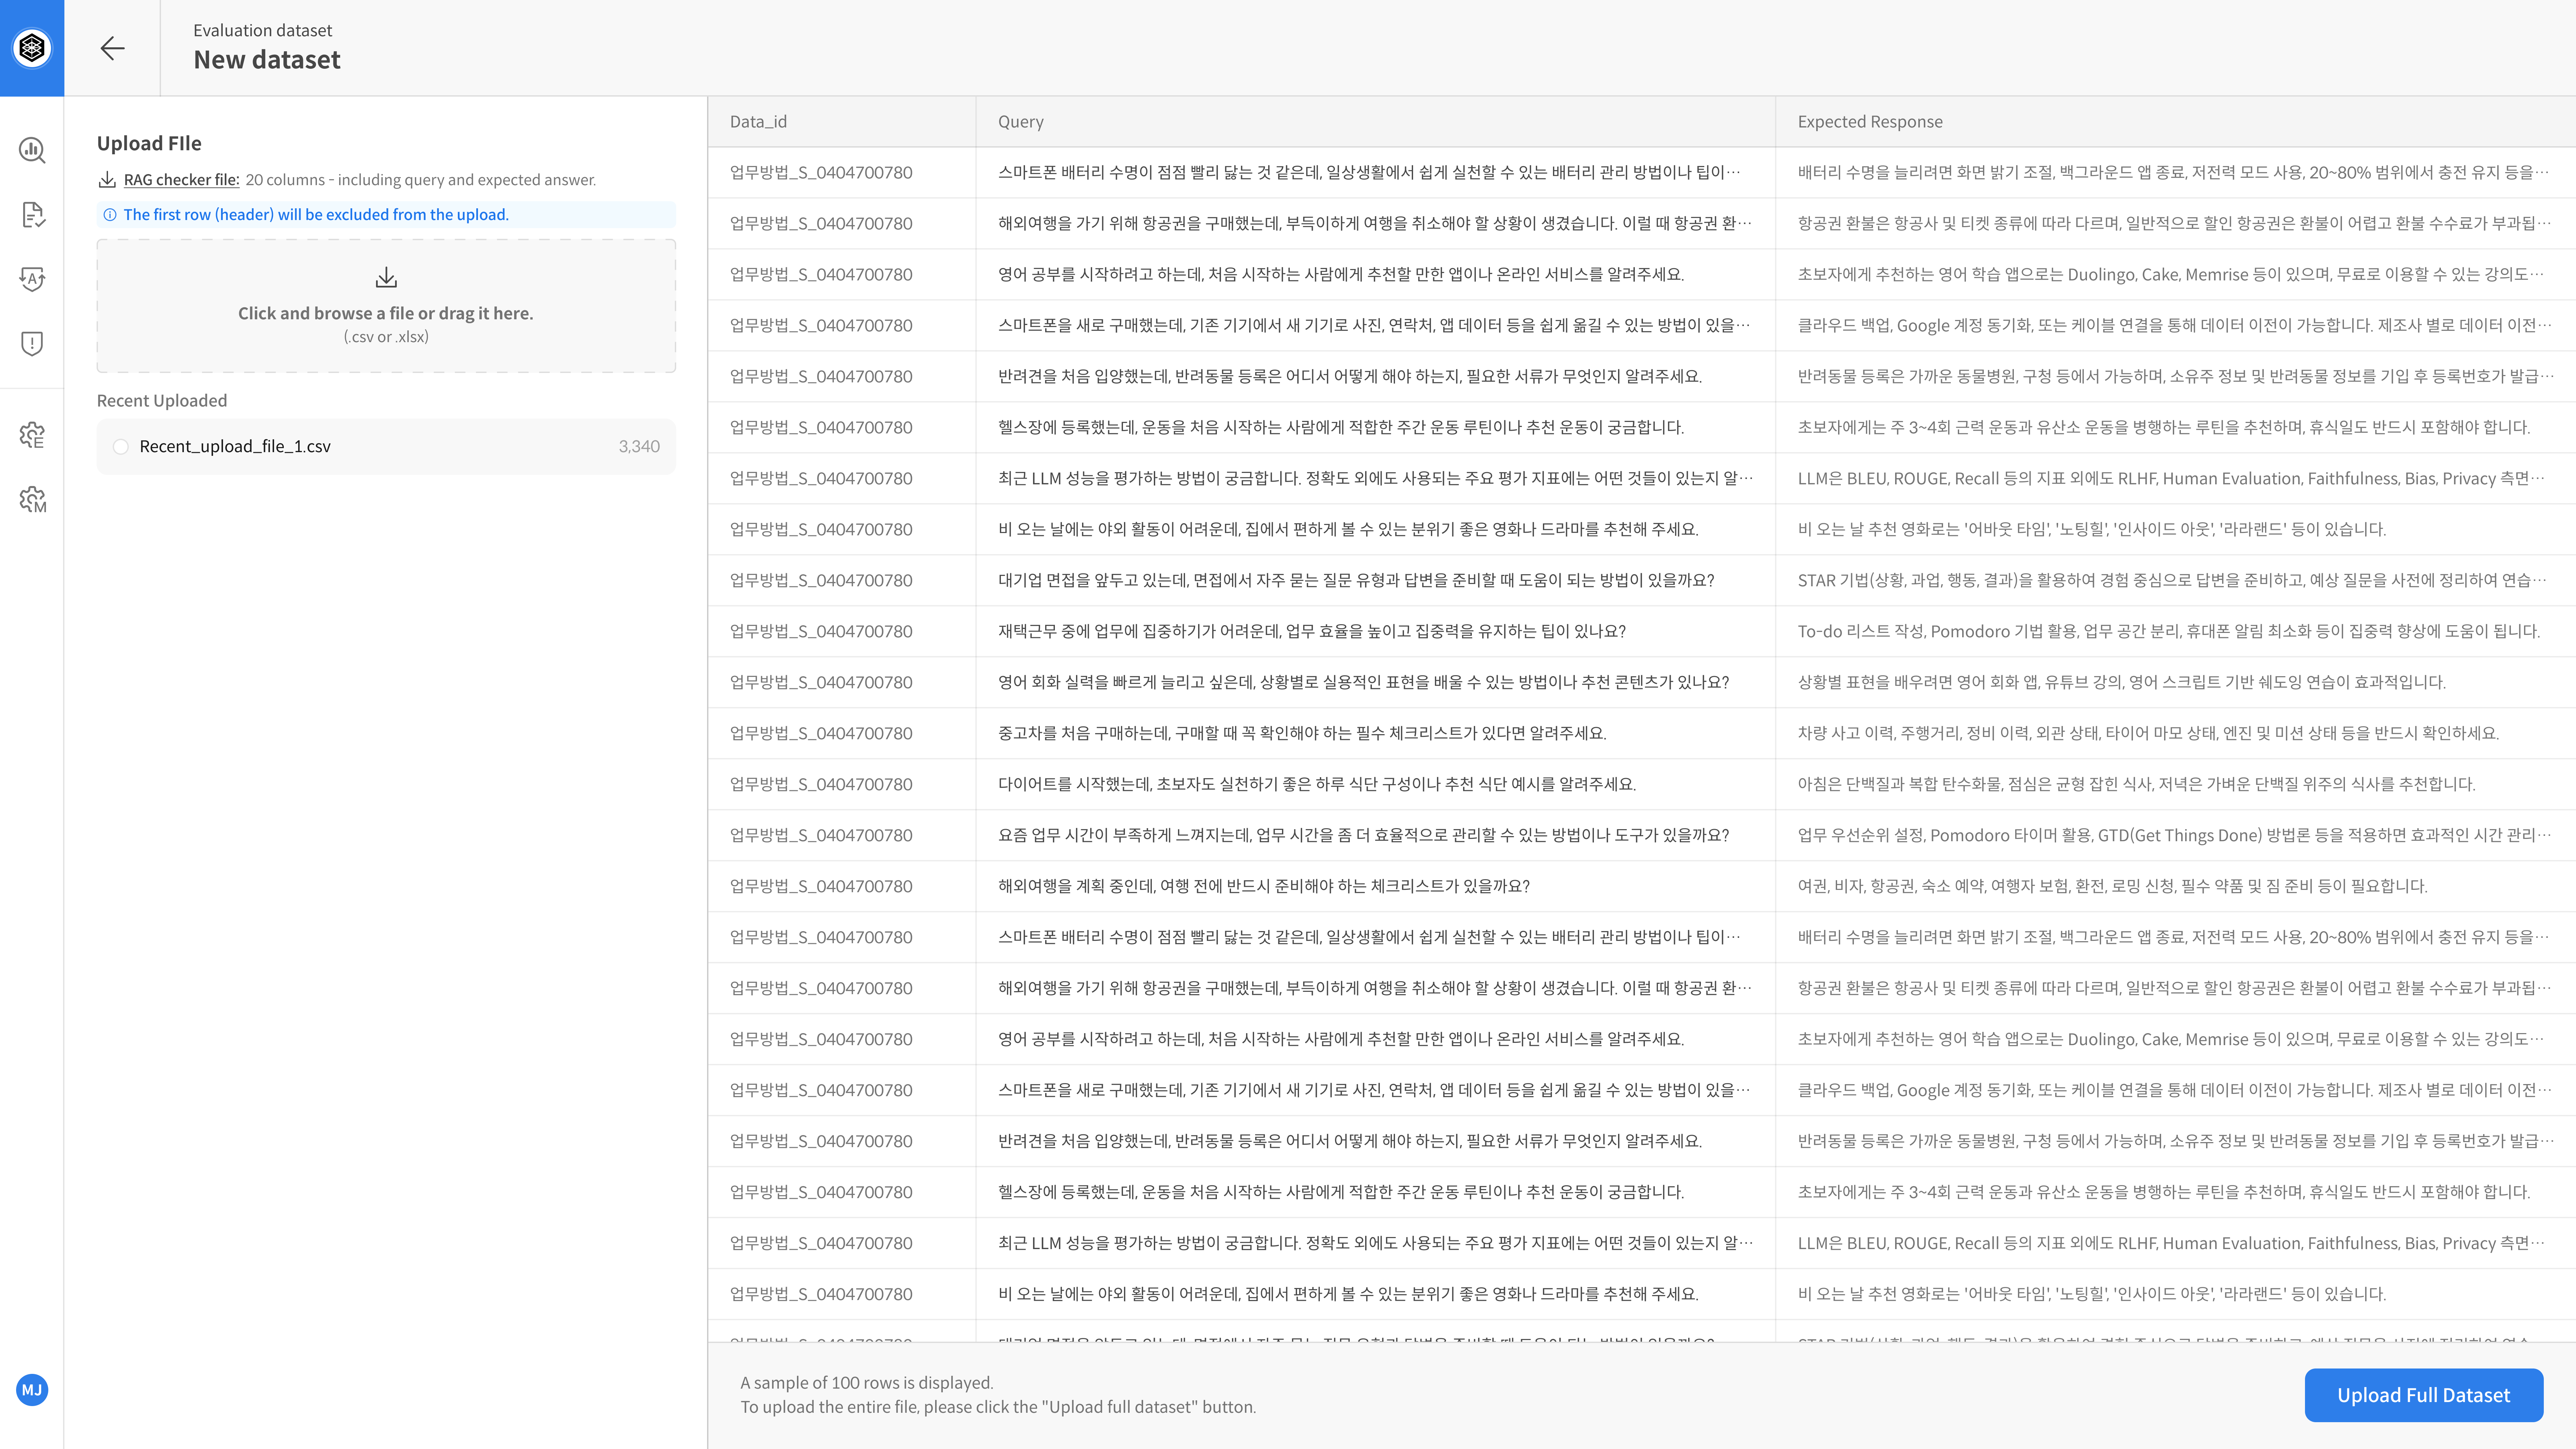
④ Preview Sample Data
Once the upload is complete, up to 100 rows will be previewed automatically.
⚠️ If you need to modify or delete data, update the file and re-upload.
Detailed information for each entry can be found in the Data Detail view.
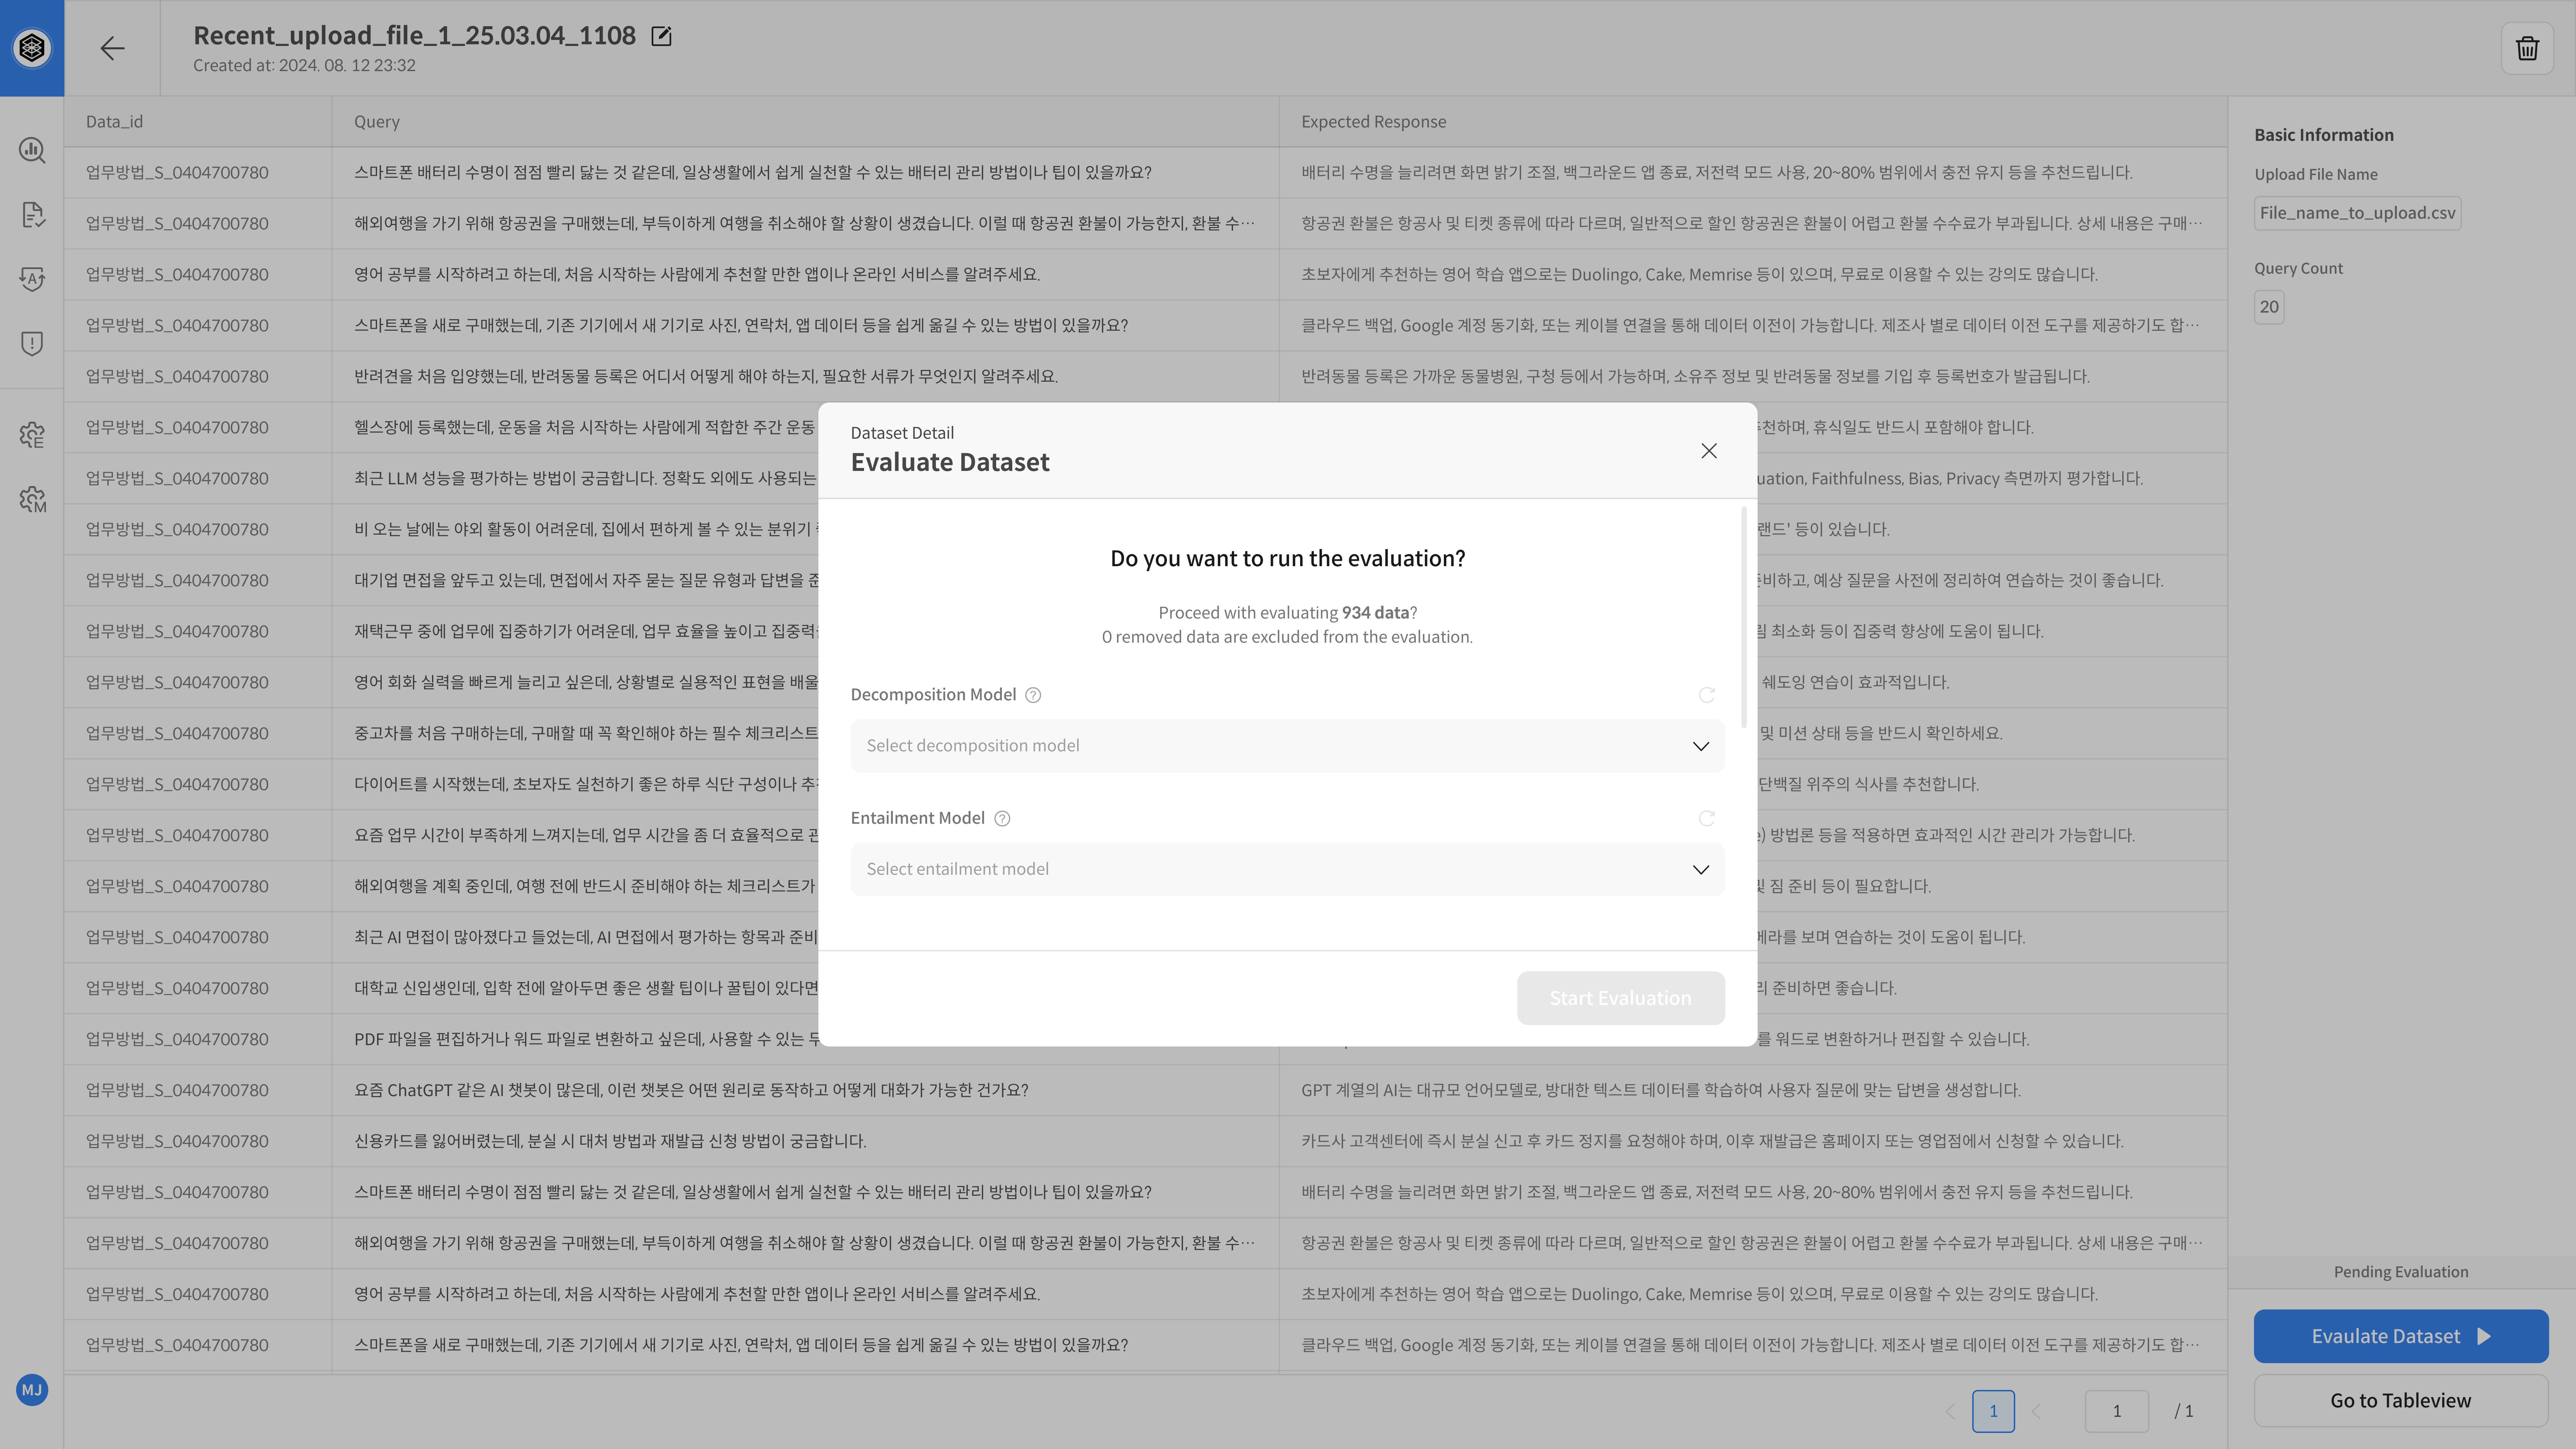
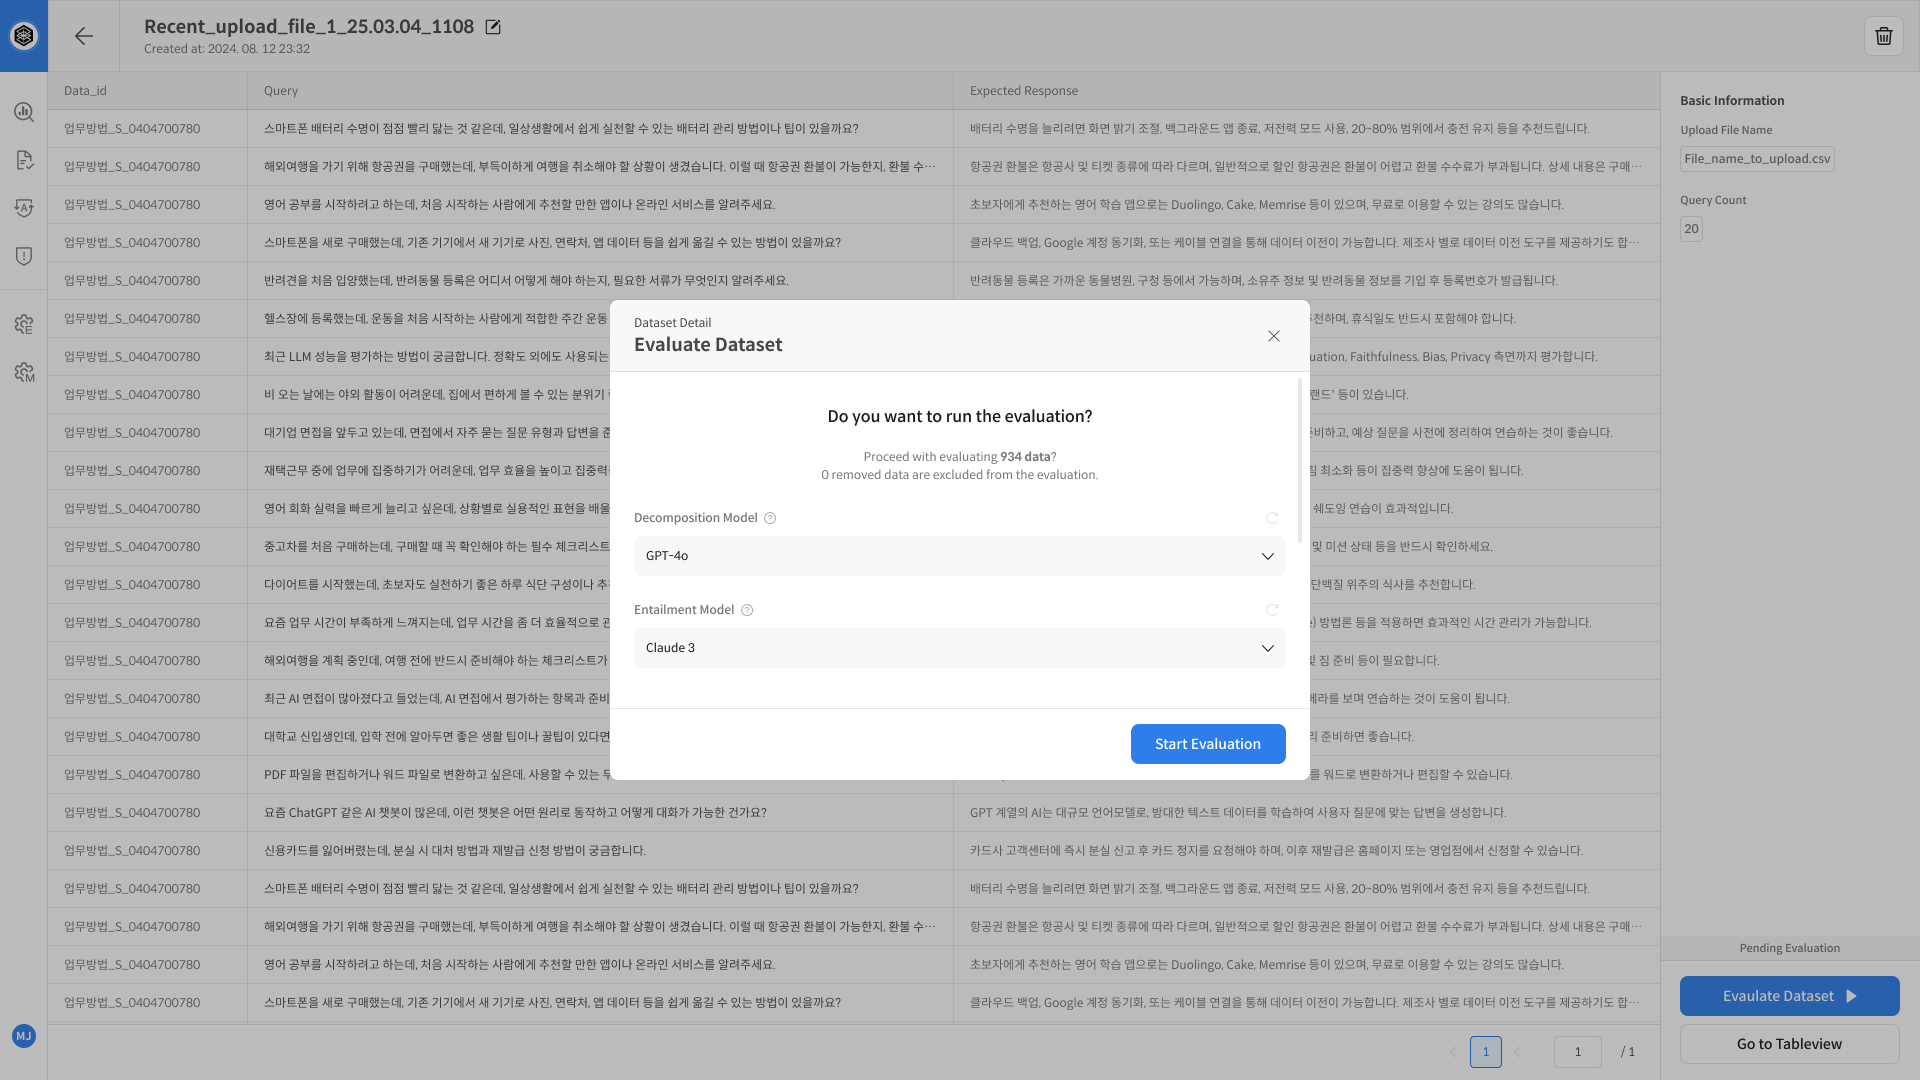
⑤ Save Dataset
After reviewing the samples, enter a dataset name and click save.
Once saved, the dataset is ready to use for evaluation within the project.
Click the [Upload Full Dataset] button at the bottom right.

⑥ Run Automatic Evaluation
From the dataset screen, click Evaluation Dataset > Start Evaluation to begin the process.

Choose the models to use for evaluation (Decomposition, Entailment), then click [Start] to launch the evaluation.
View Result – Table View
⑦ Check and Analyze Results
Once the evaluation is complete,
you can review the results in the Table View screen and analyze them in detail.
Clicking on any cell will open the Detail panel on the right to show a breakdown of the evaluation.
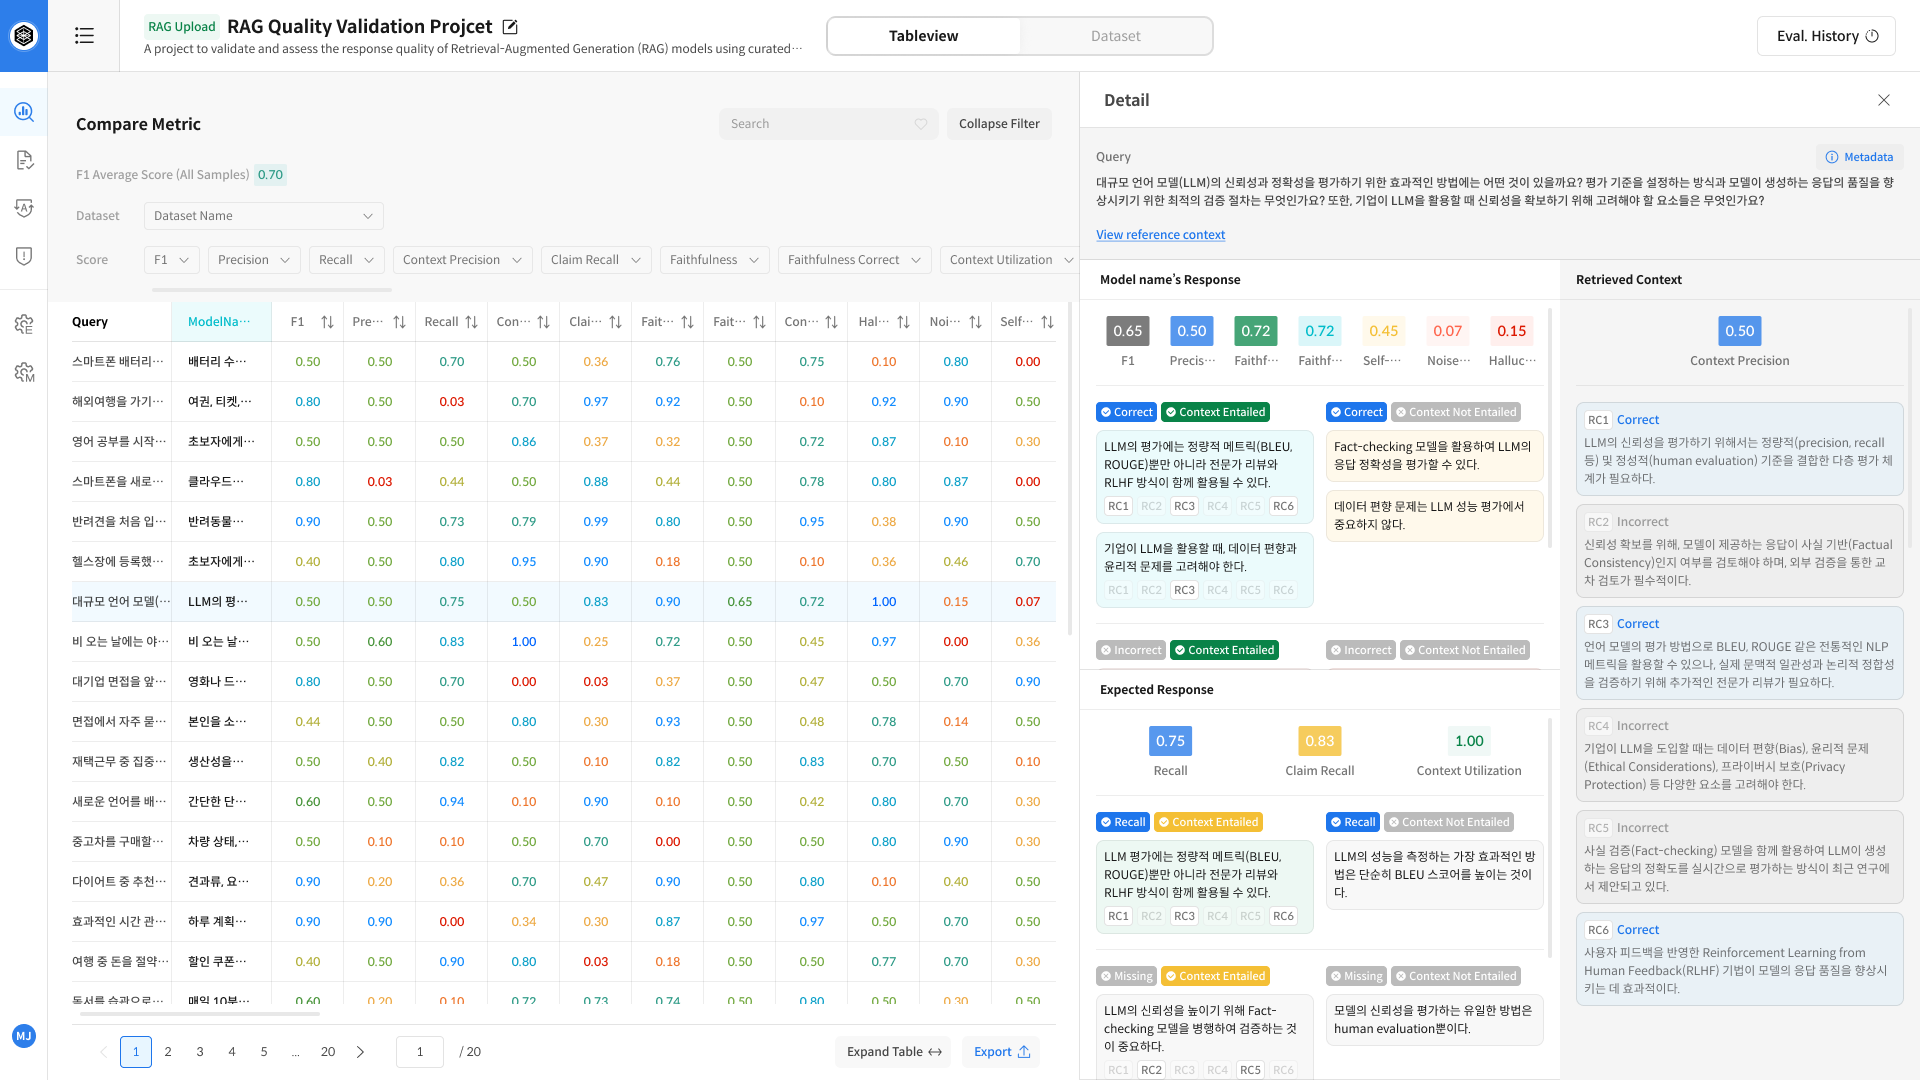
※ For more information about evaluation metrics, refer to [Evaluation Metrics].