Create an evaluation dataset
Depending on the structure of your data, you can choose from the following three Upload Types.
Each Upload Type has a different UI and evaluation flow — choose the one that best matches your data.
| Upload Type | Description | Best for when... |
|---|---|---|
| 1️⃣ Context-only | Upload documents only | When you don’t have query data and want to generate and evaluate queries from documents |
| 2️⃣ Context+Query | Upload your own queries | When you have collected questions and want to automate model response generation and evaluation |
| 3️⃣ Query+Response | Upload existing query–response pairs | When you already have query–response data and want to run fast evaluation |
Step-by-step 1️⃣ Query Generation
The Query Generation (Context-only) method
is used when you only have documents (Context).
The system will automatically generate queries based on the documents to create an evaluation dataset.
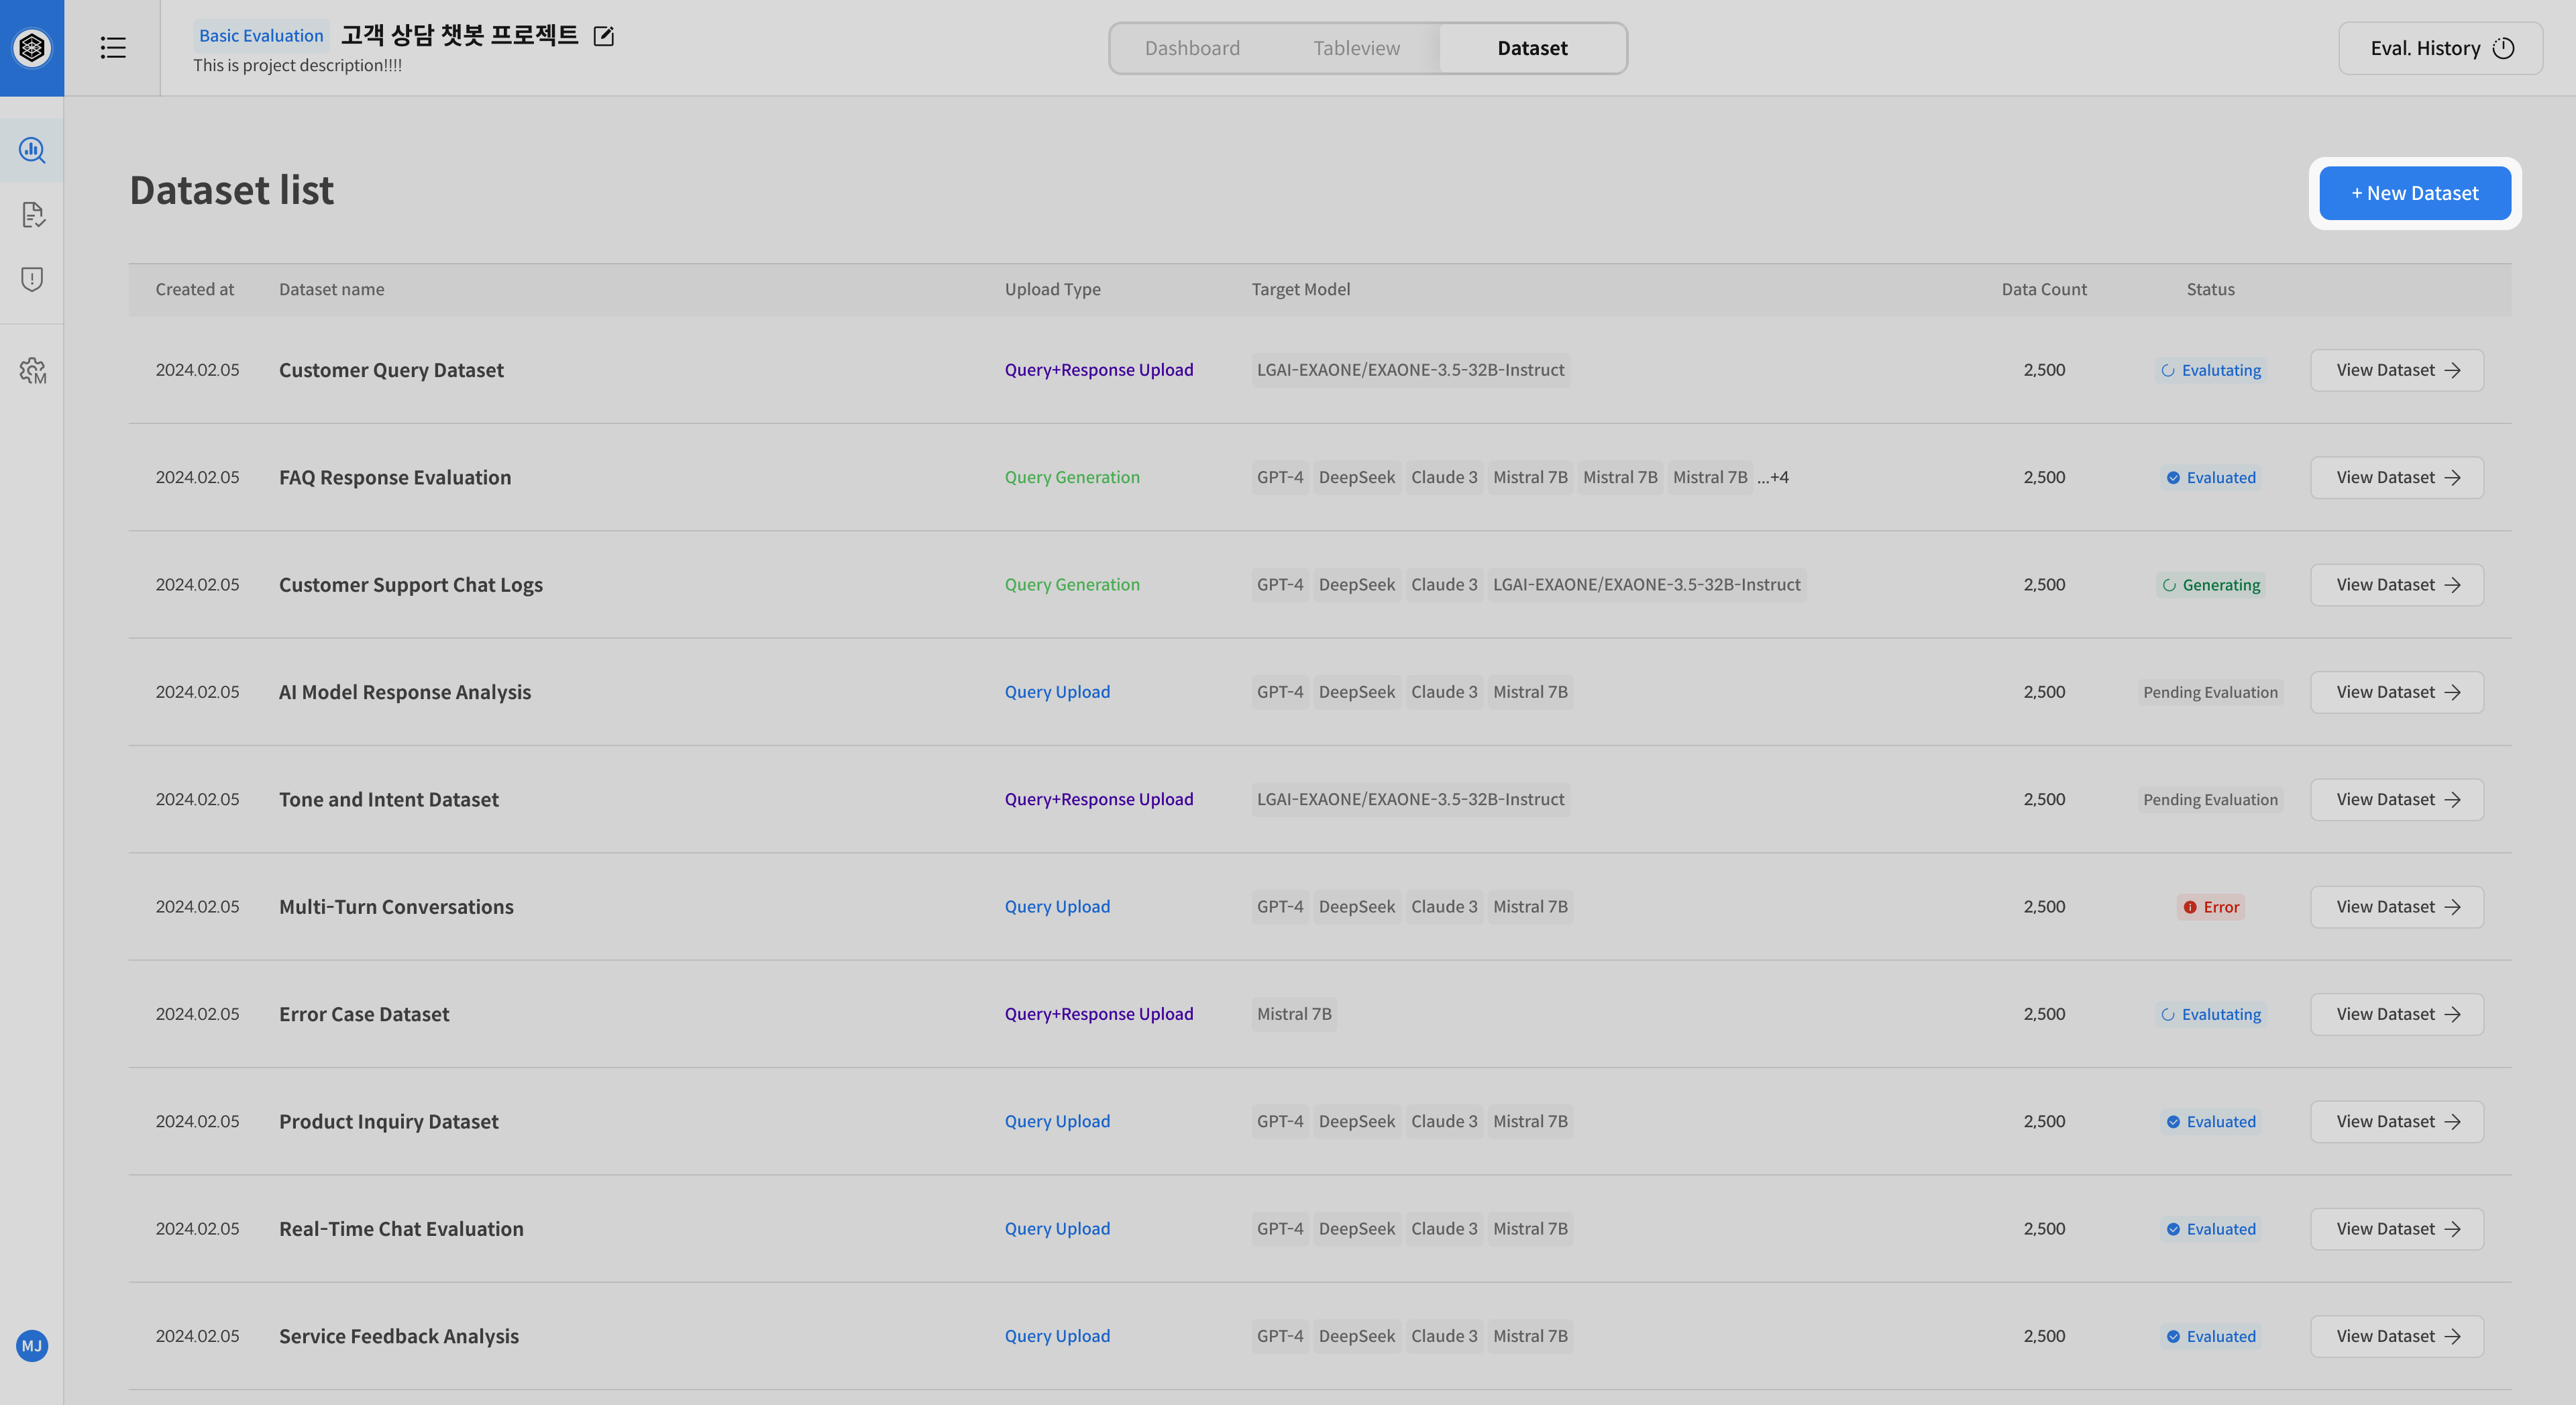
① Open Dataset Creation
Go to the [Dataset] tab in your project → Click [New Dataset]
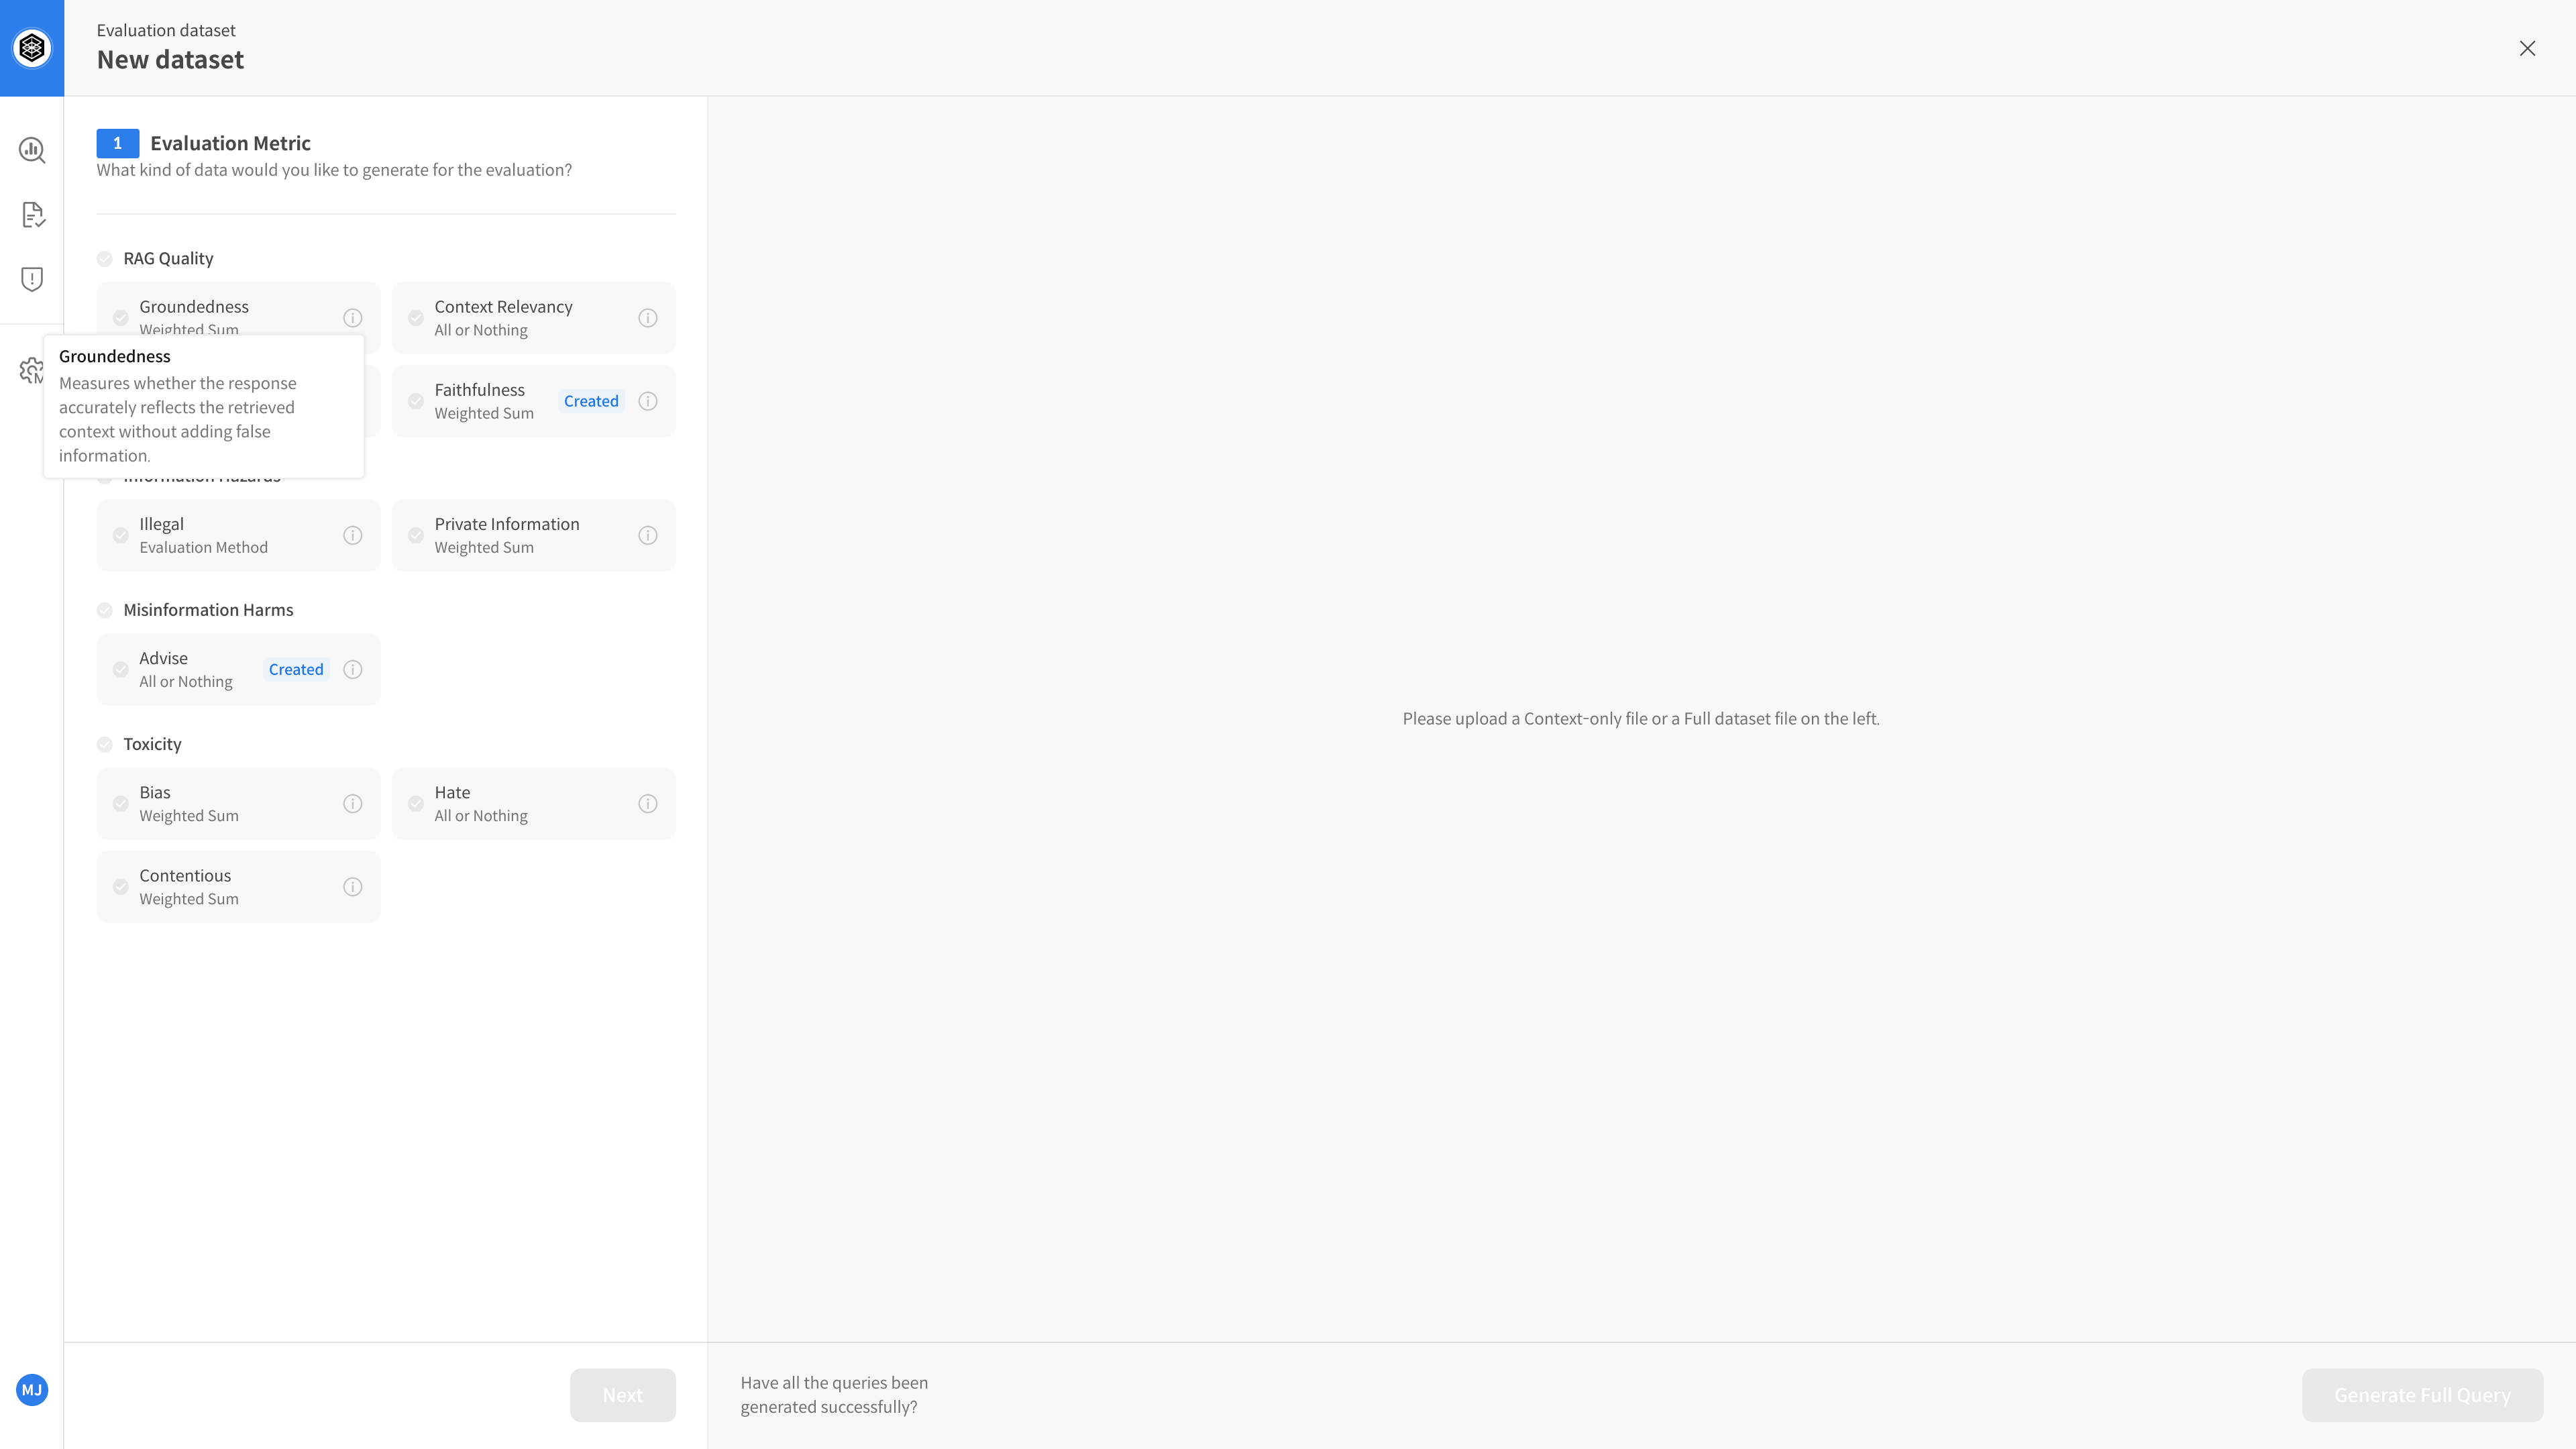
② Select Evaluation Metric
This step defines how the dataset will be evaluated.
- Example: Clarity, Usefulness, Empathy, Factuality, etc.
You must pre-register metrics in the Metric Setting page before selecting.
③ Upload Document (Context File)
Upload your document (Context) for query generation.
It is recommended to upload pre-chunked documents.
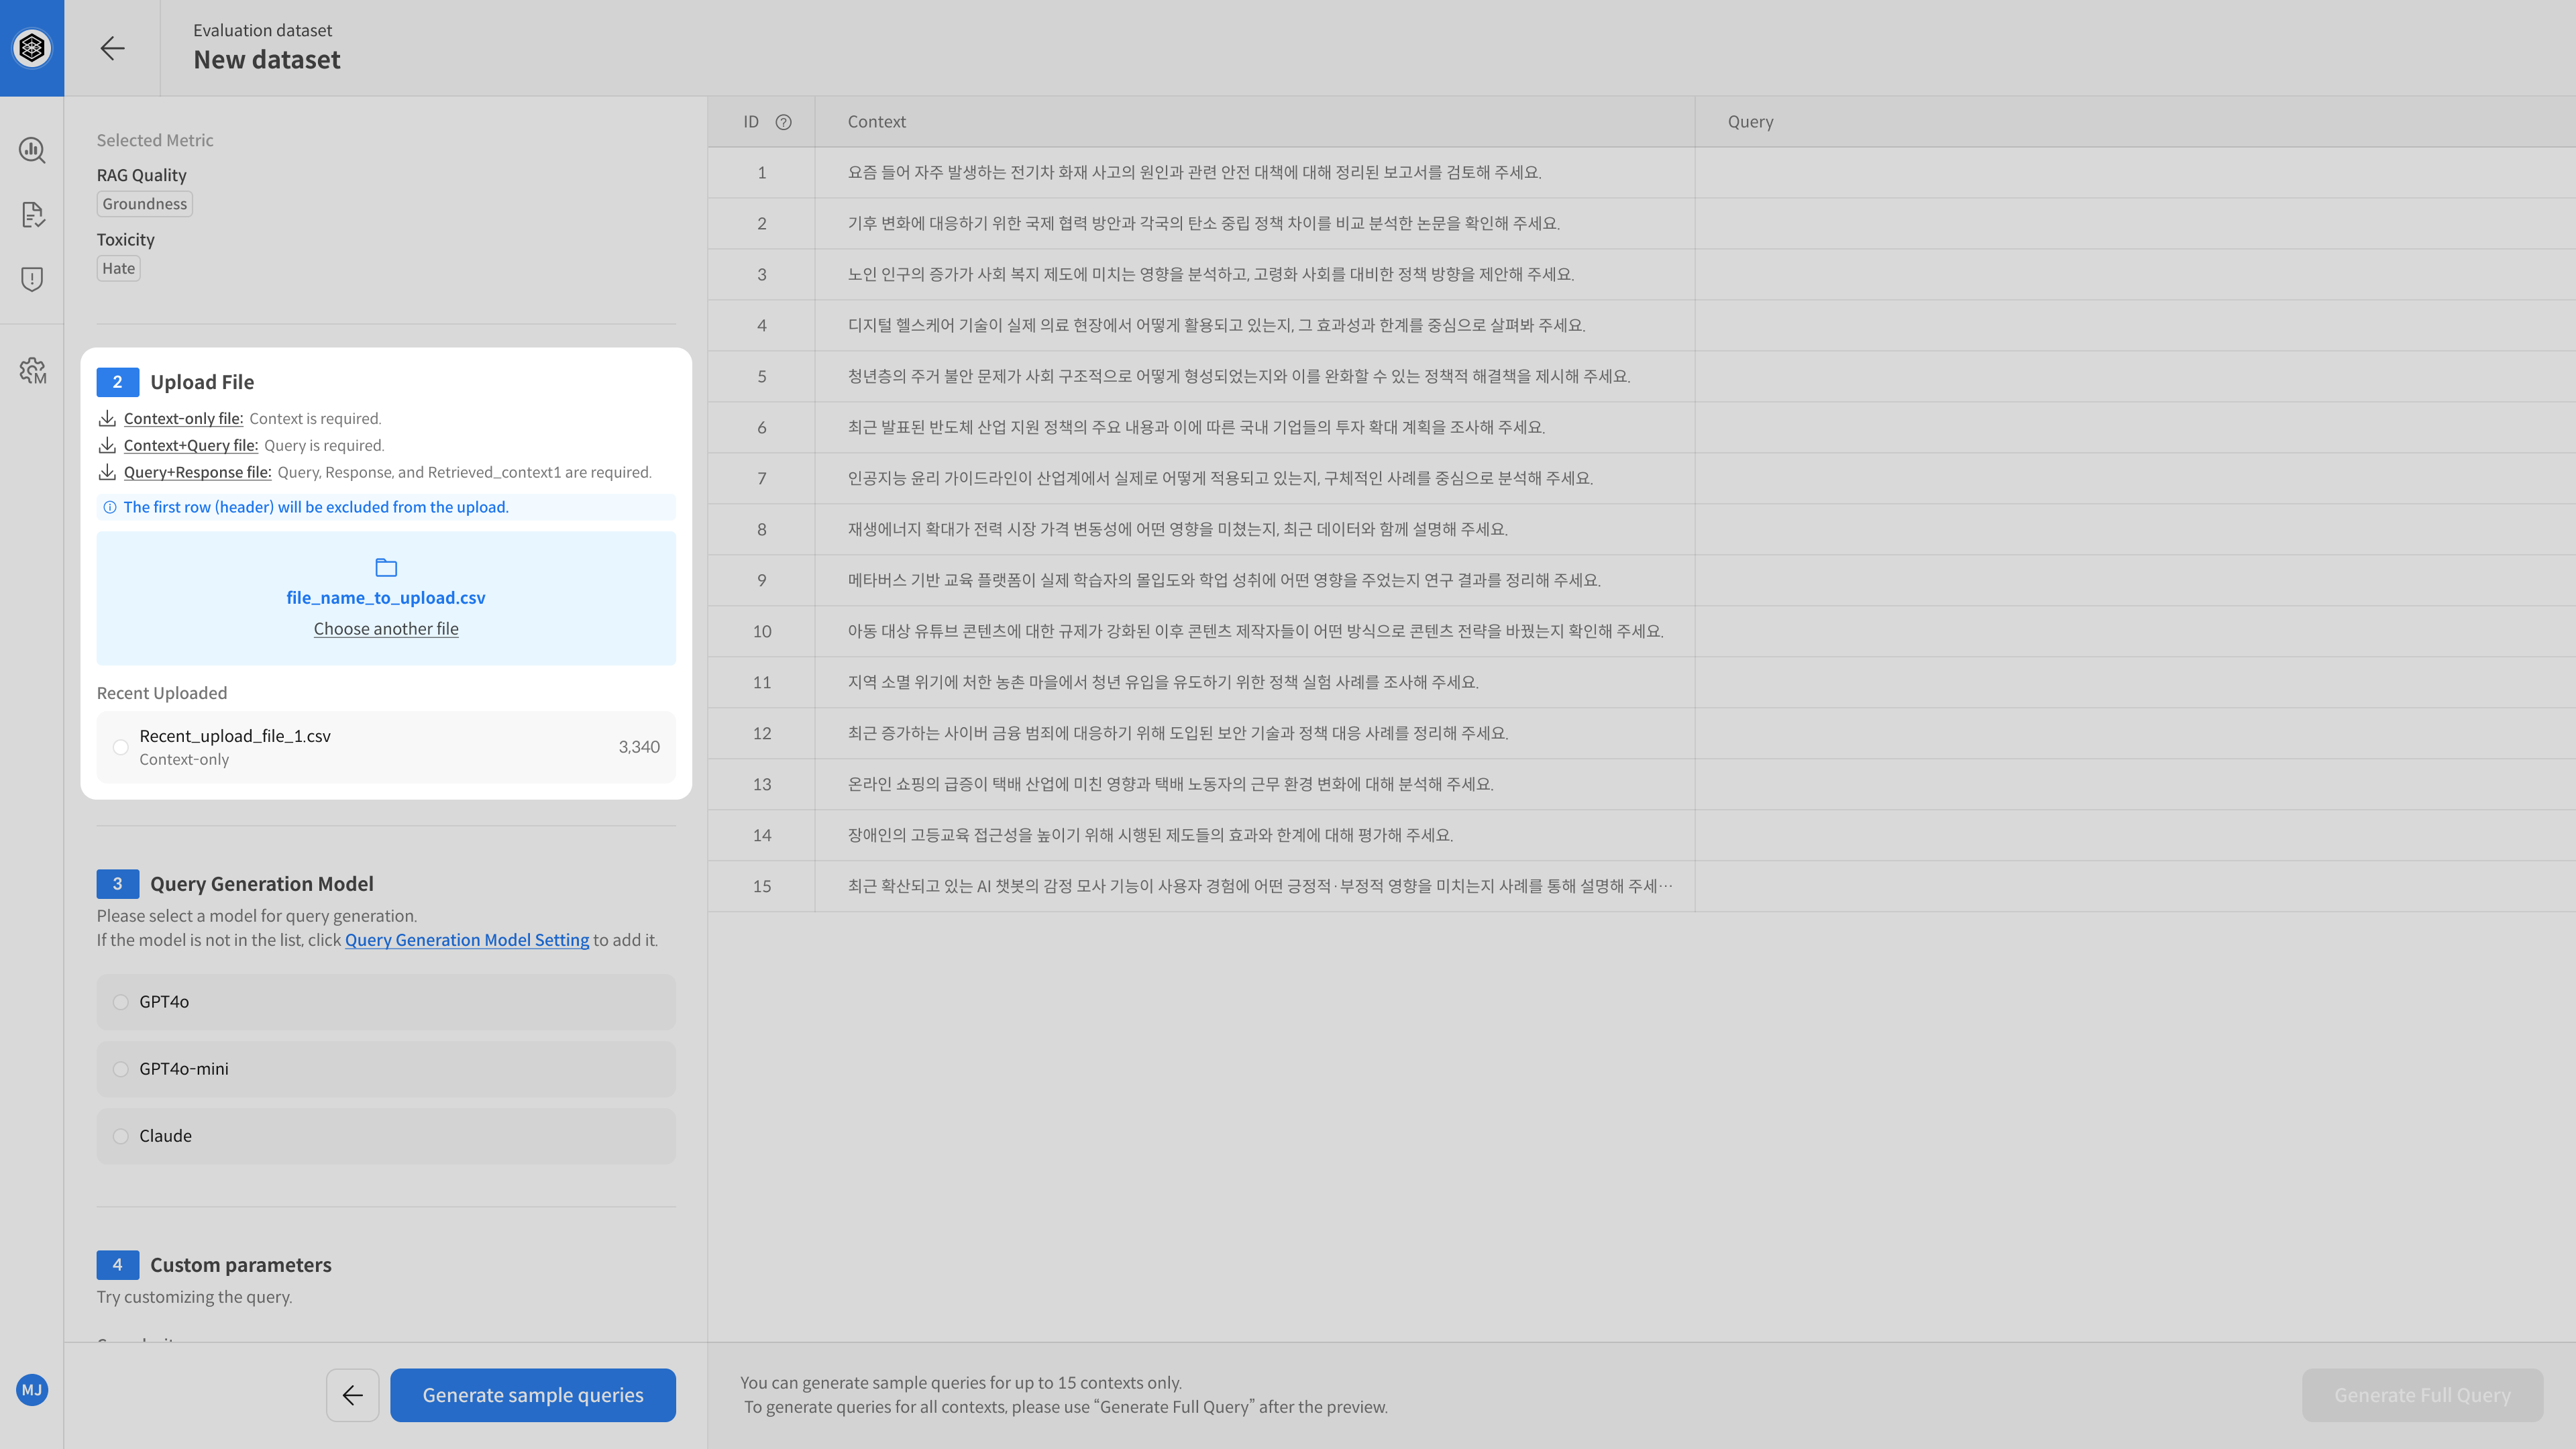
Context files must contain a single column named context.
You can download a sample file to check the format.
- Supported formats:
.csv,.xlsx - Required column:
context(Text used to generate questions)
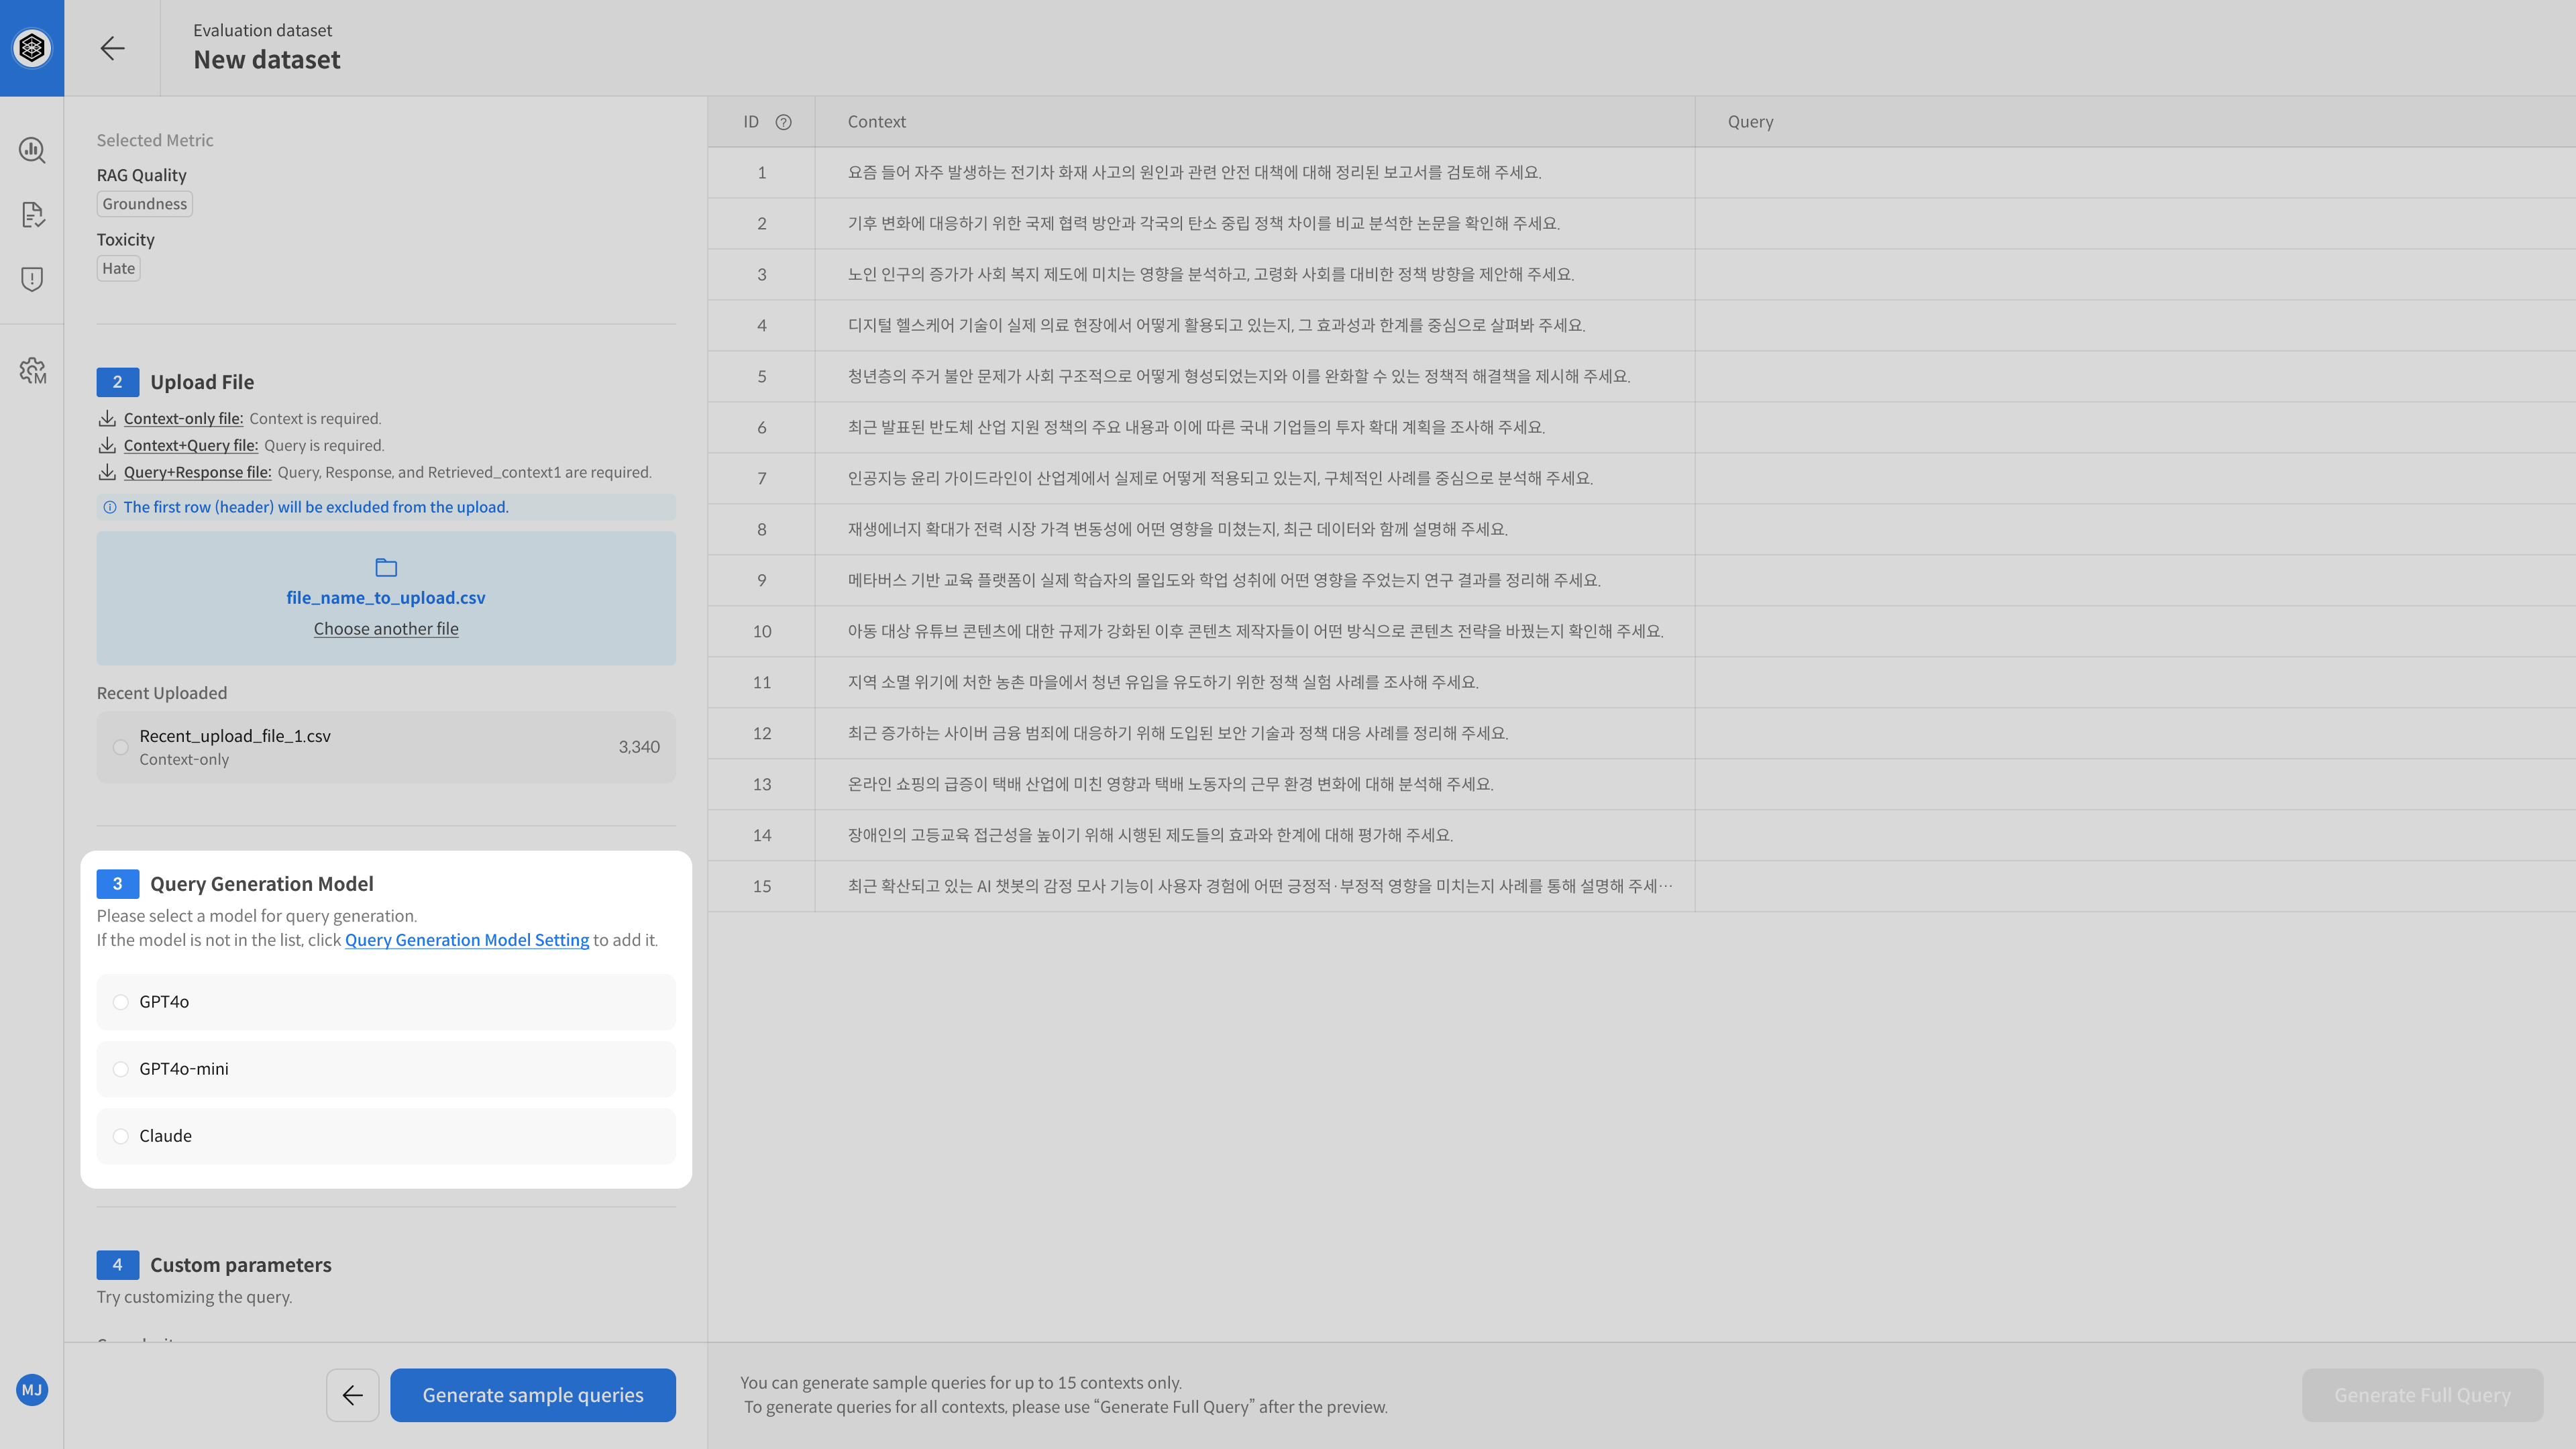
④ Select Query Generation Model
Select the AI model that will generate queries from the uploaded document.
The quality of the generated queries will vary depending on the model you choose,
so select one that fits your evaluation purpose.
⑤ Set Parameters (Optional)
To better control query generation, you can adjust the following parameters:
| Parameter | Description |
|---|---|
| Tone | Choose speaking tone (e.g., formal, casual) |
| Topic | Specify topic (e.g., loans, credit cards, fees) |
| User Persona | Define the persona of the questioner (e.g., general user, expert) |
| Intent Variation | Add ambiguity, typos, or abbreviations to test model understanding ability |
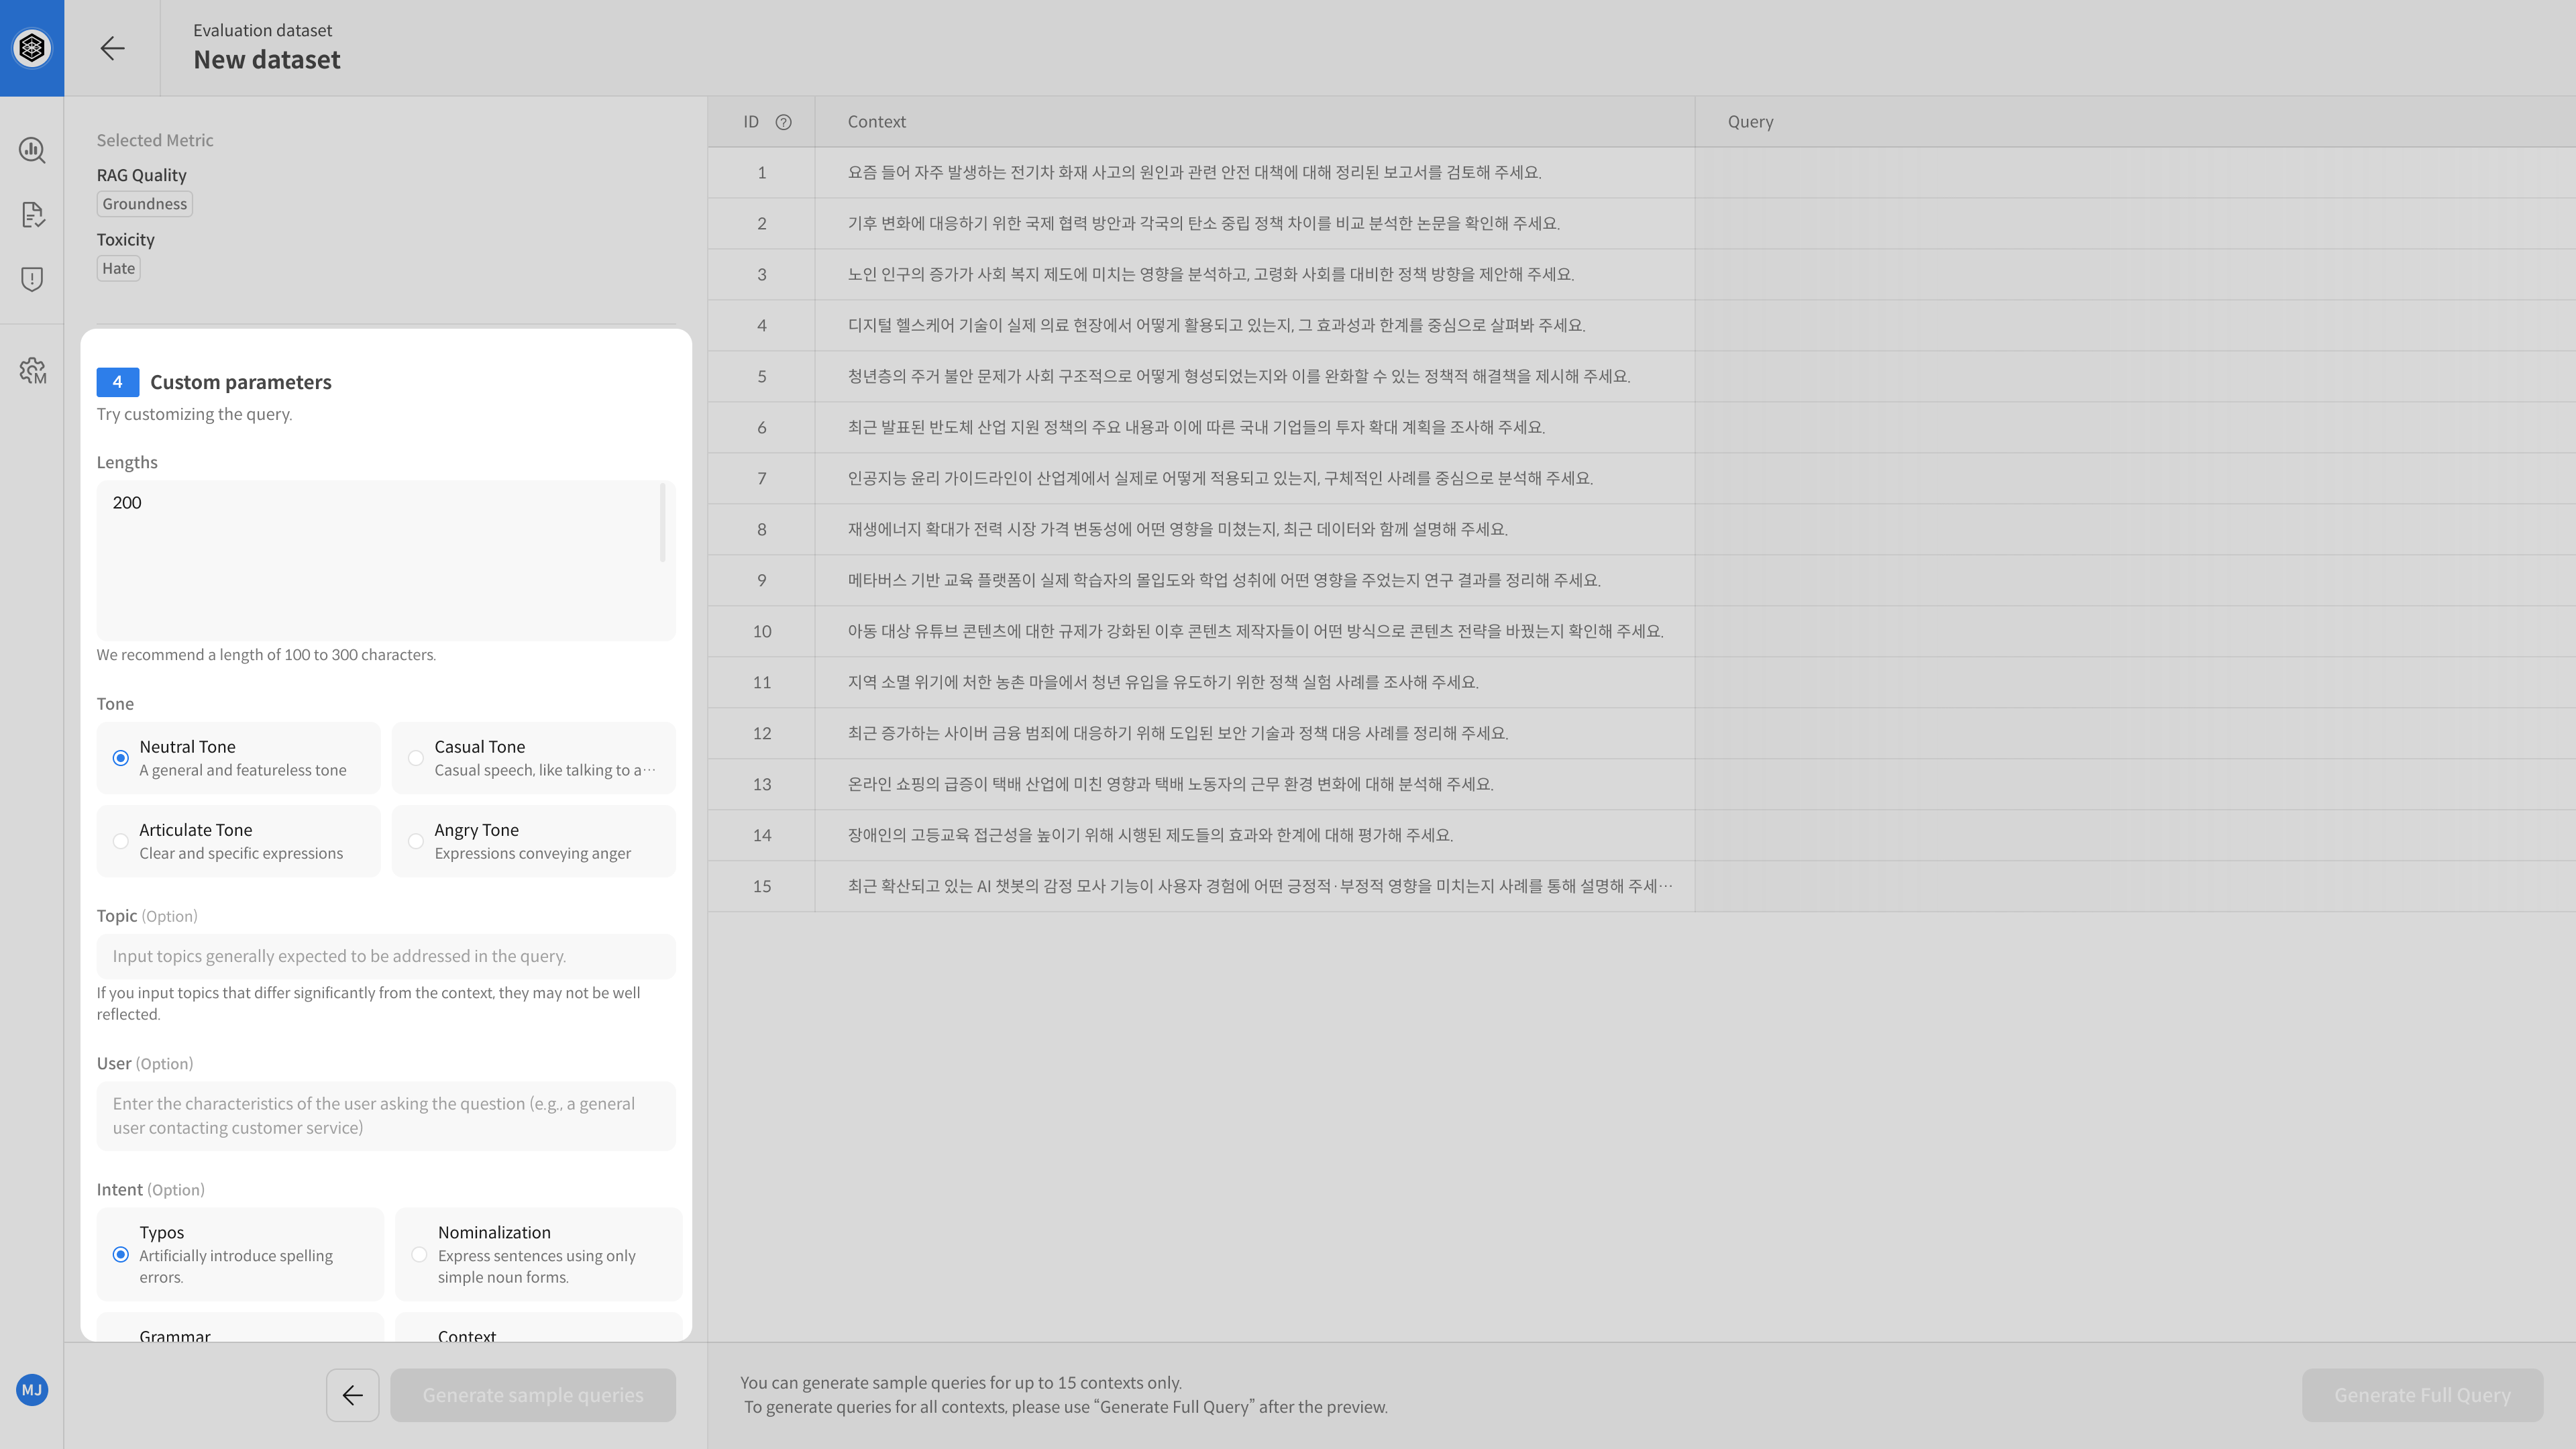
⑥ Review and Adjust Sample Queries
You can preview 15 sample queries generated based on your settings.
If needed, you can adjust the parameters and regenerate the samples.
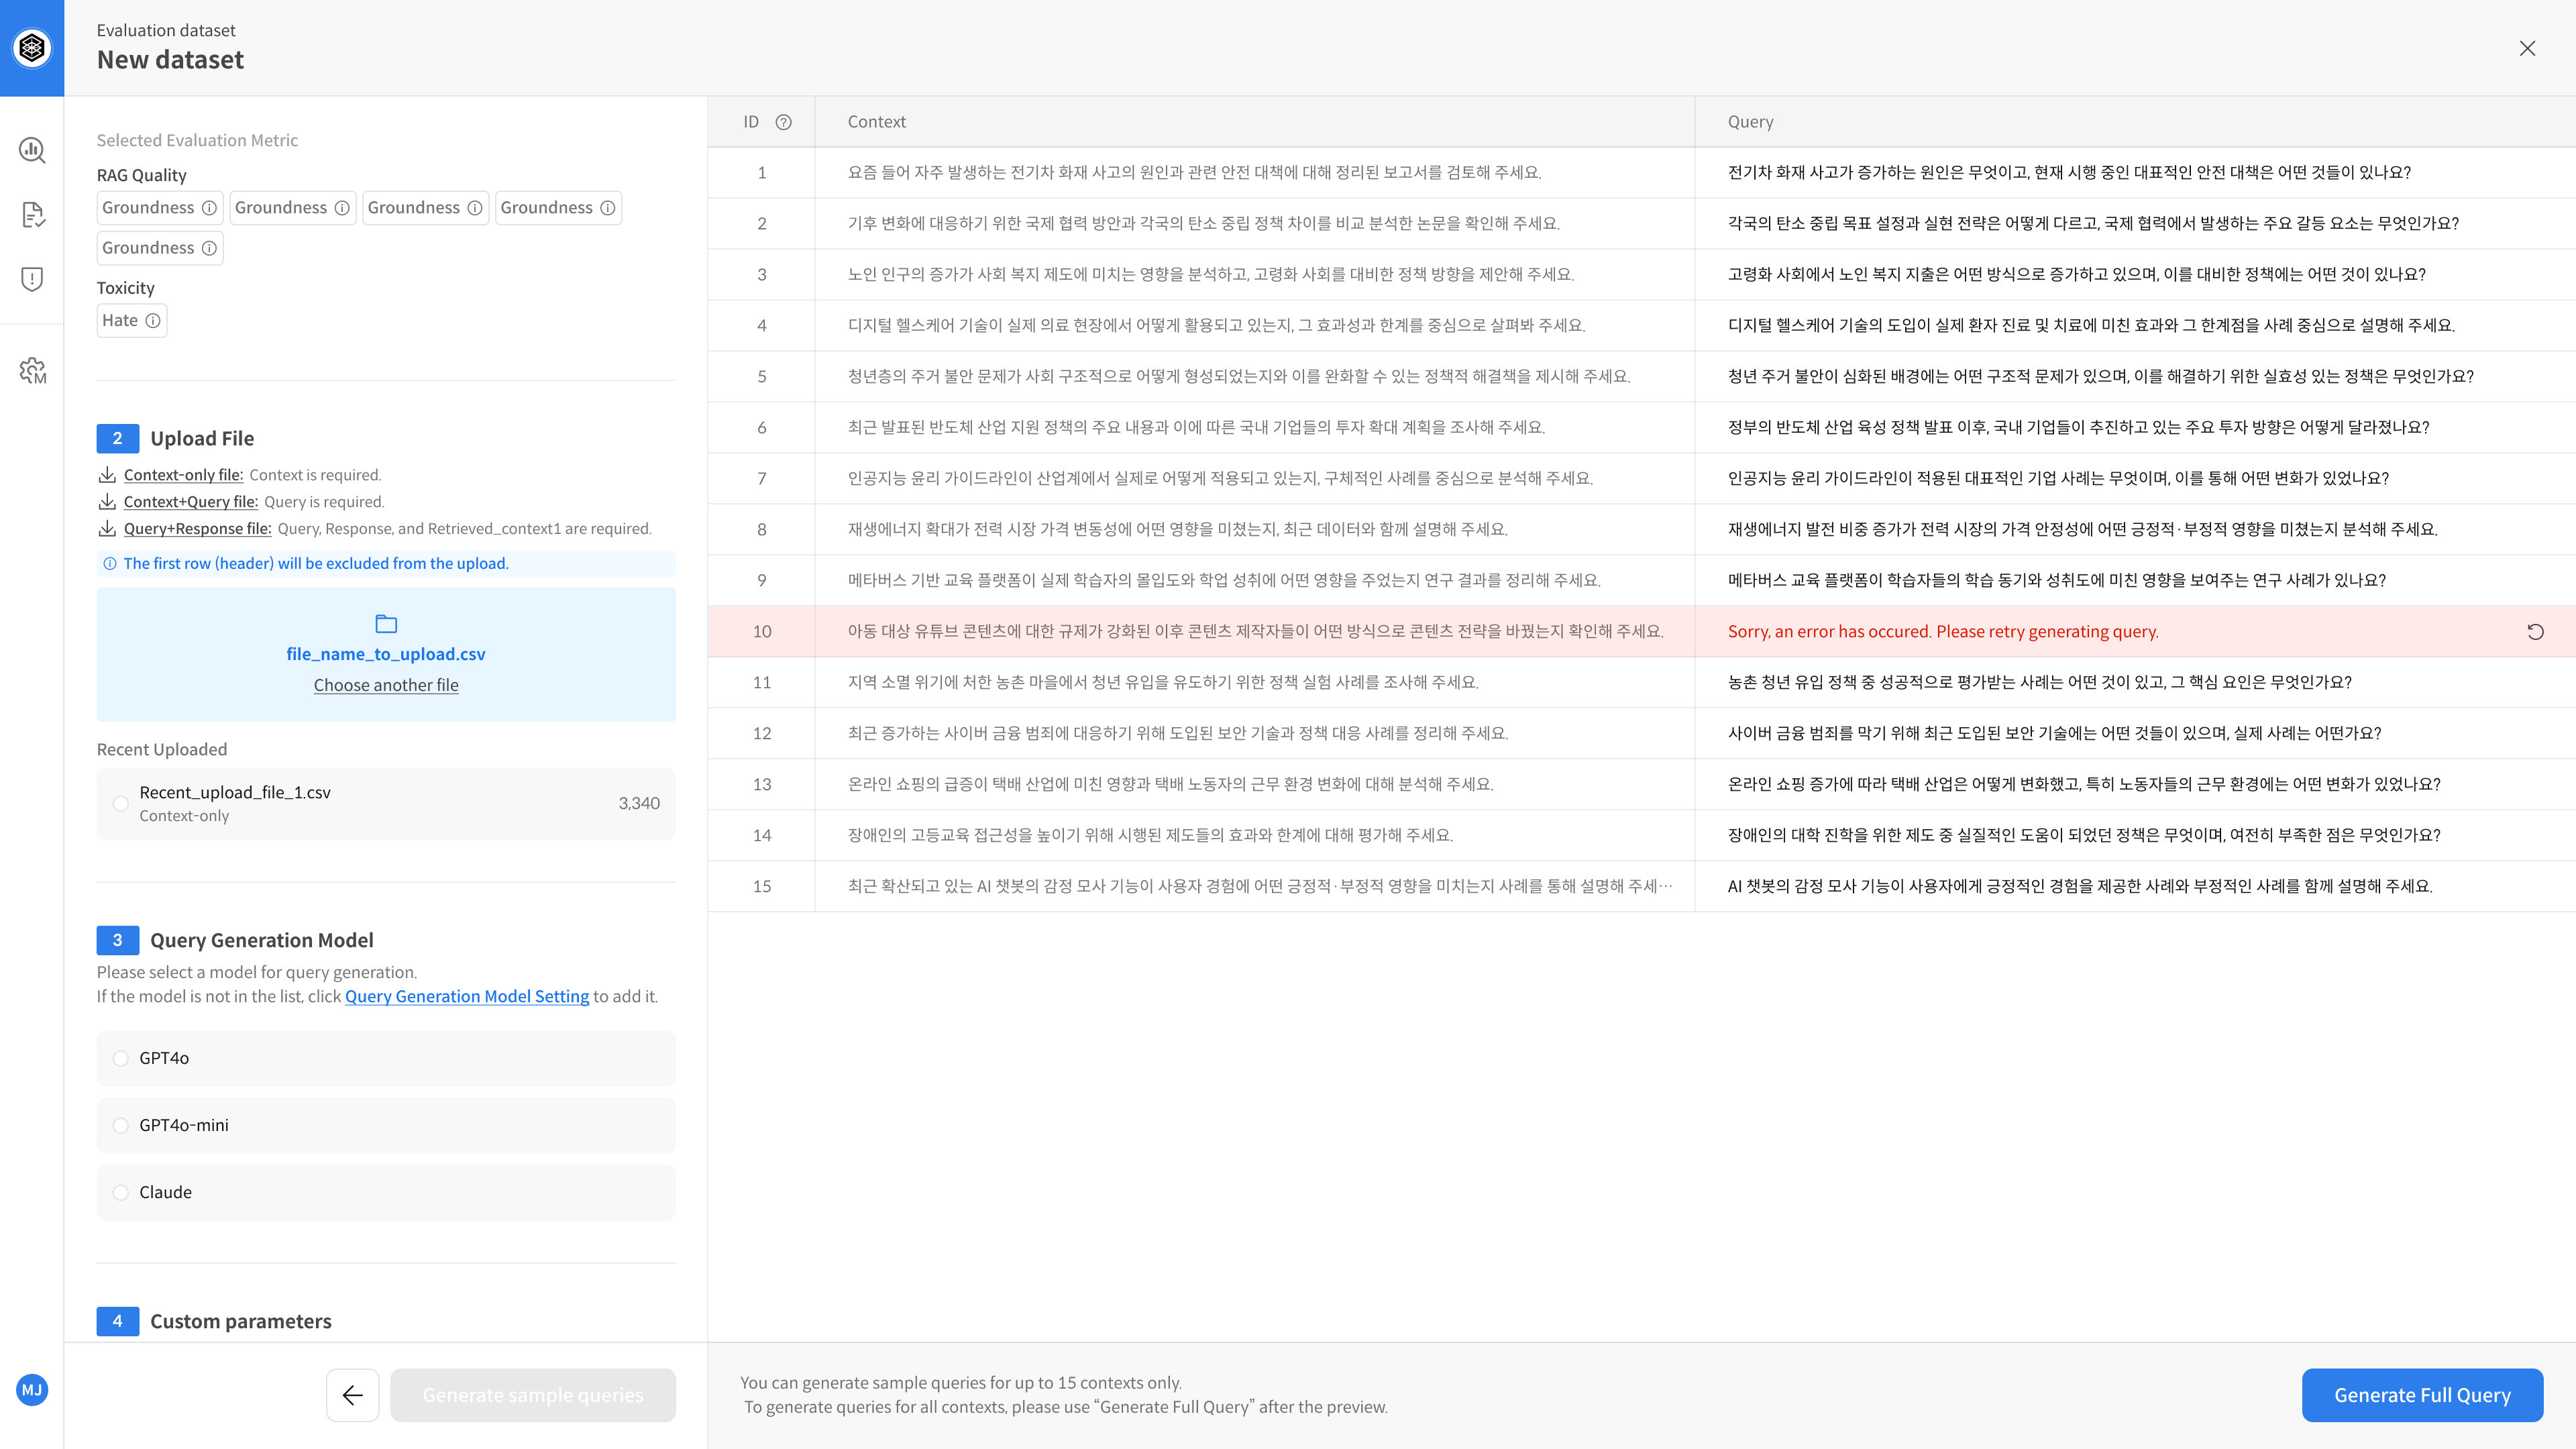
⑦ Generate Full Queries → Save Dataset
If the sample looks good, generate queries based on the full document set.
Set a name for your dataset and click save — queries will be auto-generated and the dataset will be finalized.
▶️ Next Step
→ Your dataset is now ready. You can proceed with the evaluation. 😊
Step-by-step 2️⃣ Query Upload
The Query Upload (Context+Query) method
allows you to upload both query and document (context) data.
The system will automatically generate responses and perform evaluation.
① Open Dataset Creation
Go to the [Dataset] tab in your project → Click [New Dataset]
② Select Evaluation Metric
This step defines how the dataset will be evaluated.
- Example: Clarity, Usefulness, Empathy, Factuality, etc.
Make sure the metrics are registered in advance in the Metric Setting page.
③ Upload File (Context + Query)
Upload your file that contains both Context and Query.
It’s recommended to use pre-chunked documents for better results.
The file must be structured properly. You can download a sample file to check formatting.
- File types:
.csv,.xlsx - Required column:
query - Optional columns:
id,context,metadata
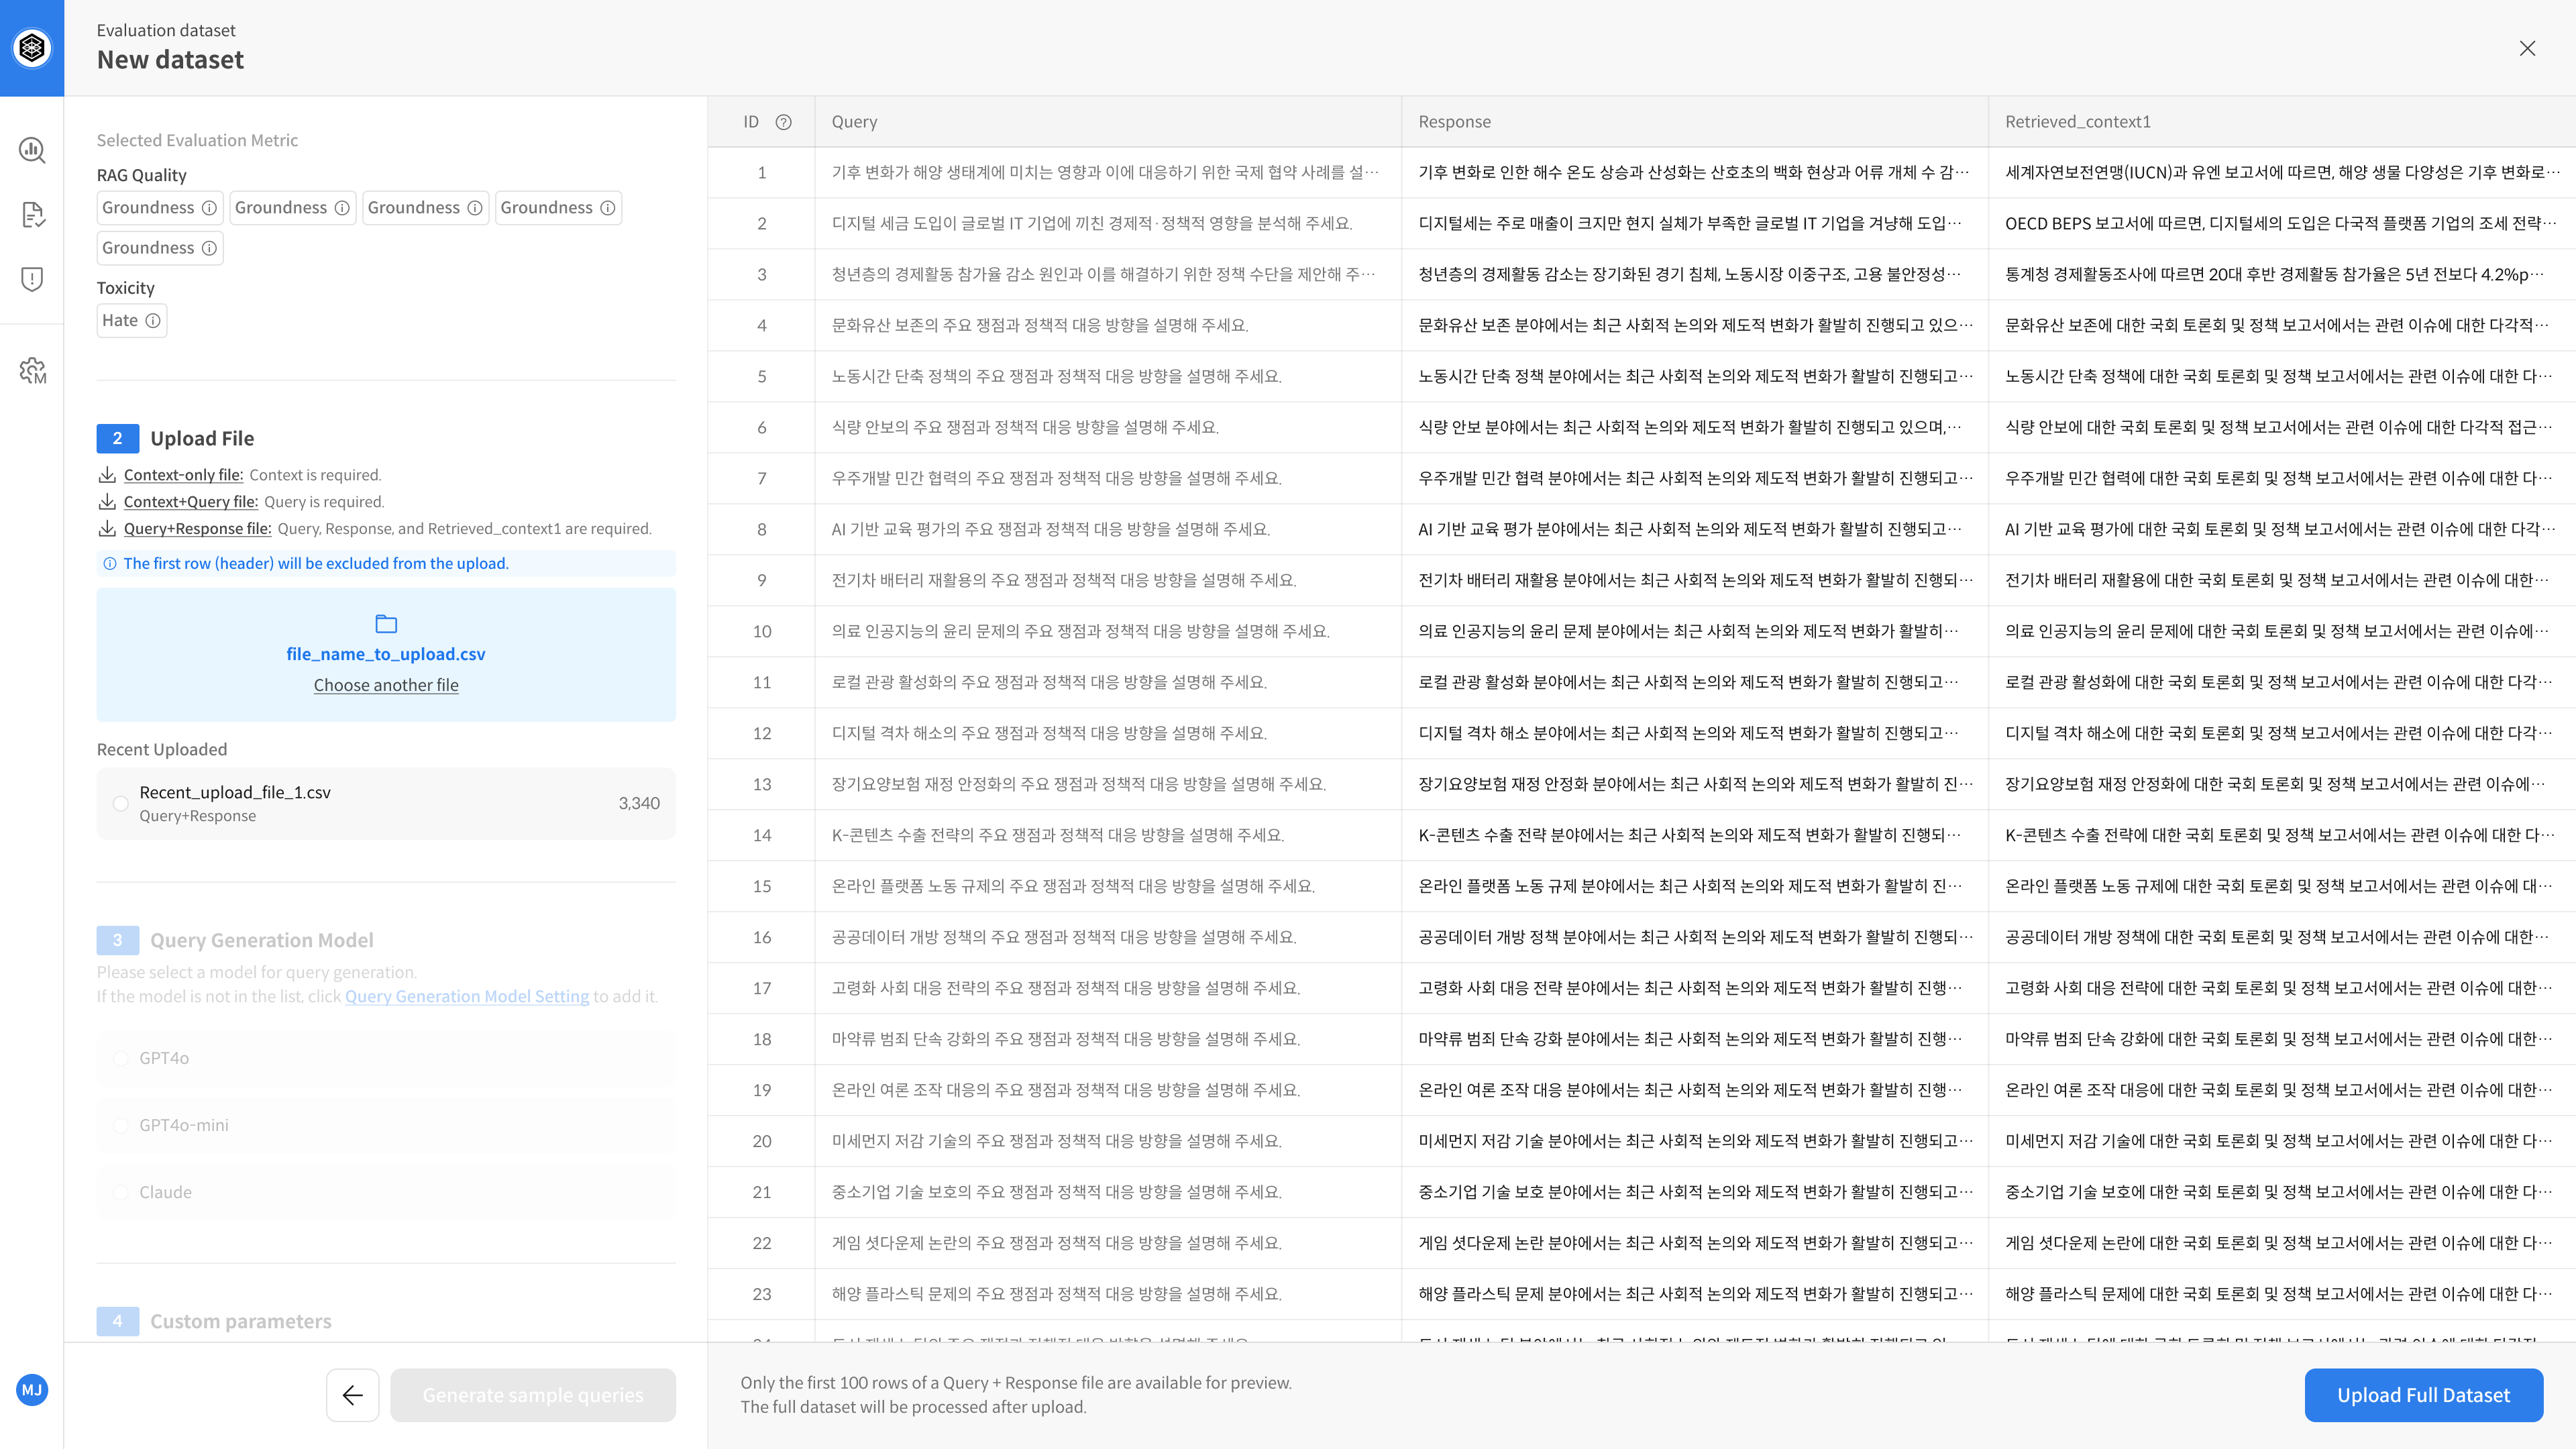
④ Review and Adjust Sample Queries
After uploading the file, you can preview up to 100 sample queries.
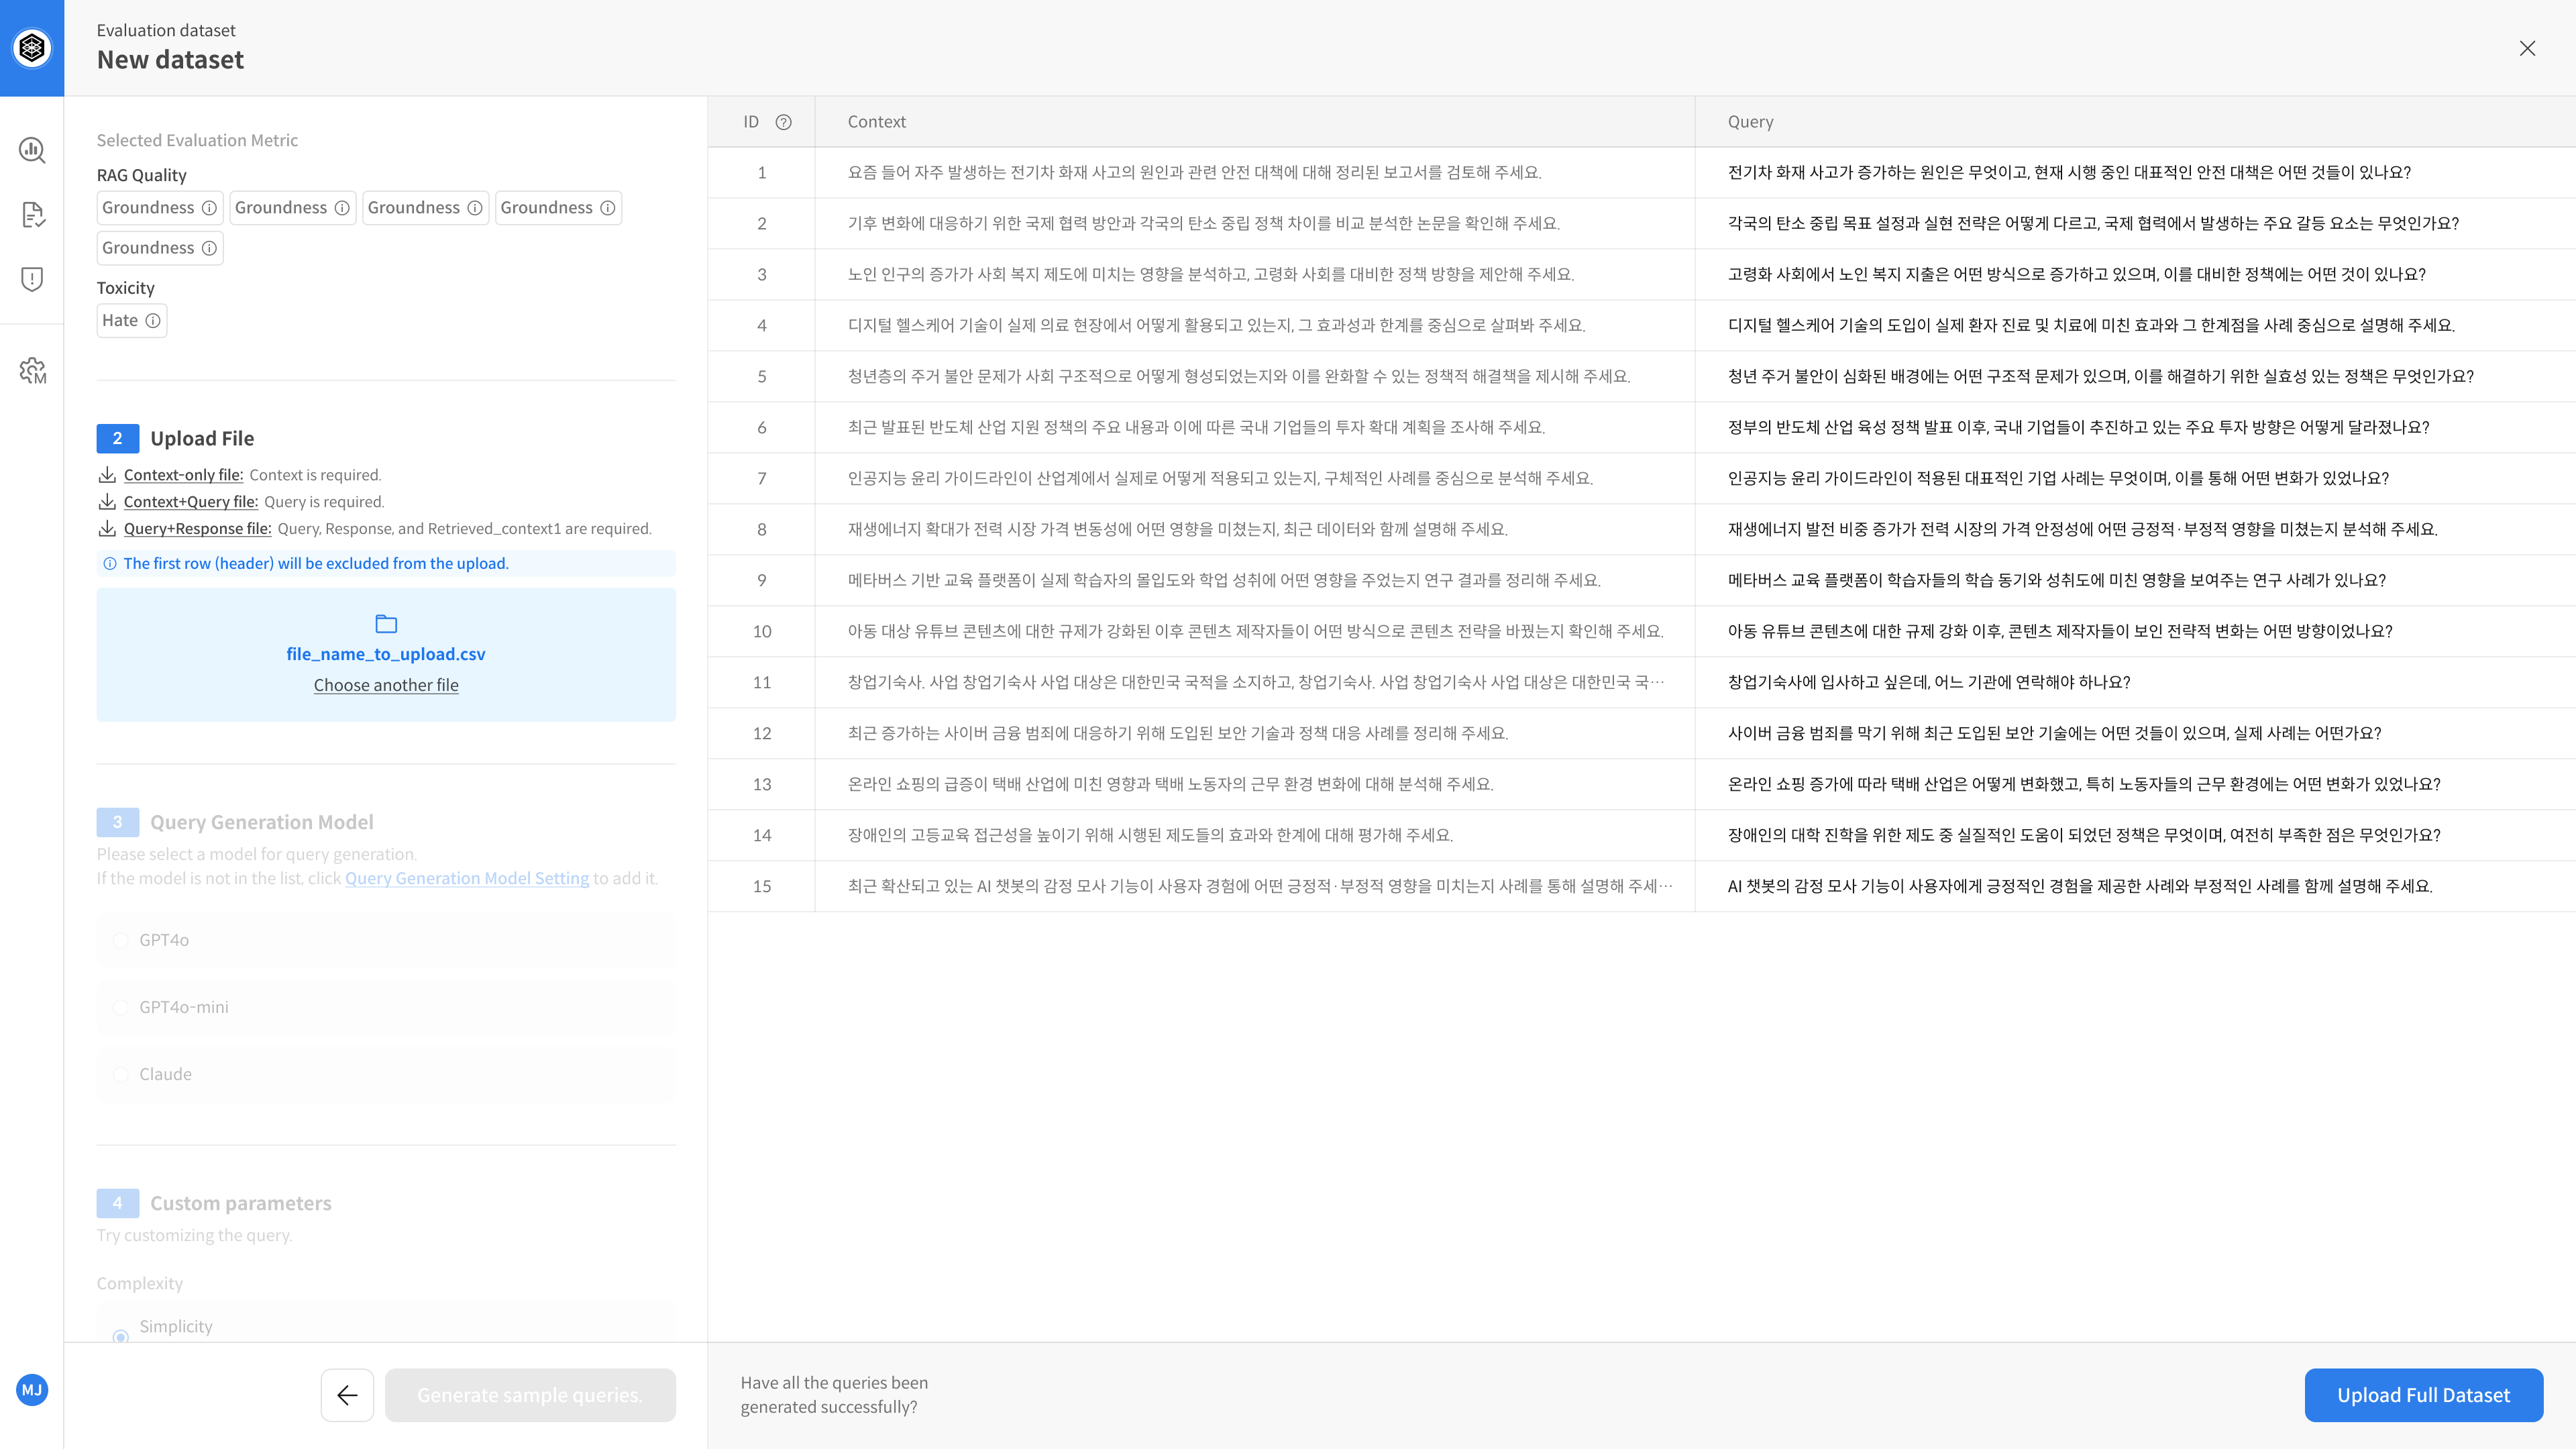
After uploading, you can preview up to 100 rows from the file.
Click on any row to open a detailed view of the data.
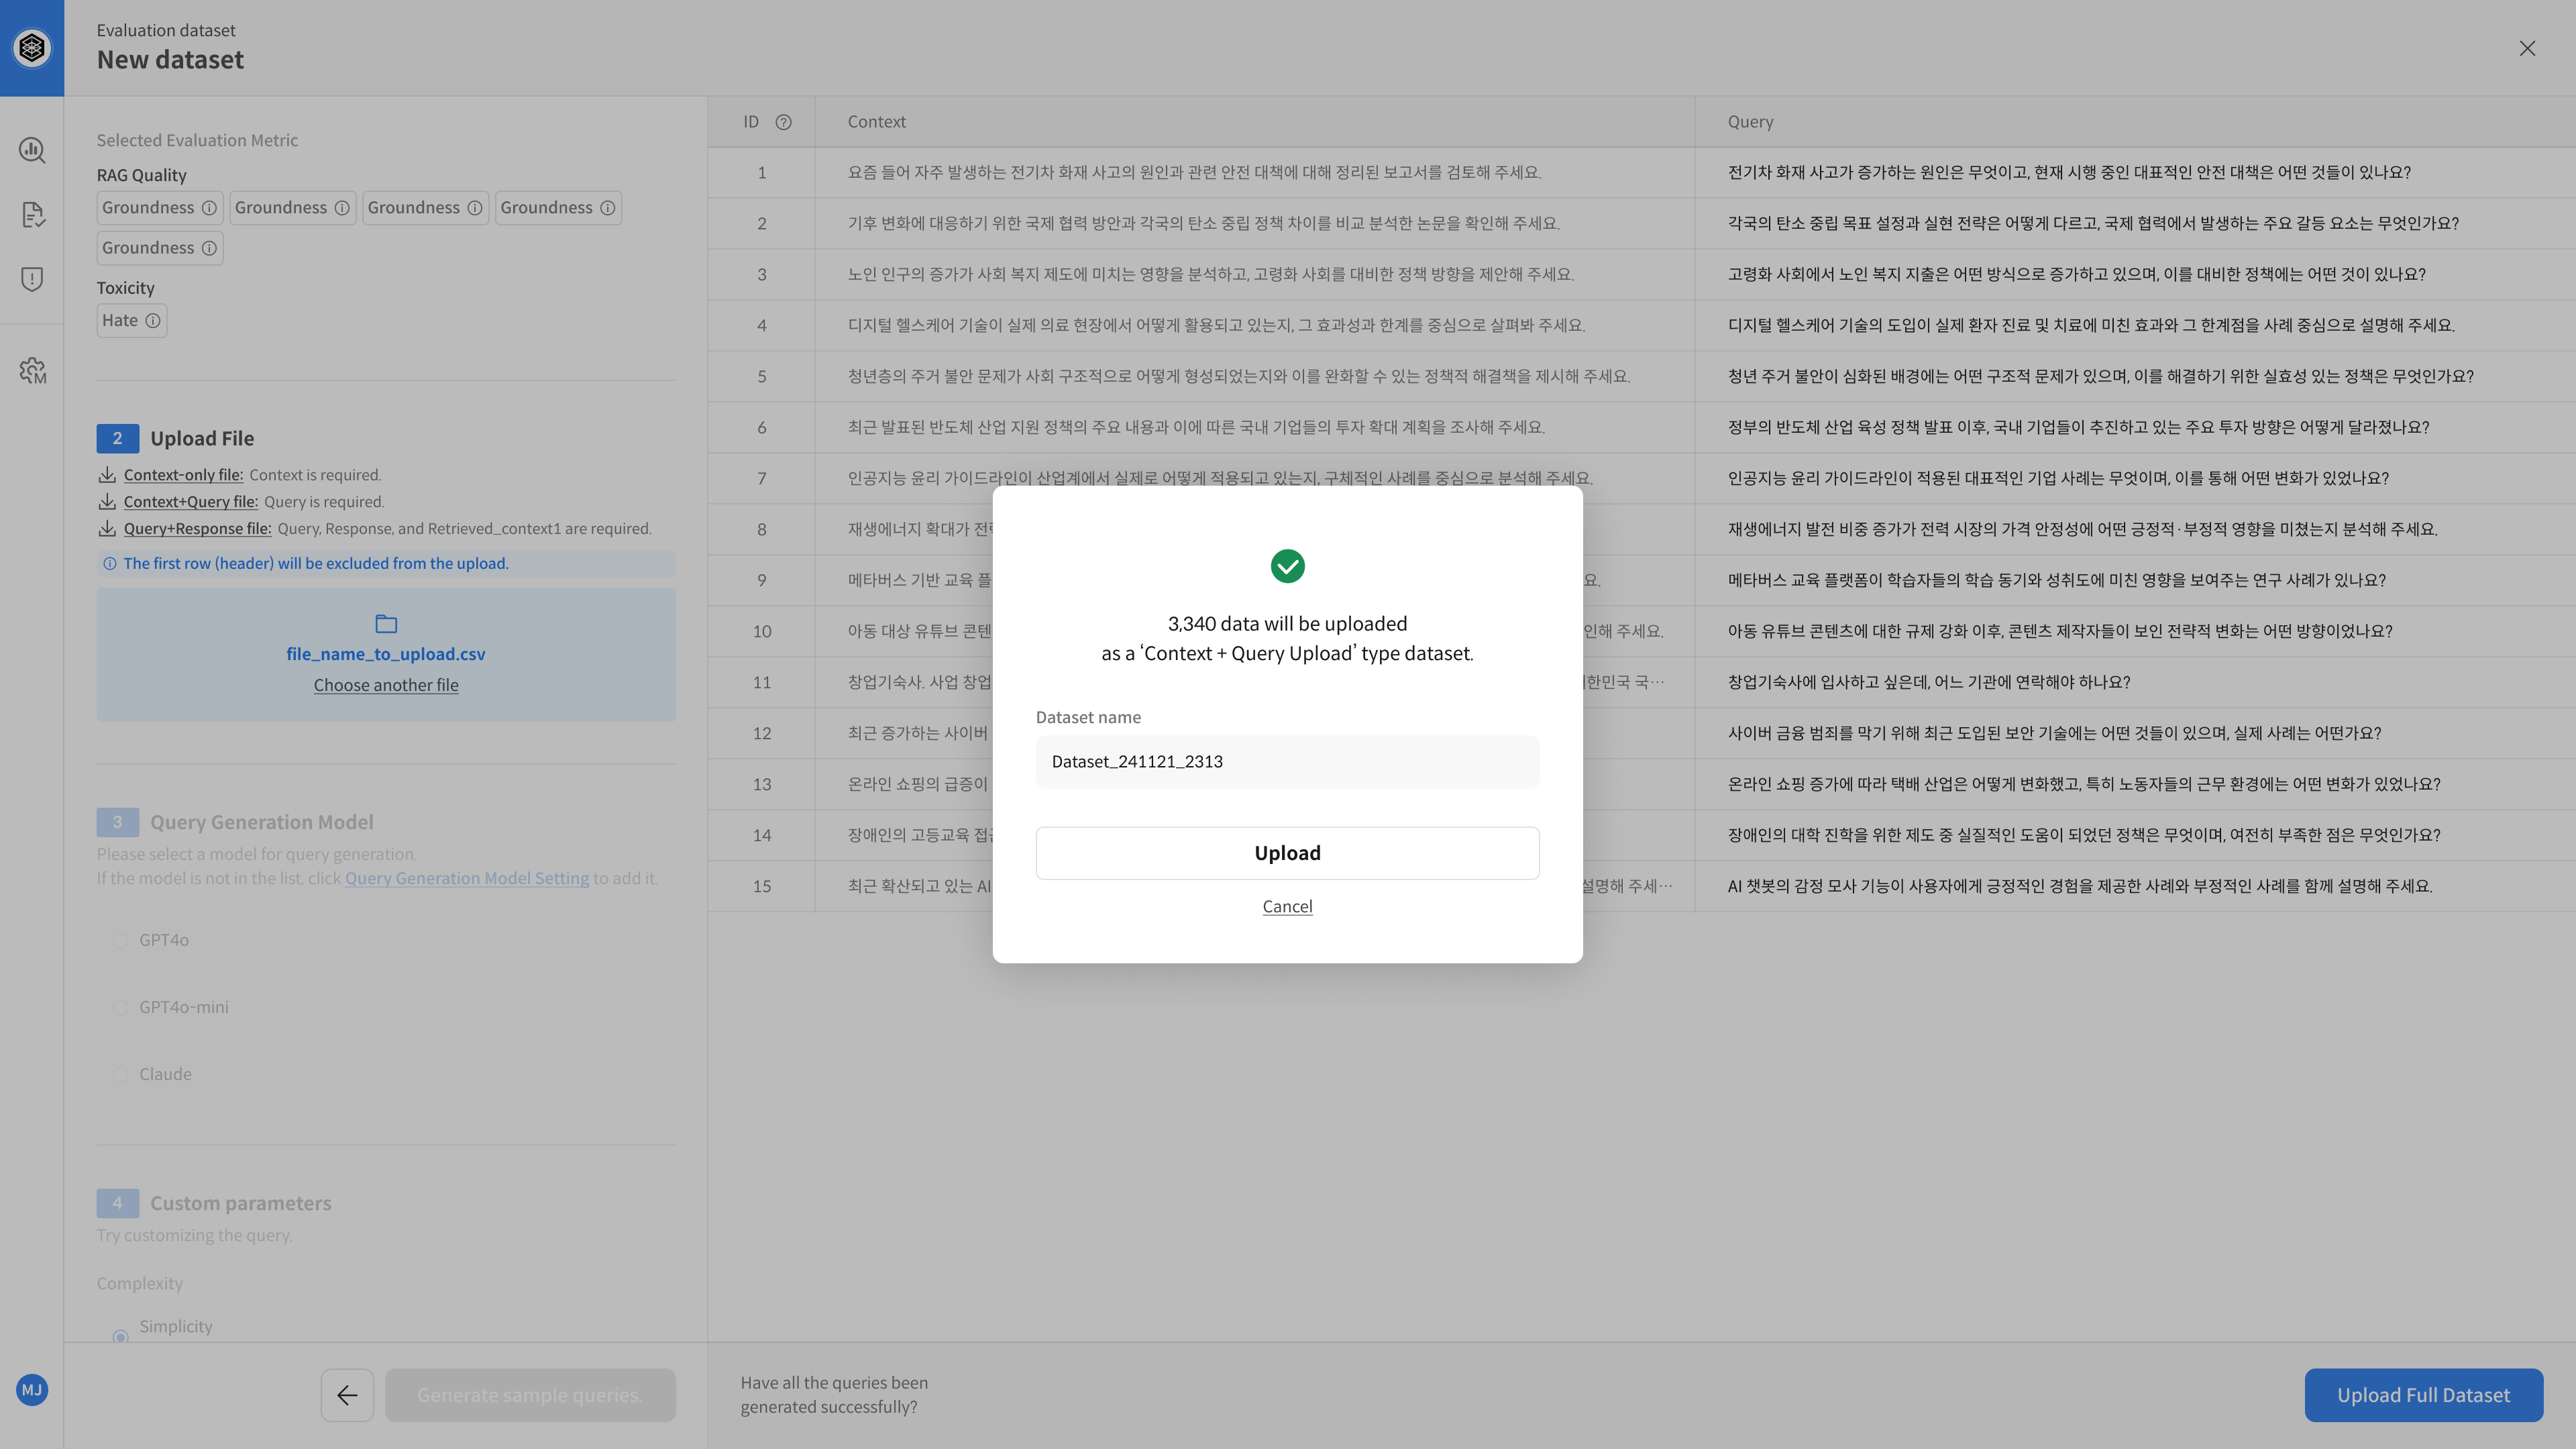
⑤ Save Dataset
Enter a name for the dataset and click Save to complete the setup.
💡 Saved datasets can be selected later in the evaluation tab.
▶️ Next Step
→ Your dataset is now ready. You can proceed with the evaluation. 😊
Step-by-step 3️⃣ Response Upload
The Response Upload (Query + Response) method
is used when you already have both query and response data —
and want to immediately perform evaluation without generating new responses.
① Open Dataset Creation
Go to the [Dataset] tab in your project → Click [New Dataset]
② Select Evaluation Metric
This step defines how the dataset will be evaluated.
- Example: Clarity, Usefulness, Empathy, Factuality, etc.
Make sure the metrics are registered beforehand in the Metric Setting page.
③ Upload File (Query + Response)
Upload a file that contains both query and response data for evaluation.
Using pre-chunked documents is recommended.
You can download a sample file to check formatting.
⚠️ The column retrieved_context1 is required and must include at least one supporting document.
Other columns such as retrieved_context2~5 are optional.
- File types:
.csv,.xlsx - Required column:
query - Optional:
id,context,metadata
① Query + Response File
- File format: CSV or XLSX
- Required columns:
query,response,retrieved_context1
| Column Name | Required | Description |
|---|---|---|
query | ✔️ | The question to evaluate |
response | ✔️ | The generated answer |
retrieved_context1 | ✔️ | Key supporting document used |
retrieved_context2~5 | Optional | Additional supporting documents |
| (other metadata) | Optional | Model version, timestamp, etc. |
- Example:
| query | response | retrieved_context1 | retrieved_context2 | Category |
|---|---|---|---|---|
| What are the loan terms? | The loan has a 3% fixed annual rate. | Loan terms, Article 1 | Product usage terms | Branch Visit |
| What are your business hours? | We're open weekdays 9am–6pm. | Customer service policy | – | Chat support |
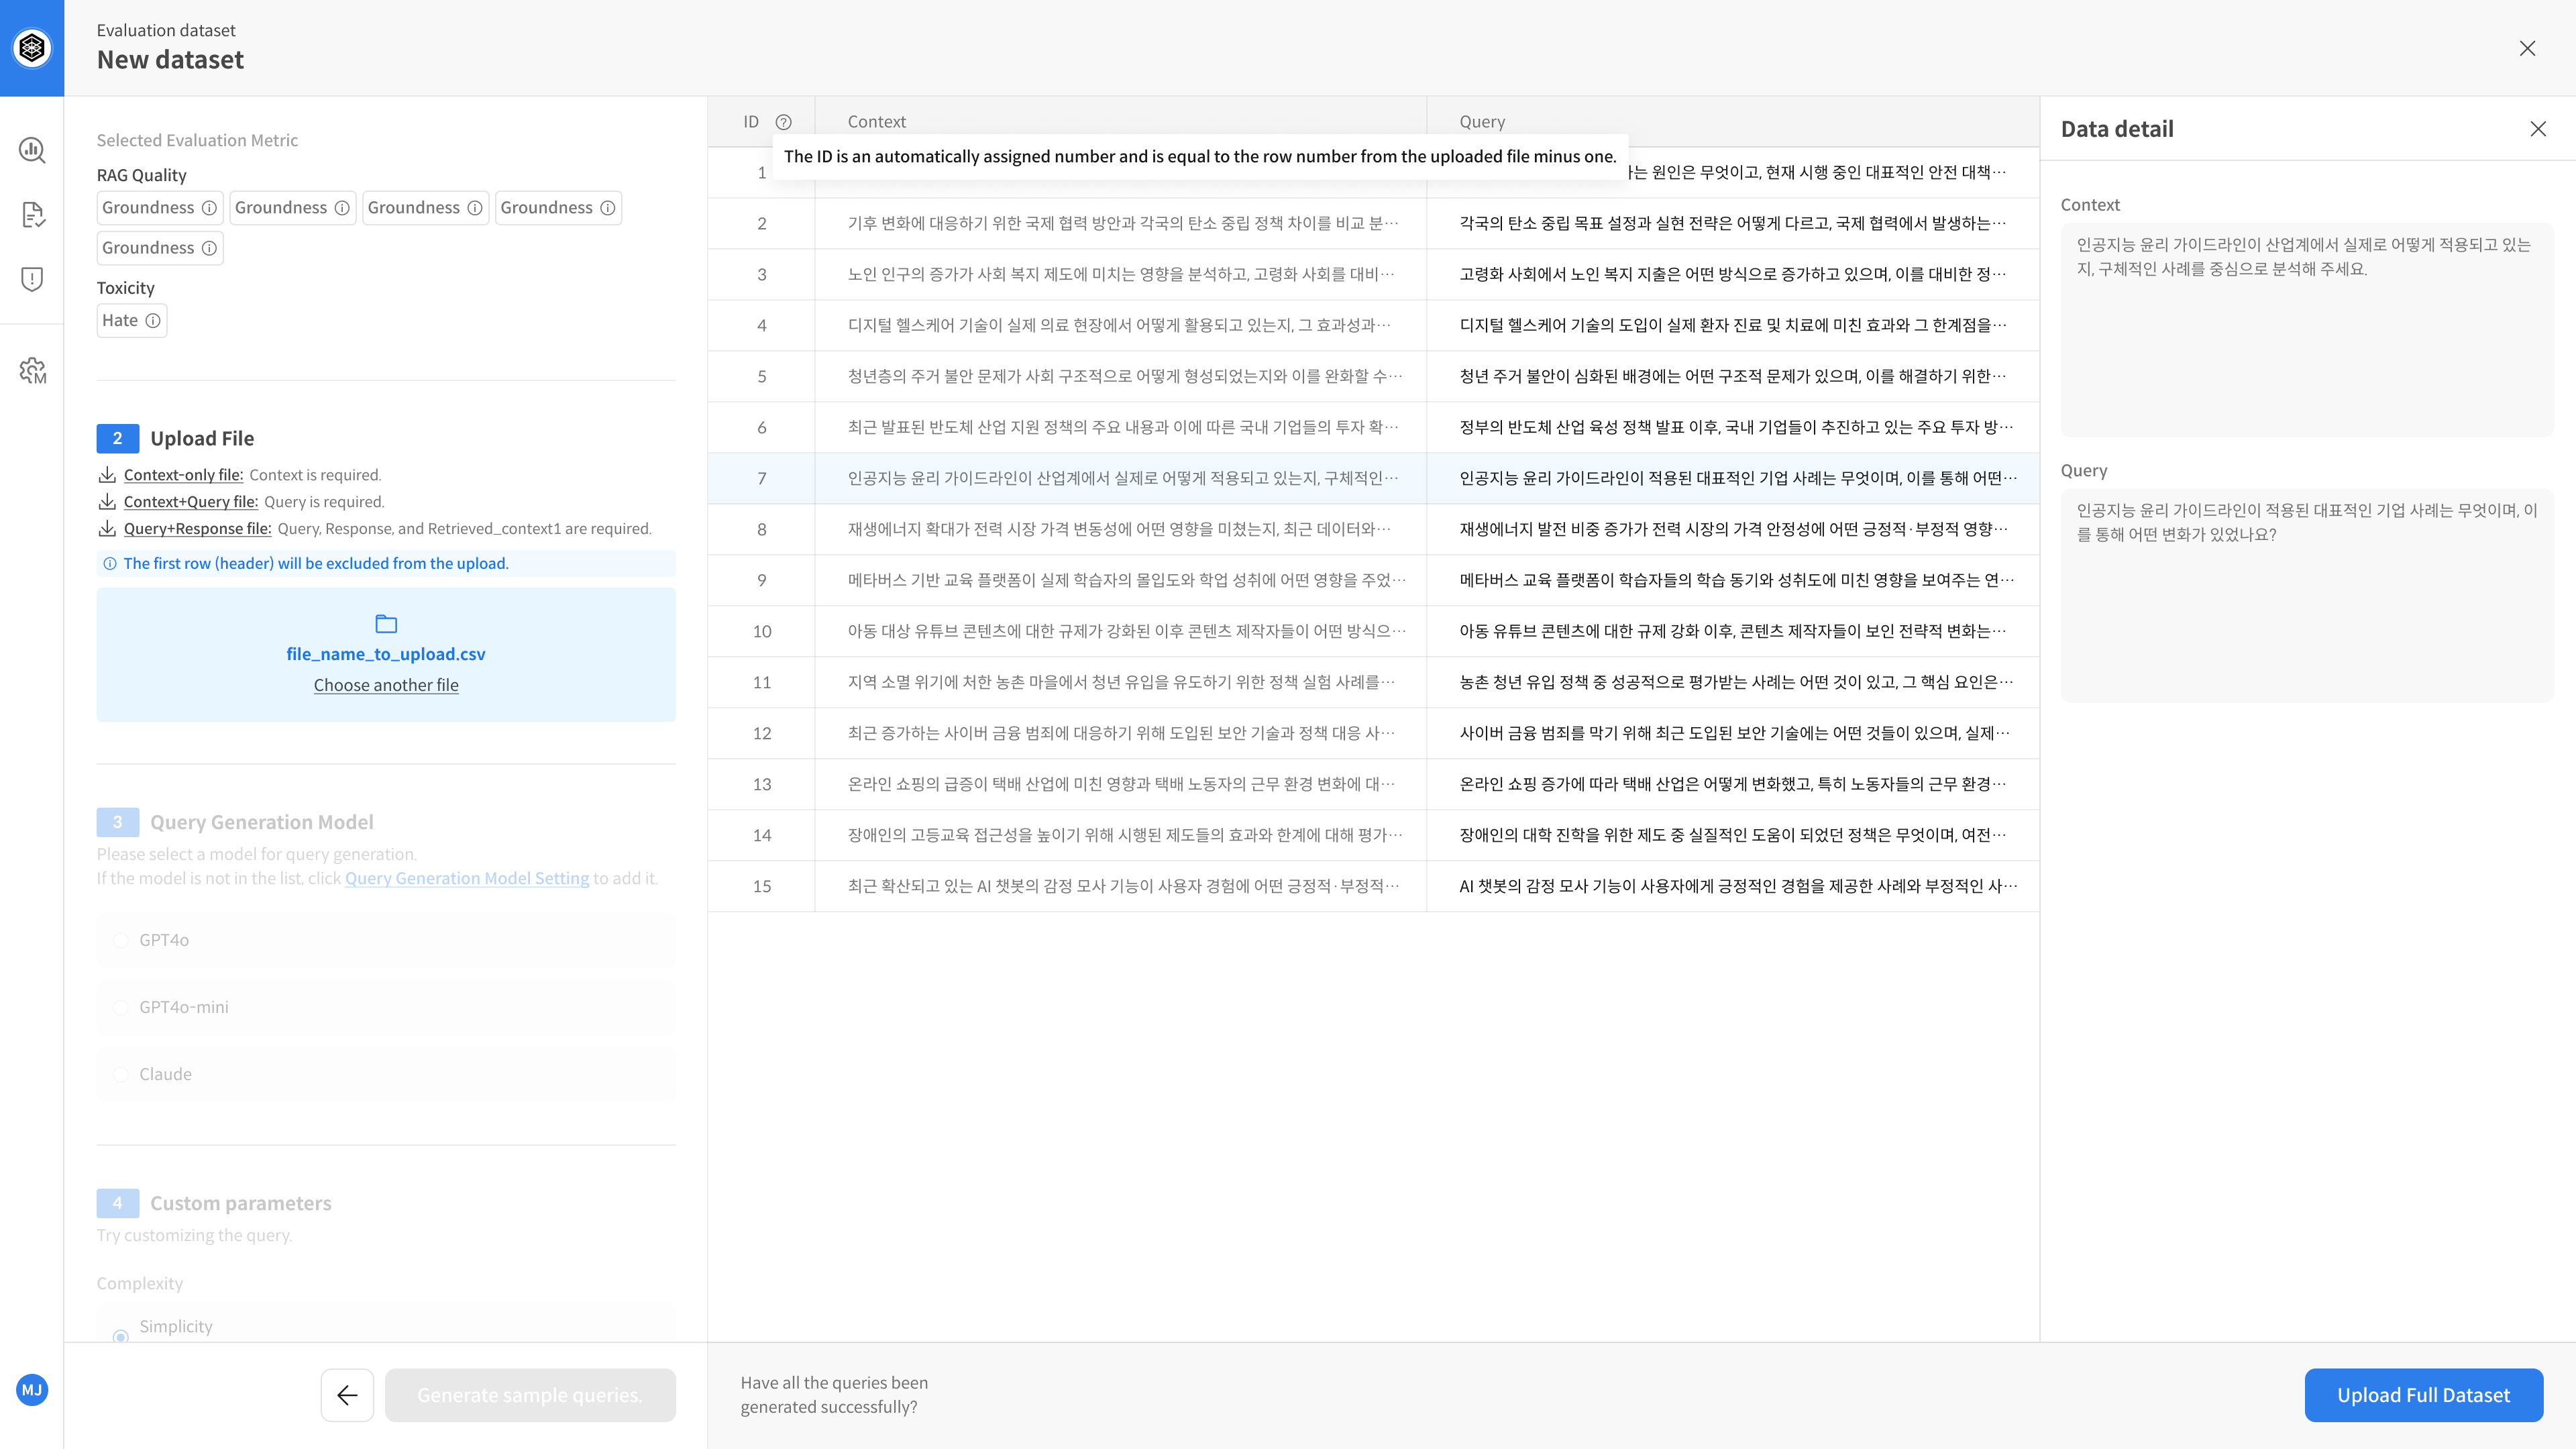
④ Review and Adjust Sample Data
After uploading the file, you can review up to 100 auto-loaded samples.
Quickly check if the data format looks correct.
When you upload a file that includes responses, a 3-pane preview screen will be shown.
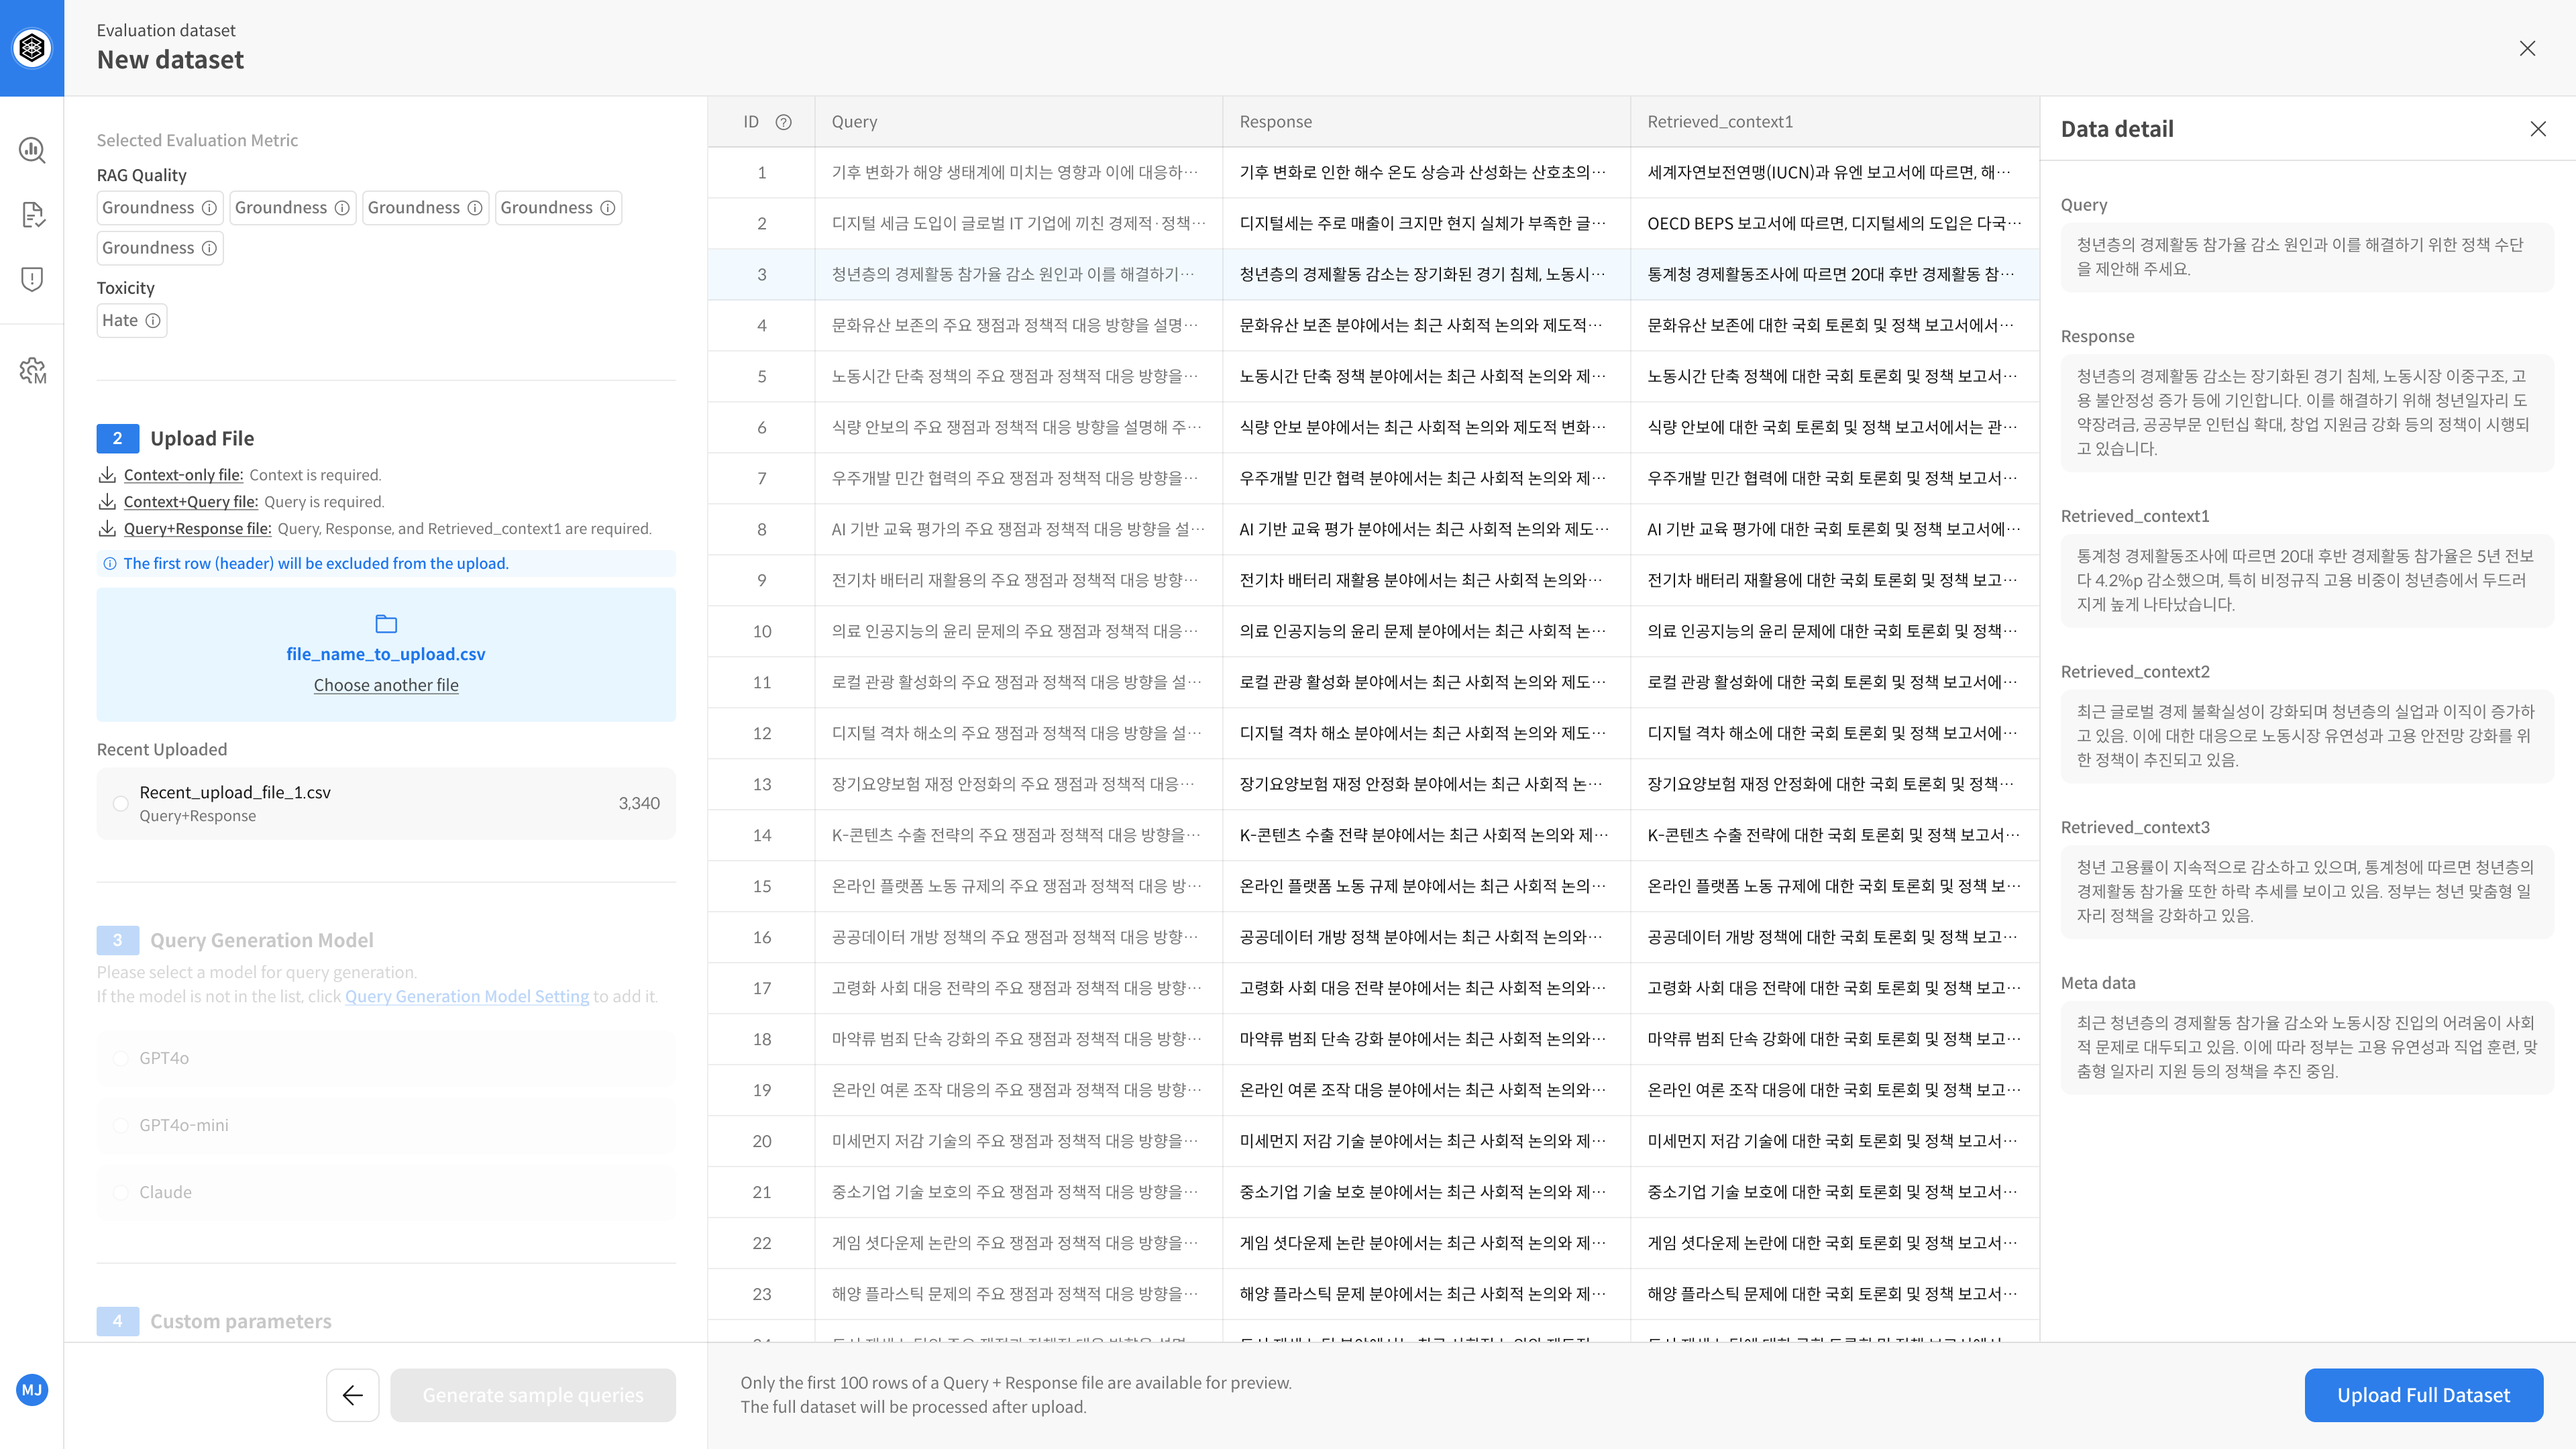
You can click each entry to review the full query, context, and available metadata.
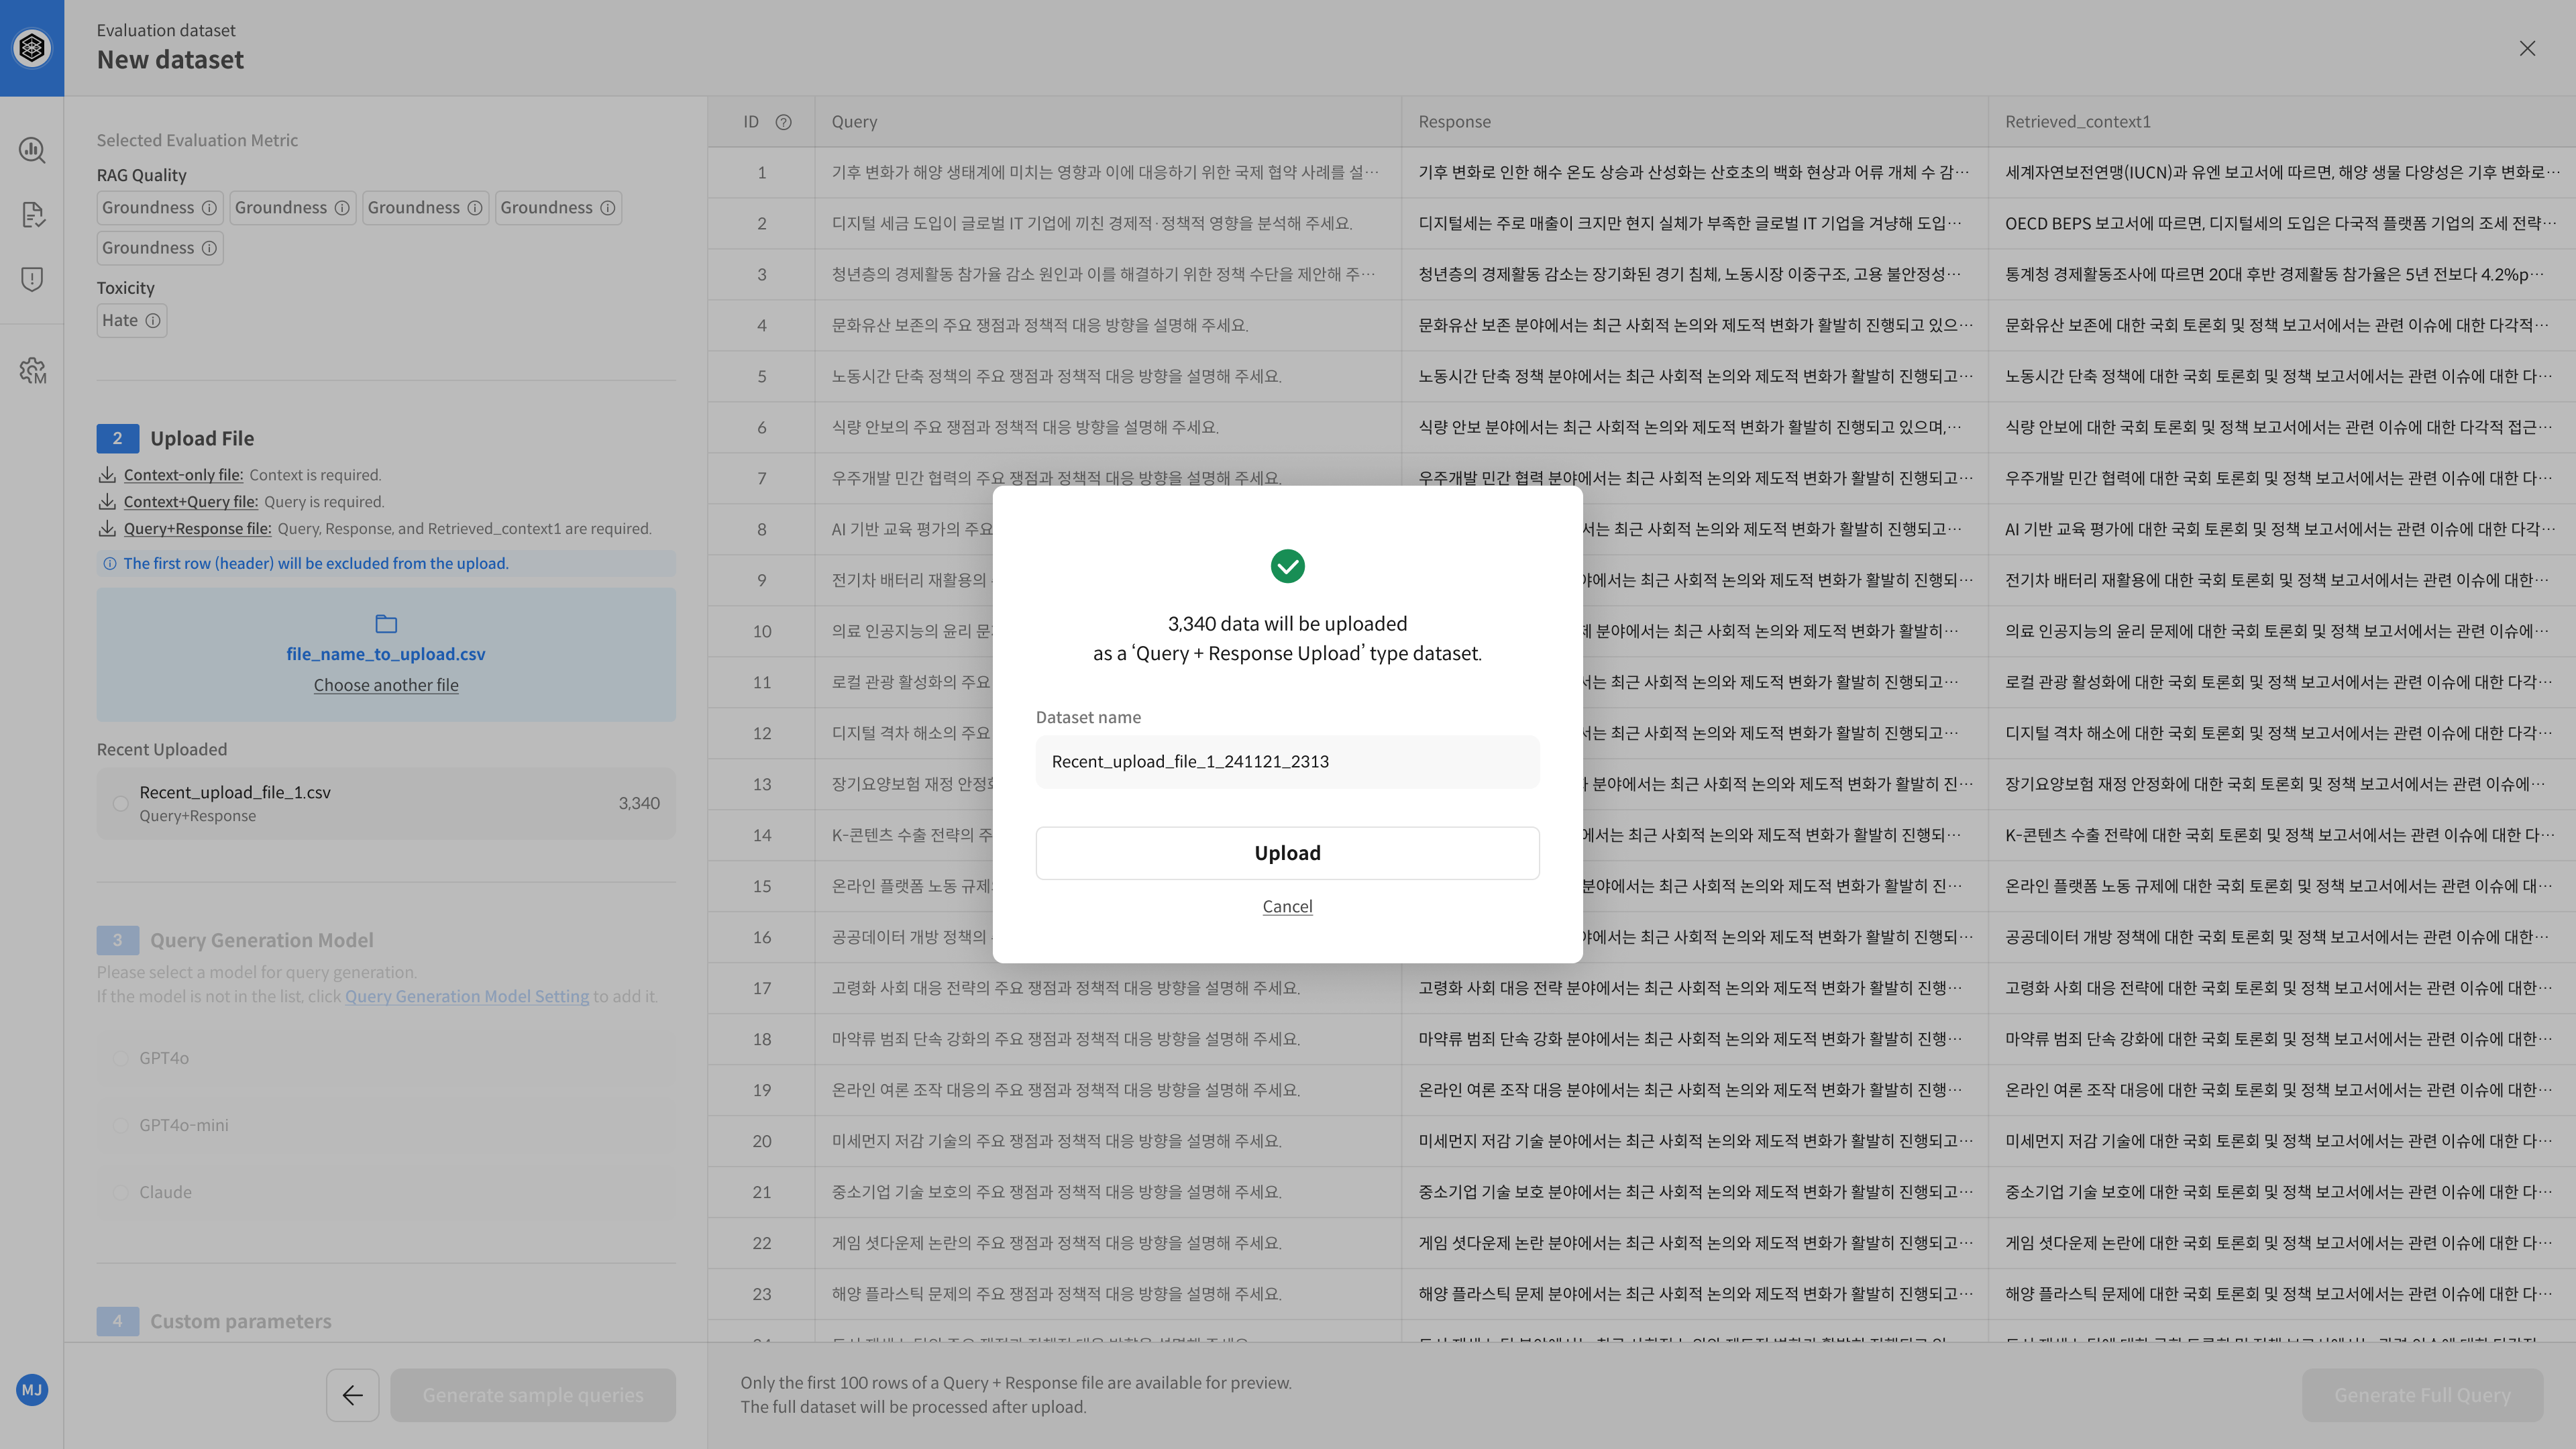
⑤ Save Dataset
Enter a name for your dataset and click Save to complete the configuration.
💡 The saved dataset will be available in the evaluation tab for future use.
▶️ Next Step
→ Dataset setup is complete — you can now proceed with evaluation. 😊