Metric Management Overview
Datumo Eval provides several default metrics. However, you may need to create custom metrics tailored to your specific use cases. This page guides you on how to set up and manage your own metrics. From basic to advanced settings, you can define your own evaluation criteria through various features. Through Metric Configuration, you can effectively evaluate your AI models and analyze their strengths and weaknesses. Here, we cover everything from defining metrics, adding scales, setting rubrics, to creating advanced prompts. Metric Configuration
- Metric Management (Basic): Covers basic metric settings and rubric definition methods.
- Metric Management (Advanced): Explains the feature for creating your own metrics by generating prompts for advanced users.
Step-by-step
Step 1. Basic Settings (Metric Management)
In addition to the default metrics provided by Datumo Eval, users can create their own metrics to suit their needs. Follow these steps to set up your own evaluation metrics:
① Create a New Metric
Besides the default metrics, you can define new ones. First, open the [Metric Management] page from the left navigation bar. You can start creating and managing metrics on this page. Click the [+ New Metric] button in the upper right corner to open a modal where you can select a default evaluation method.
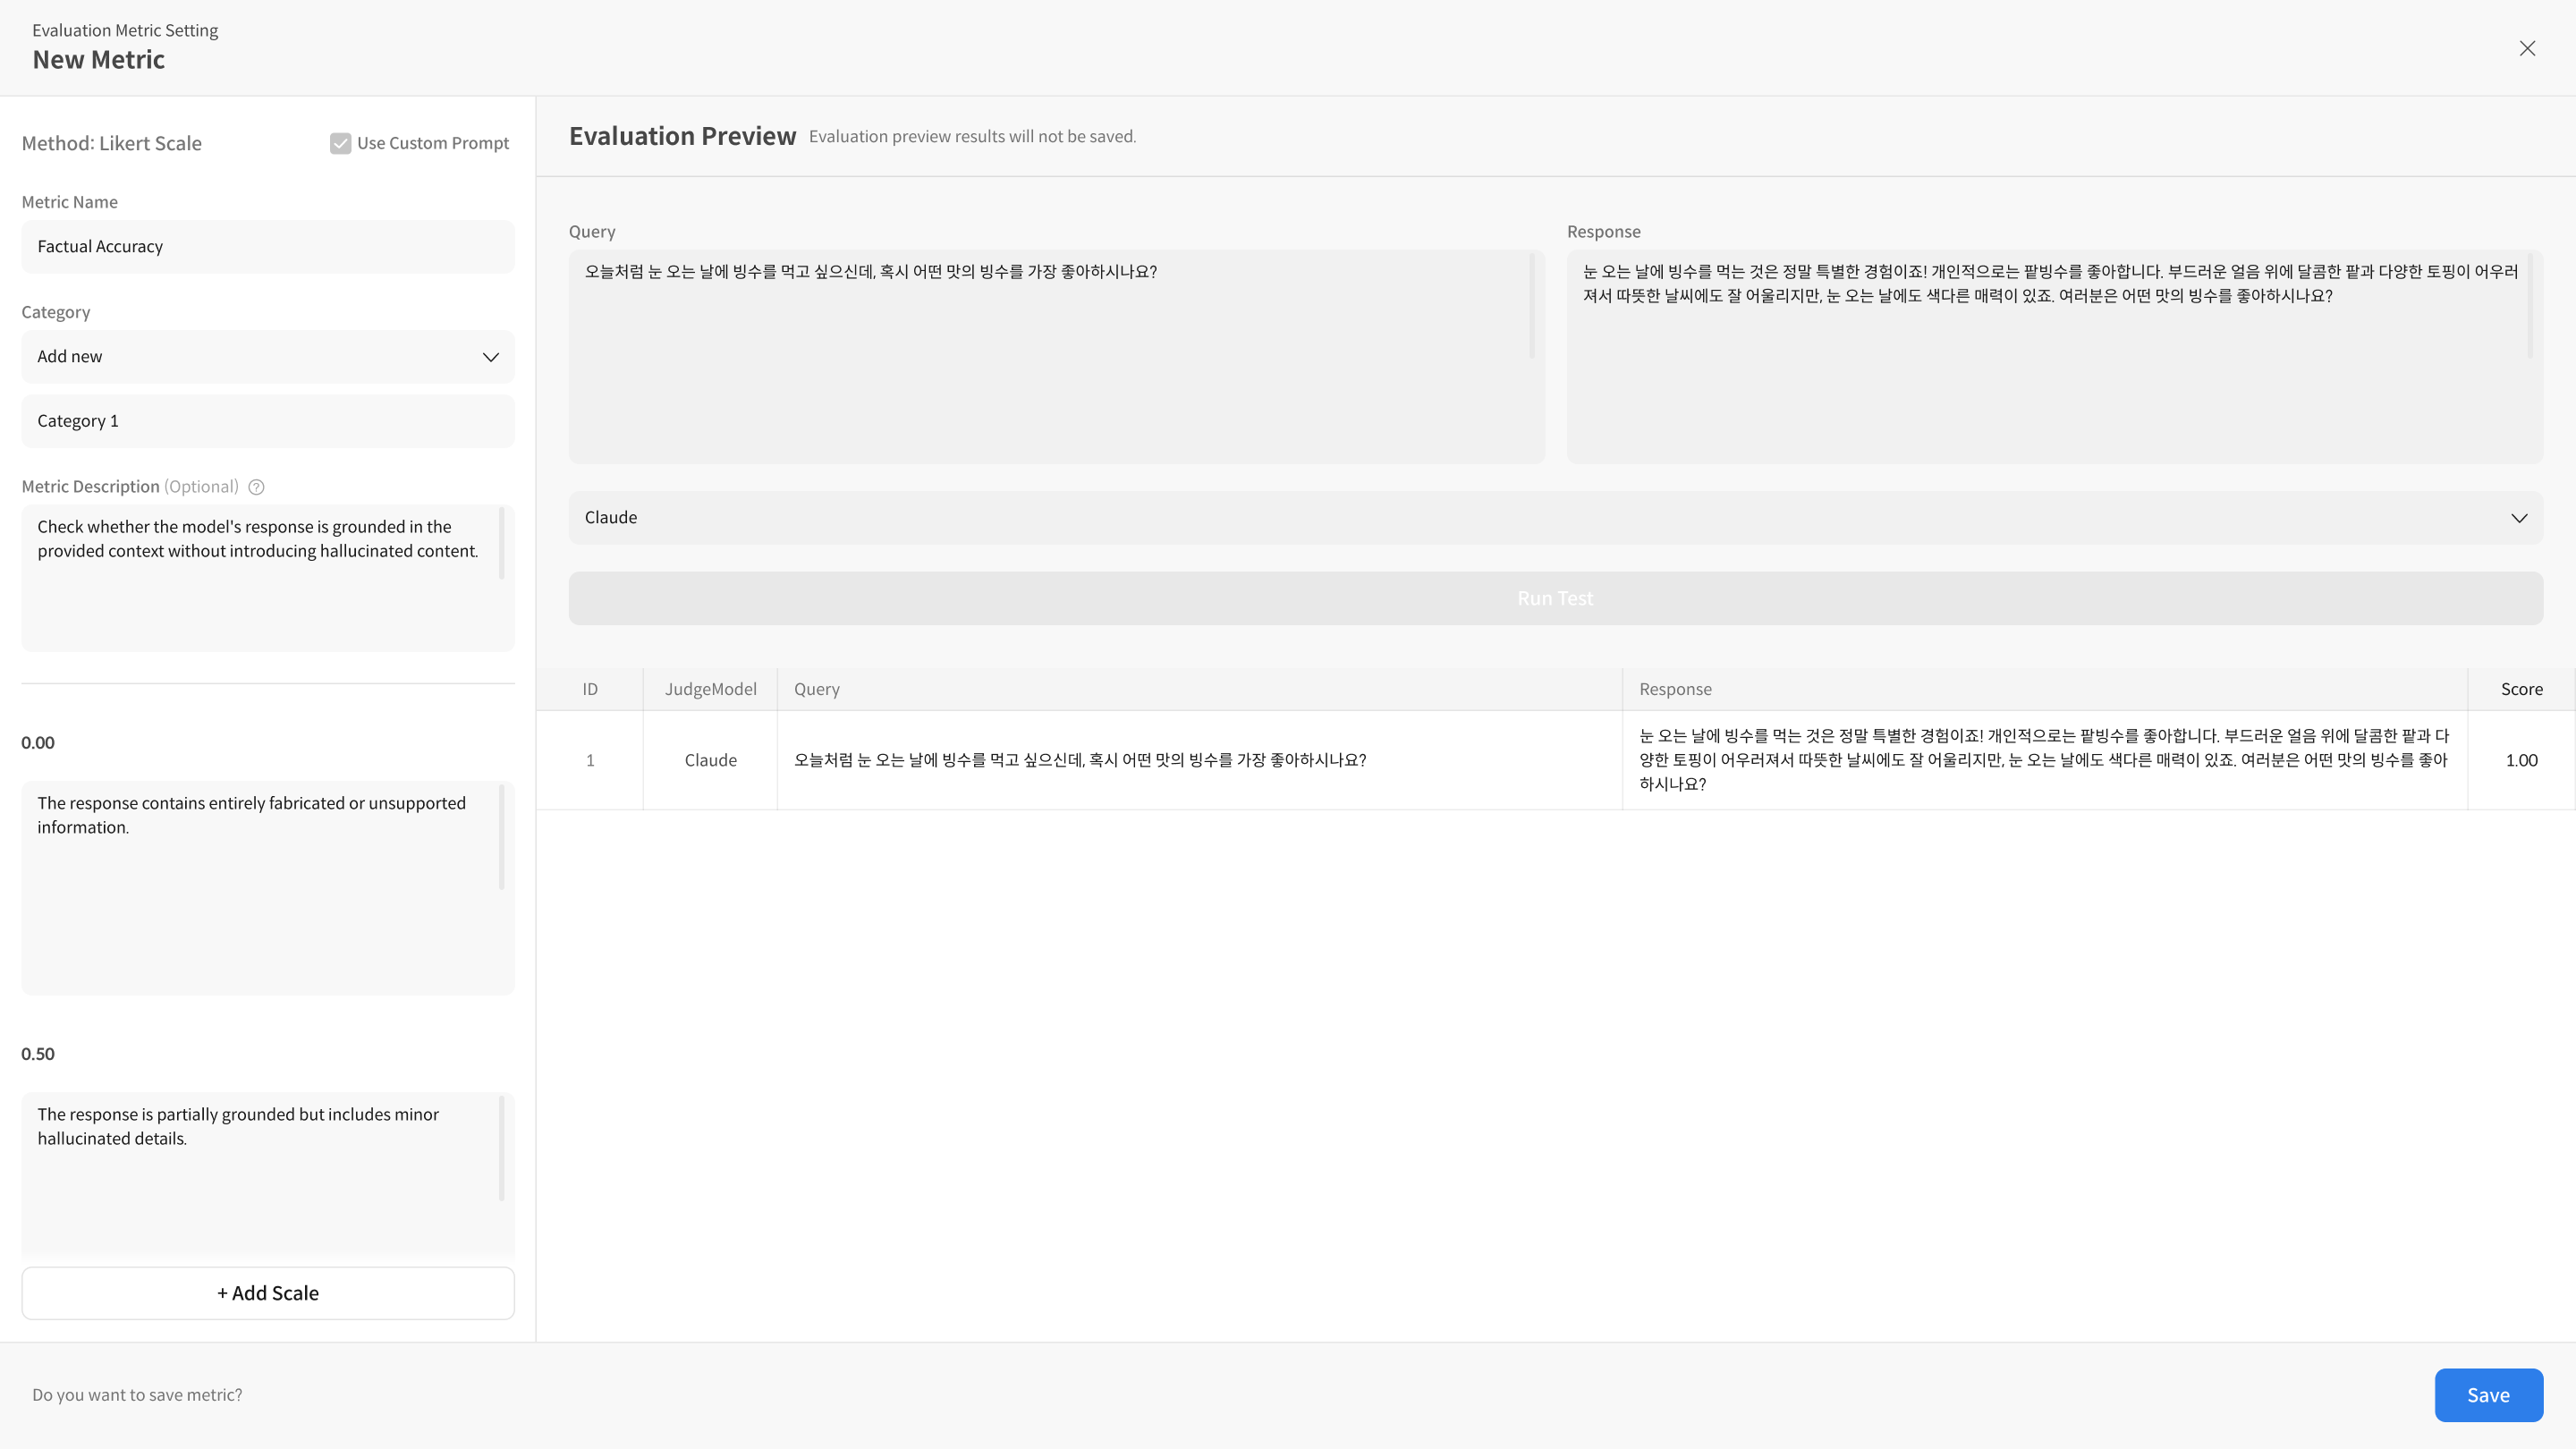
② Configure Basic Information and Rubric
When creating a new metric, you need to configure several items. Important elements in this process include the Metric Name, Category, Metric Description, and Prompt Description. You can freely add or delete rubric items as needed. The following explains what each element means according to the screen flow:
- Metric Name
- Enter the name of the new metric. This name will be used as the model evaluation criterion.
- e.g., "Accuracy Assessment", "User Satisfaction", etc.
- Category
- You can manage metrics by classifying them into categories. For example, you can organize them into "Model Performance", "Safety Evaluation", etc.
- Metric Description
- Add a metric description. This is the description shown to the user, briefly explaining what criteria each metric evaluates.
- e.g., "This metric evaluates the accuracy of the model."
- Prompt Description
- The prompt description is a required field. Write the definition of the prompt to be used when evaluating the metric.
- This description is reflected in the metric rubric and is used when questions for evaluation are automatically generated.
- e.g., "This metric evaluates the accuracy of the model's response, based on the correctness of the answer to the user's request."
- Scale
- Set the evaluation scale for each metric. For example, you can use a scale of 1-5 points or Excellent, Average, Poor.
- After setting the scale, add a description for each score to set detailed evaluation criteria.
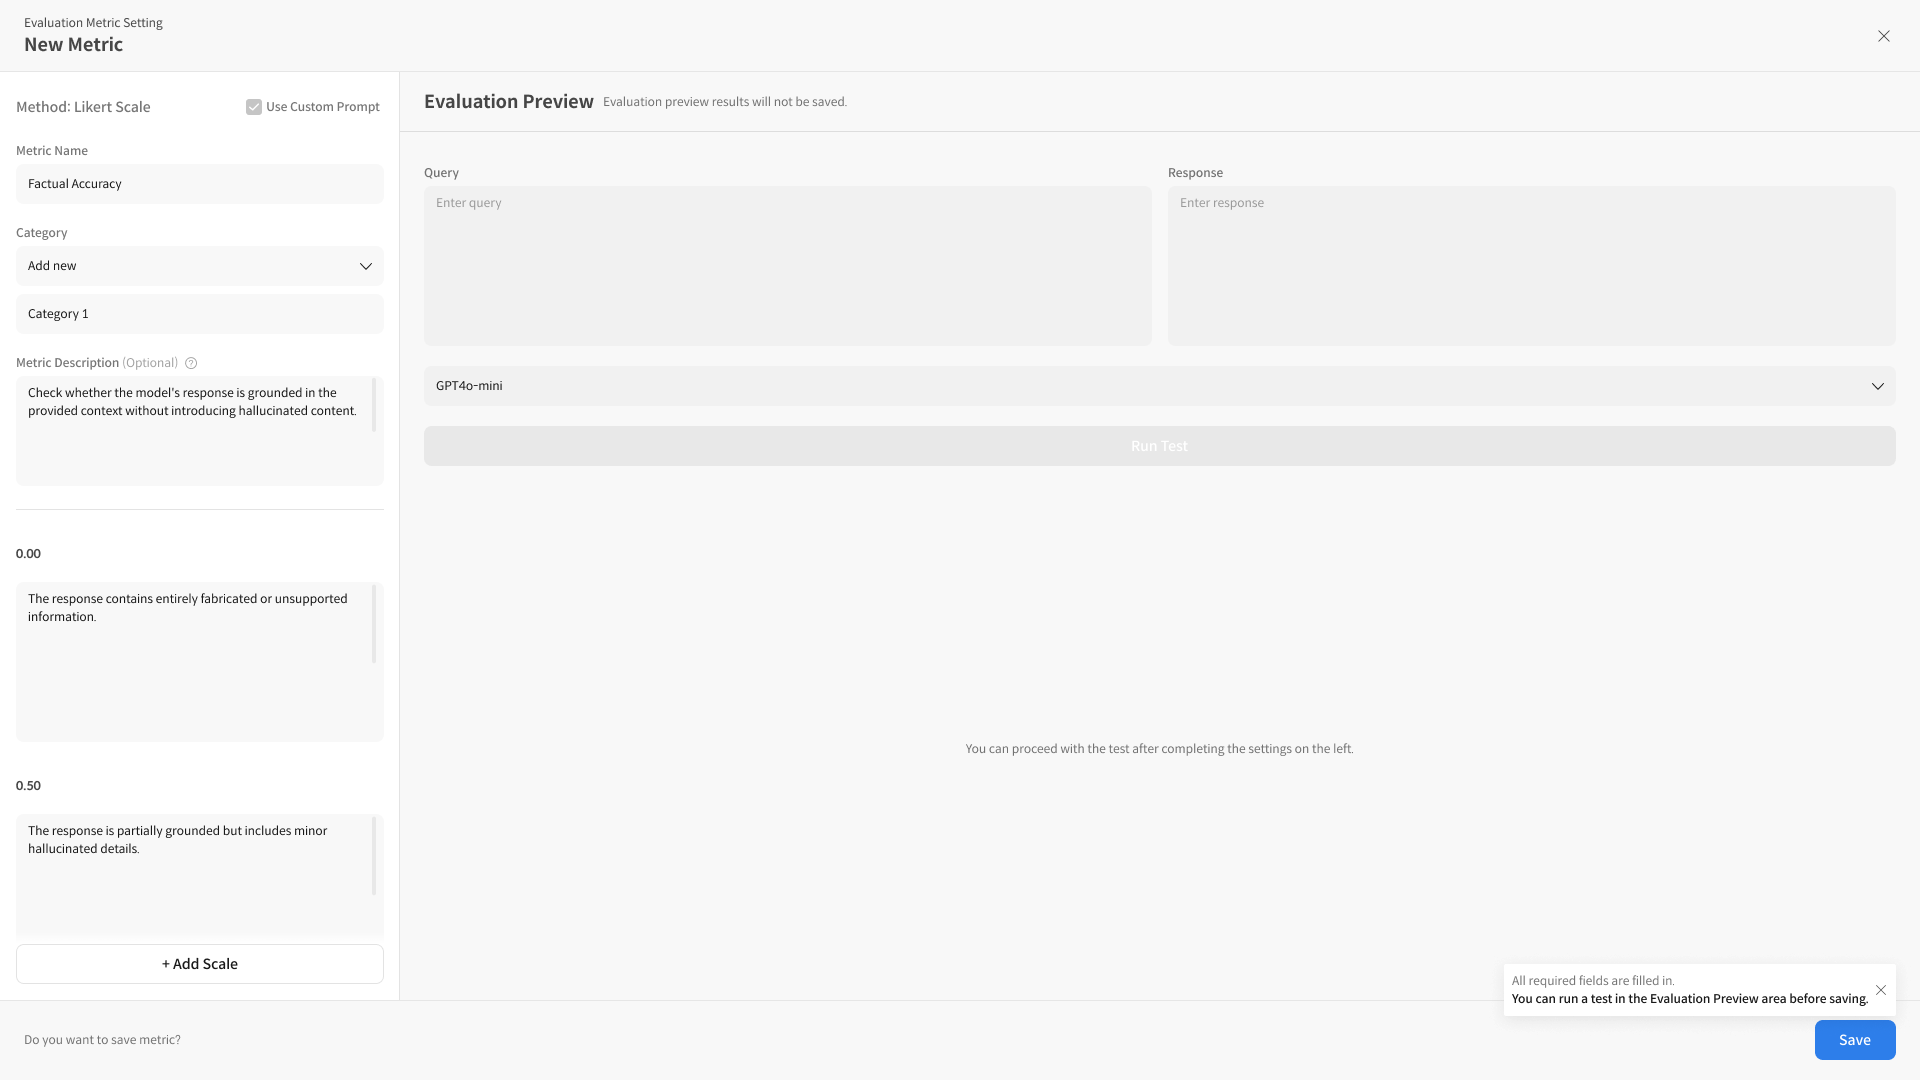
③ Run Test
You can preview whether the evaluation criteria of the created rubric work as intended. Enter the Query, Response, and (Optional) Context, then select a model and run [Run Test].
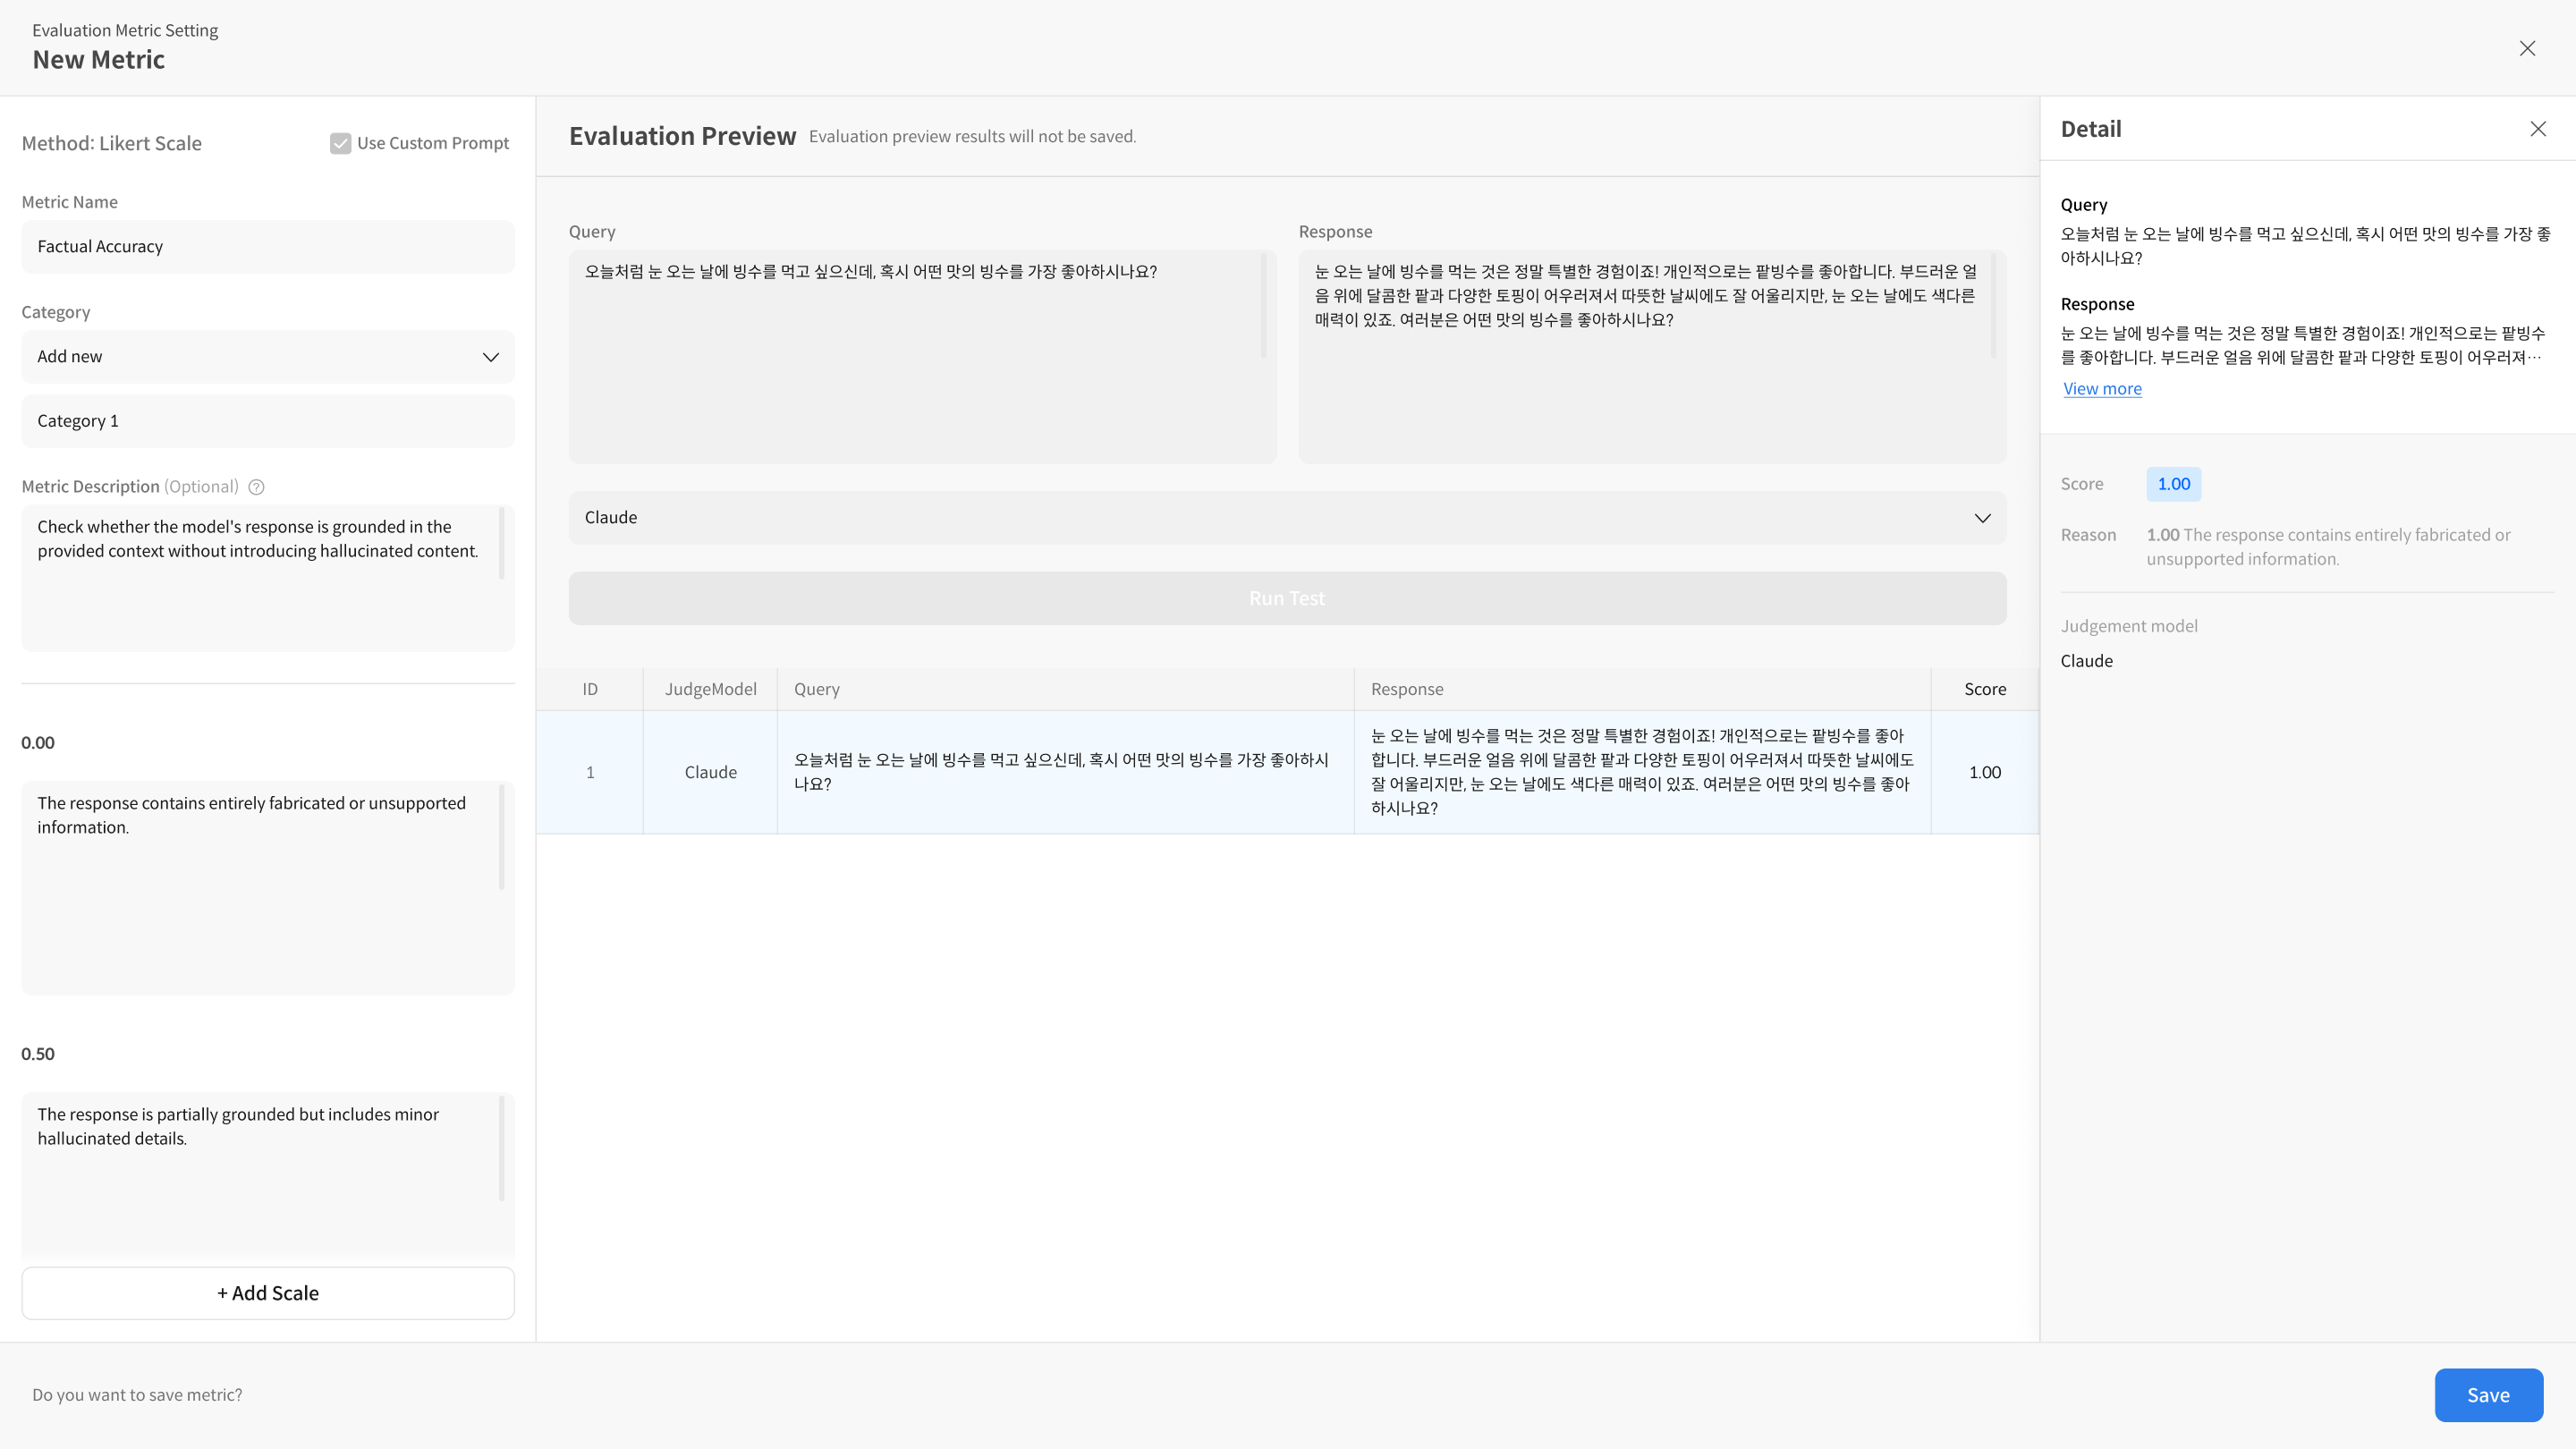
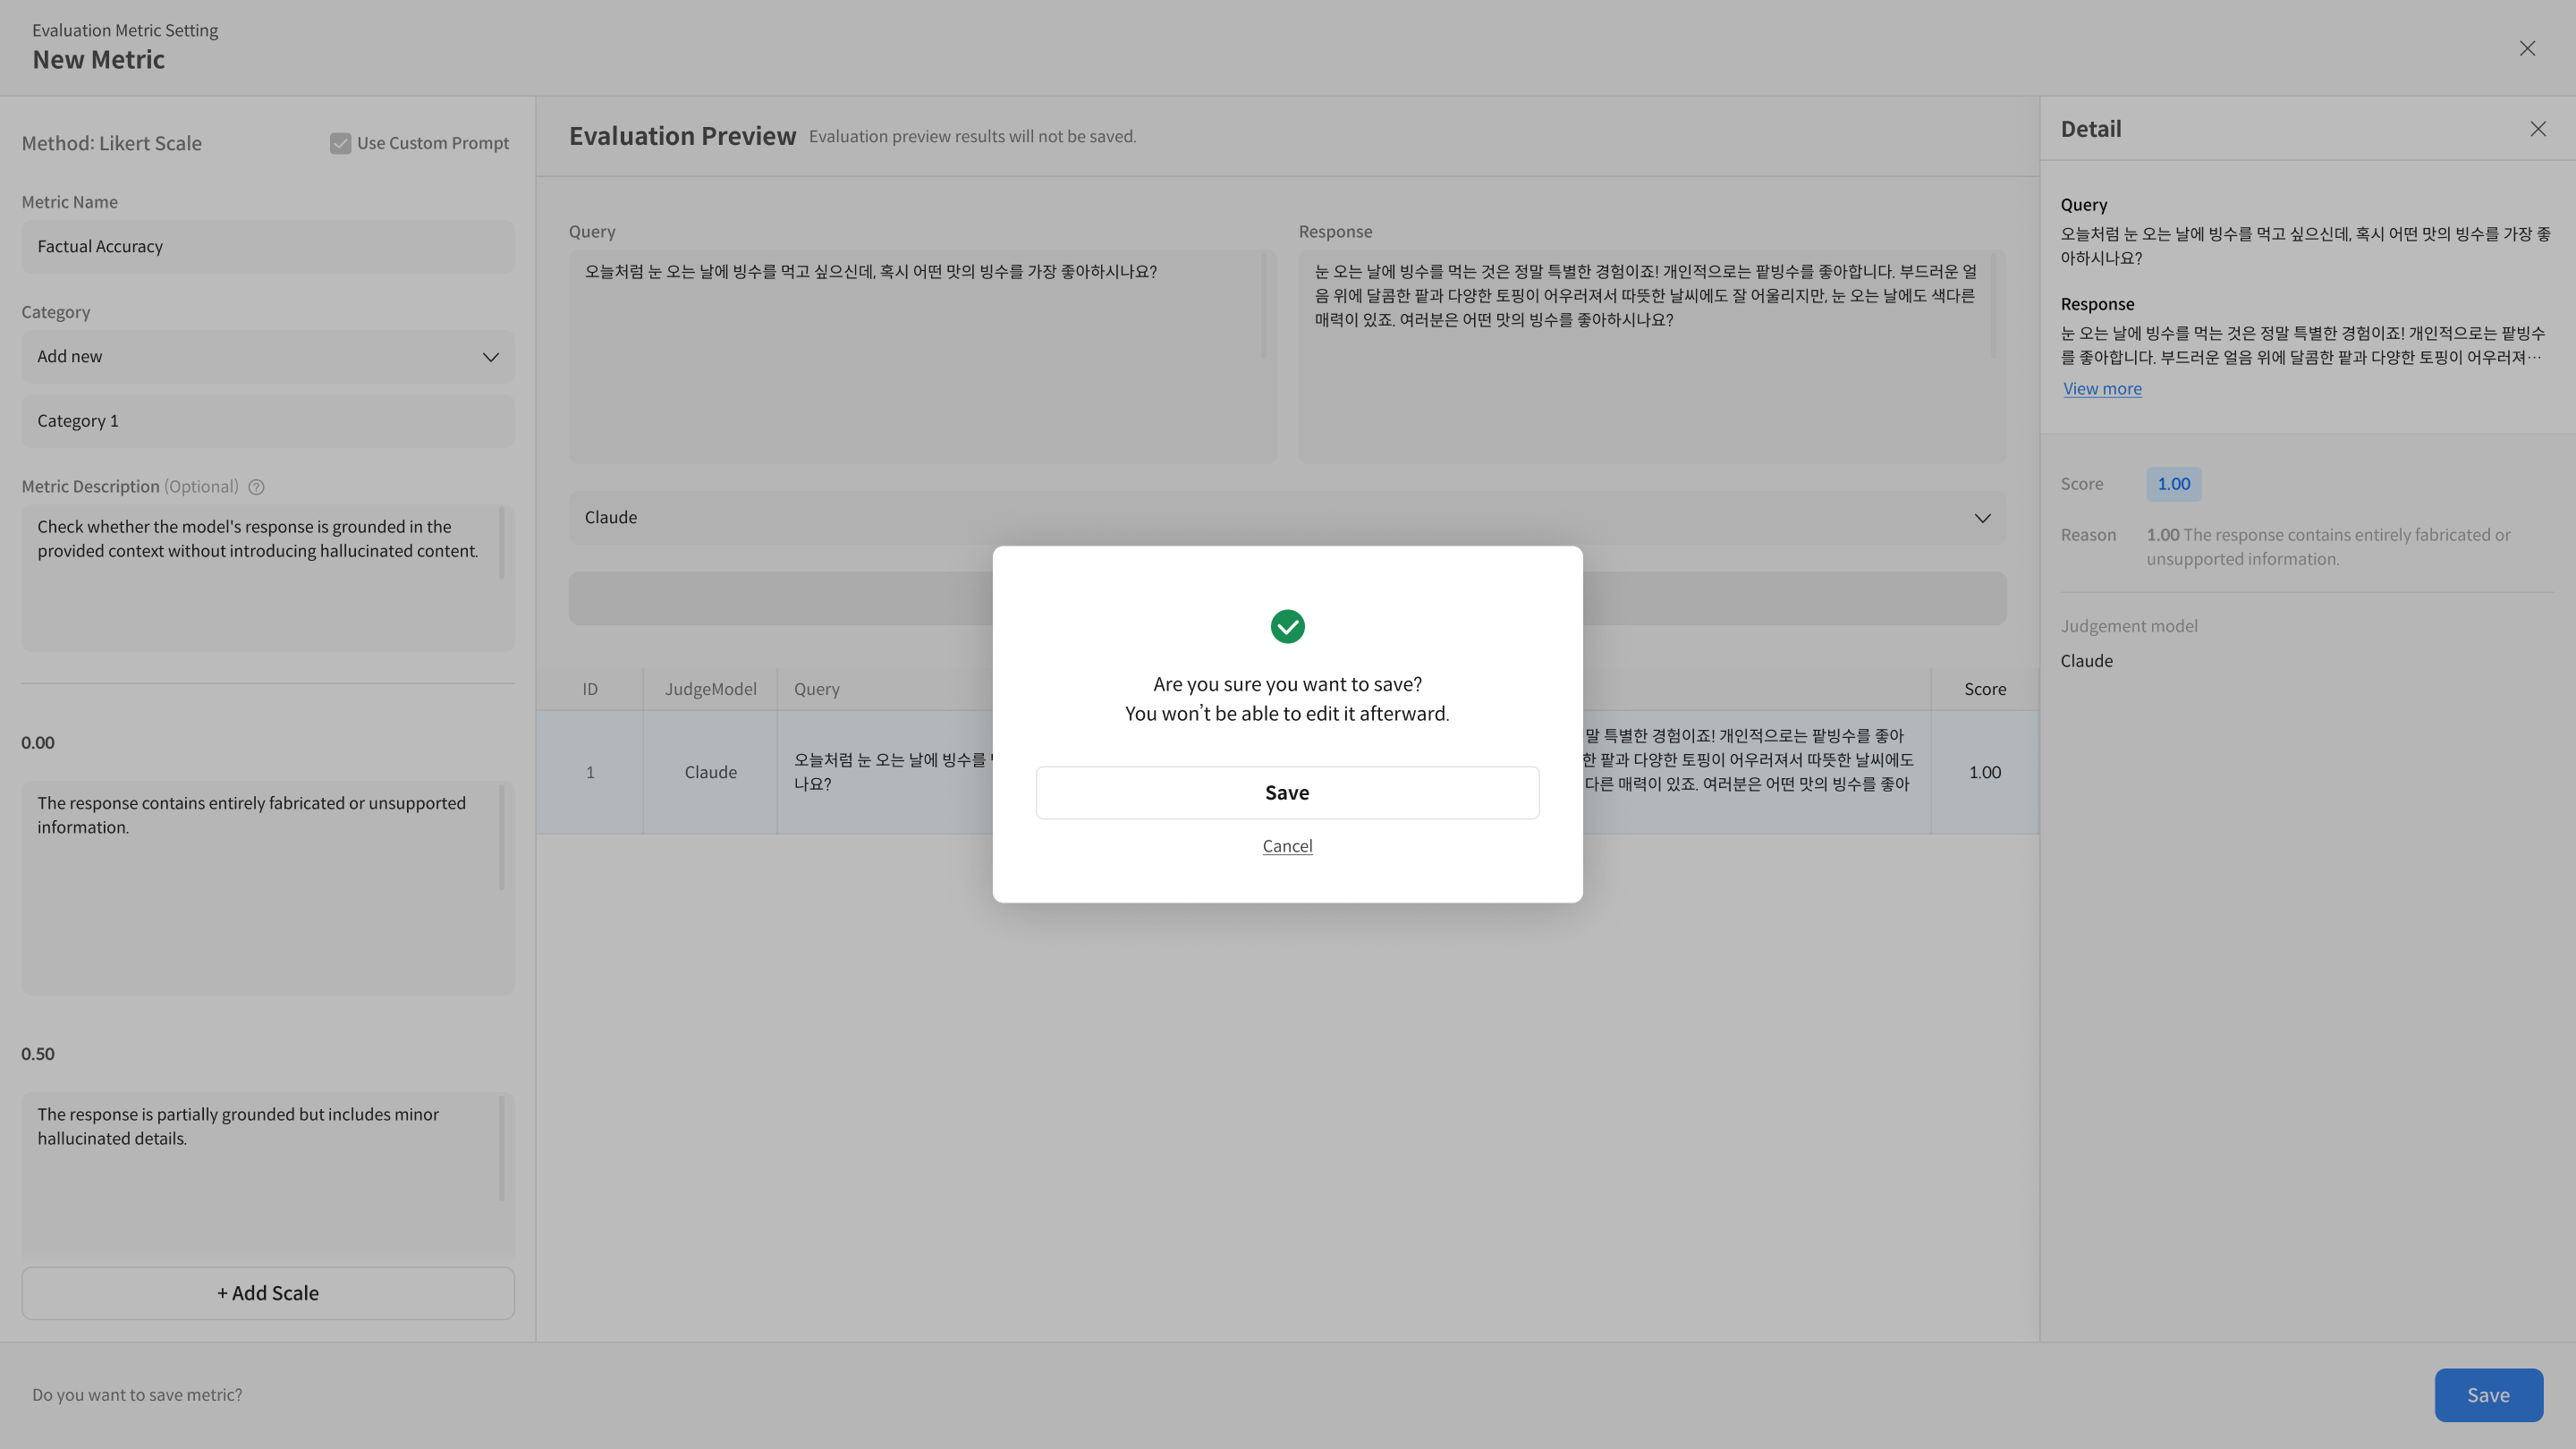
④ Save and Utilize Metric Once you have completed all the settings, click the [Save] button to save the metric. The configured metric can be saved and used for future evaluations. After saving, you can proceed with evaluation tests on the metric detail screen, just as you did during creation.
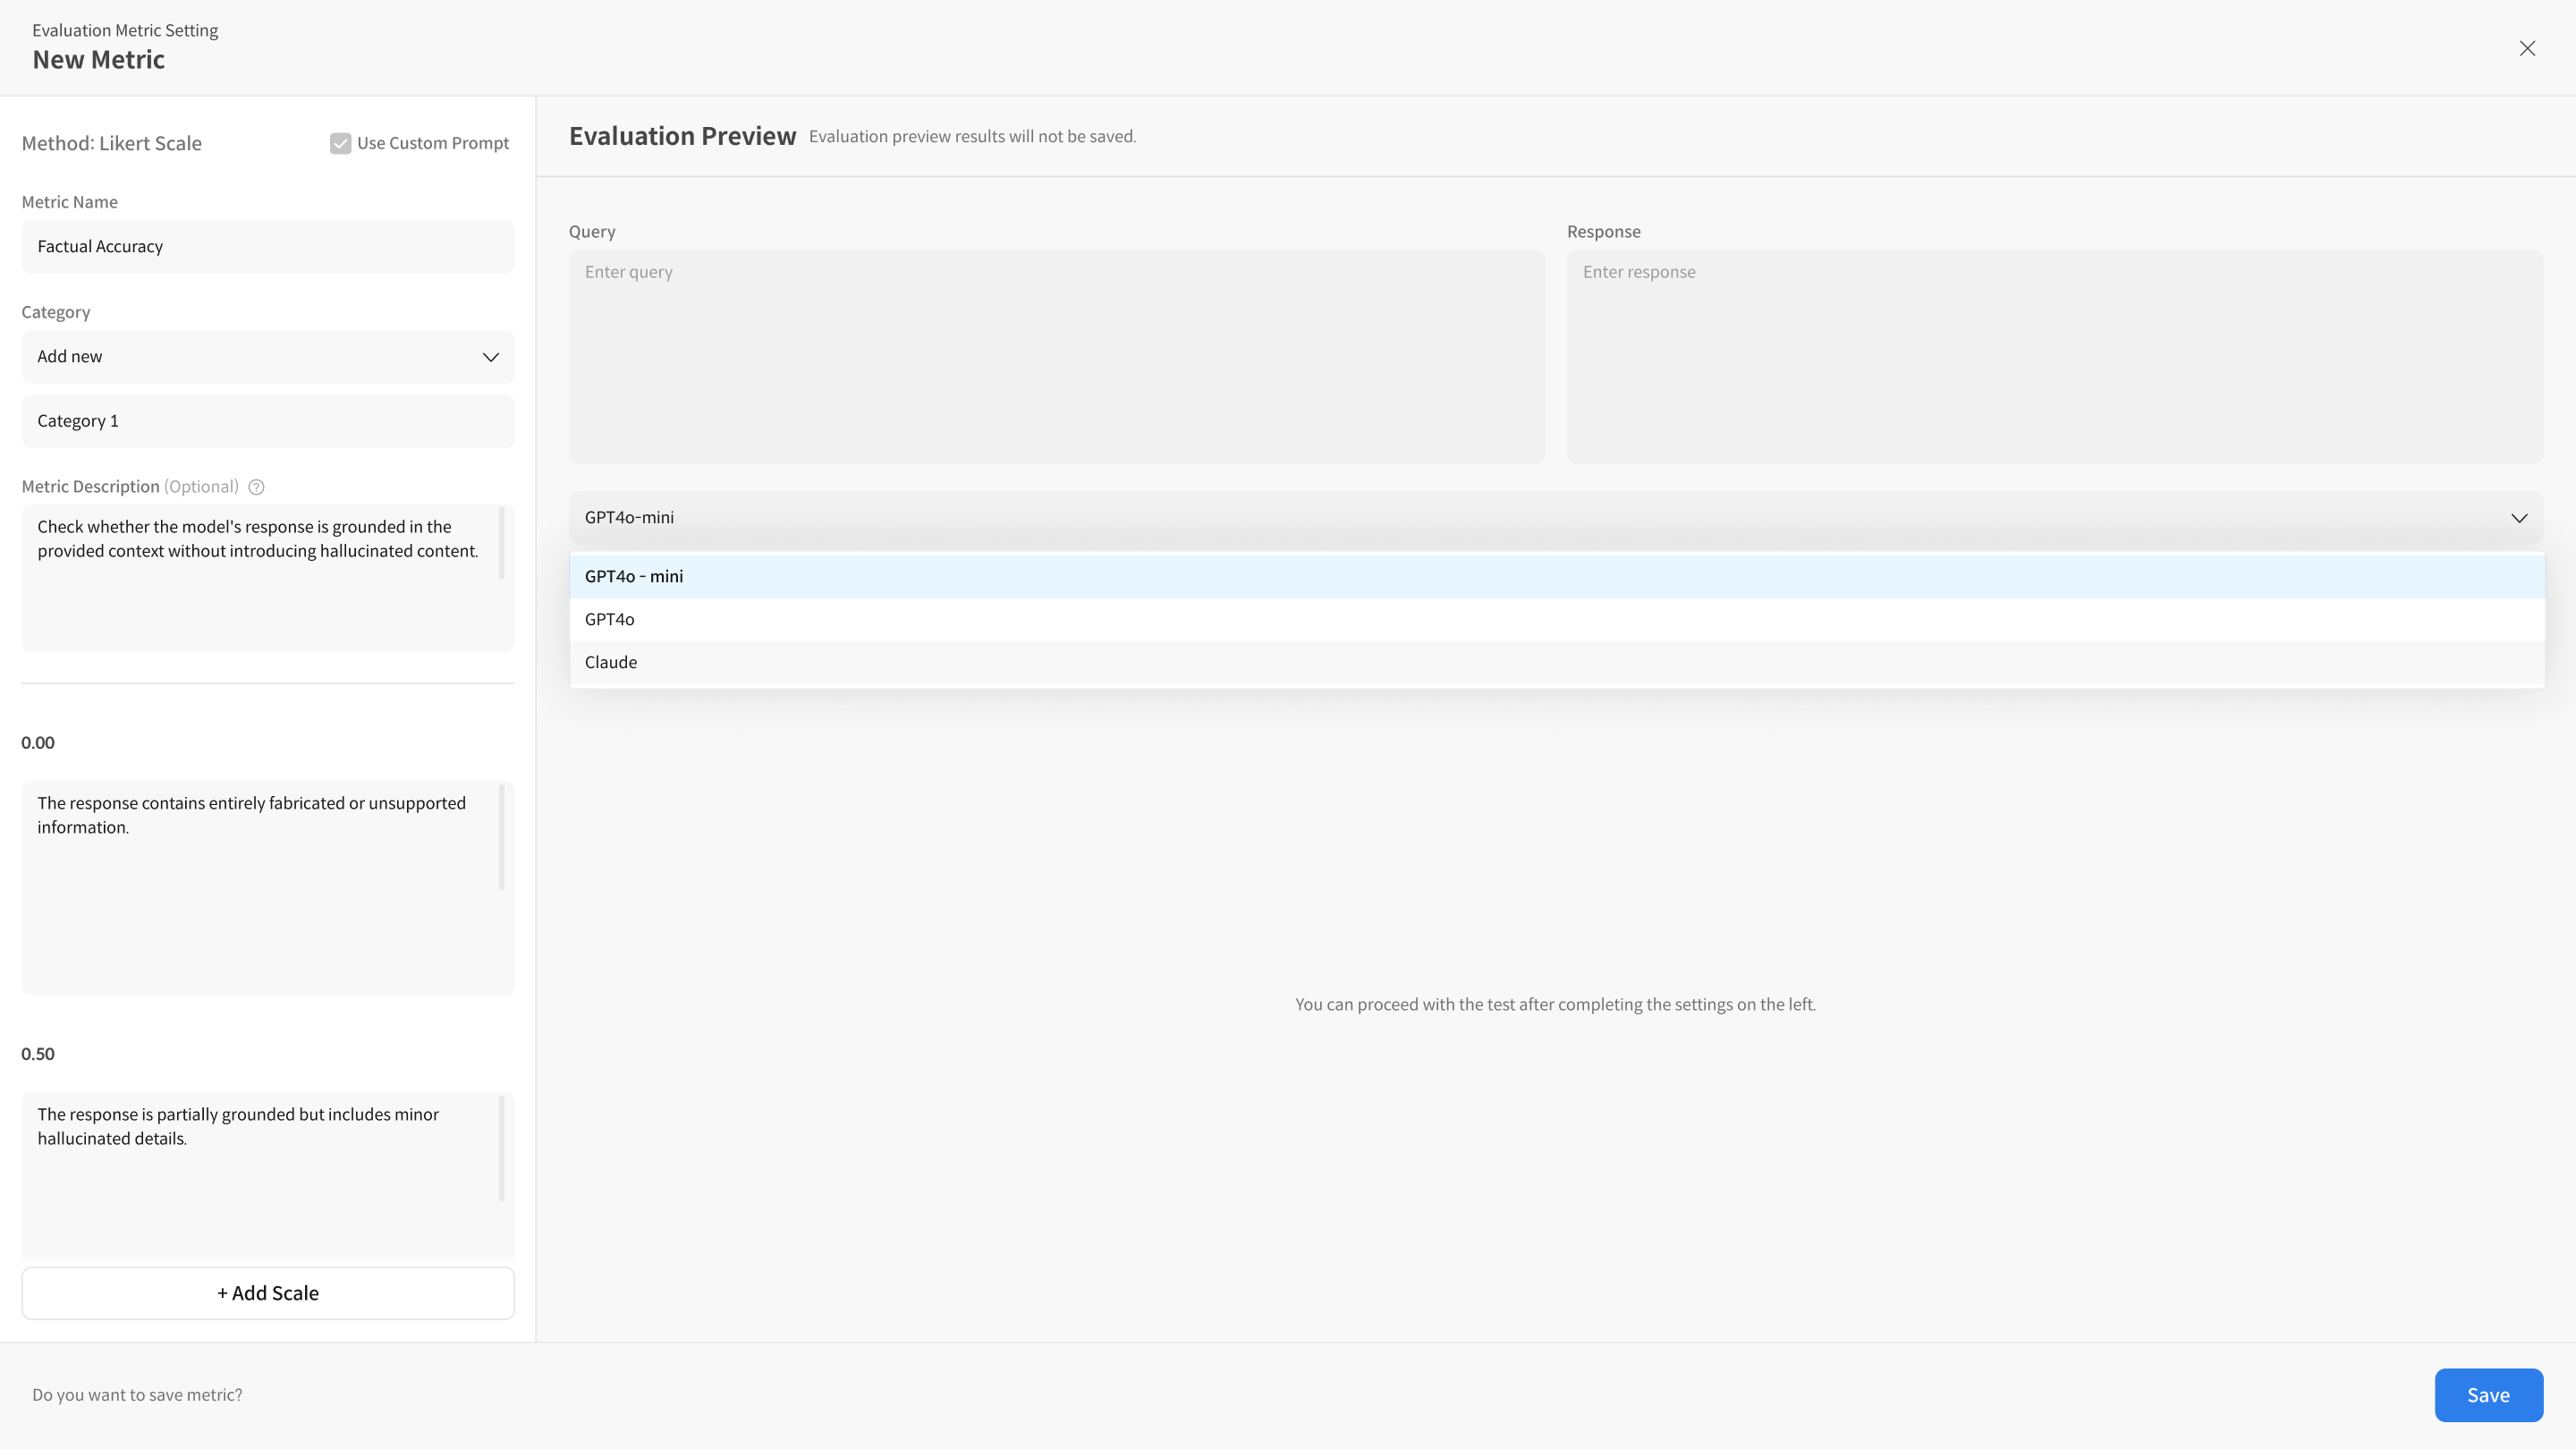
Step 2. Advanced Settings (Use Custom Prompt)
Although Datumo Eval provides default prompts, you may need to create custom metrics from prompts tailored to your use case. You can use Use Custom Prompt to set up metrics from prompts.
Use Custom Prompt is a feature for users who are already familiar with the basic New Metric functionality. If not, please review the [Step 1. Basic Settings] section before proceeding.
The quick flow for advanced settings is as follows:
Step 1: Select the Use Custom Prompt option to activate the custom metric feature. Step 2: Enter the rubric (Scale) and prompt content. Step 3: Verify that the metric is working correctly with Run Test. Step 4: Save it.
- The score scale is automatically entered in the Scale Prompt on the Scale tab.
- The score scale and output format are fixed and cannot be modified. ※ The output format is blinded and cannot be edited.
- If you want to use other columns, i.e., metadata, from the user prompt (User Prompt) besides the required columns, you can use them by entering them within
{{}}.
① Select the Use Custom Prompt option.
② Enter the rubric (Scale) and prompt content.
-
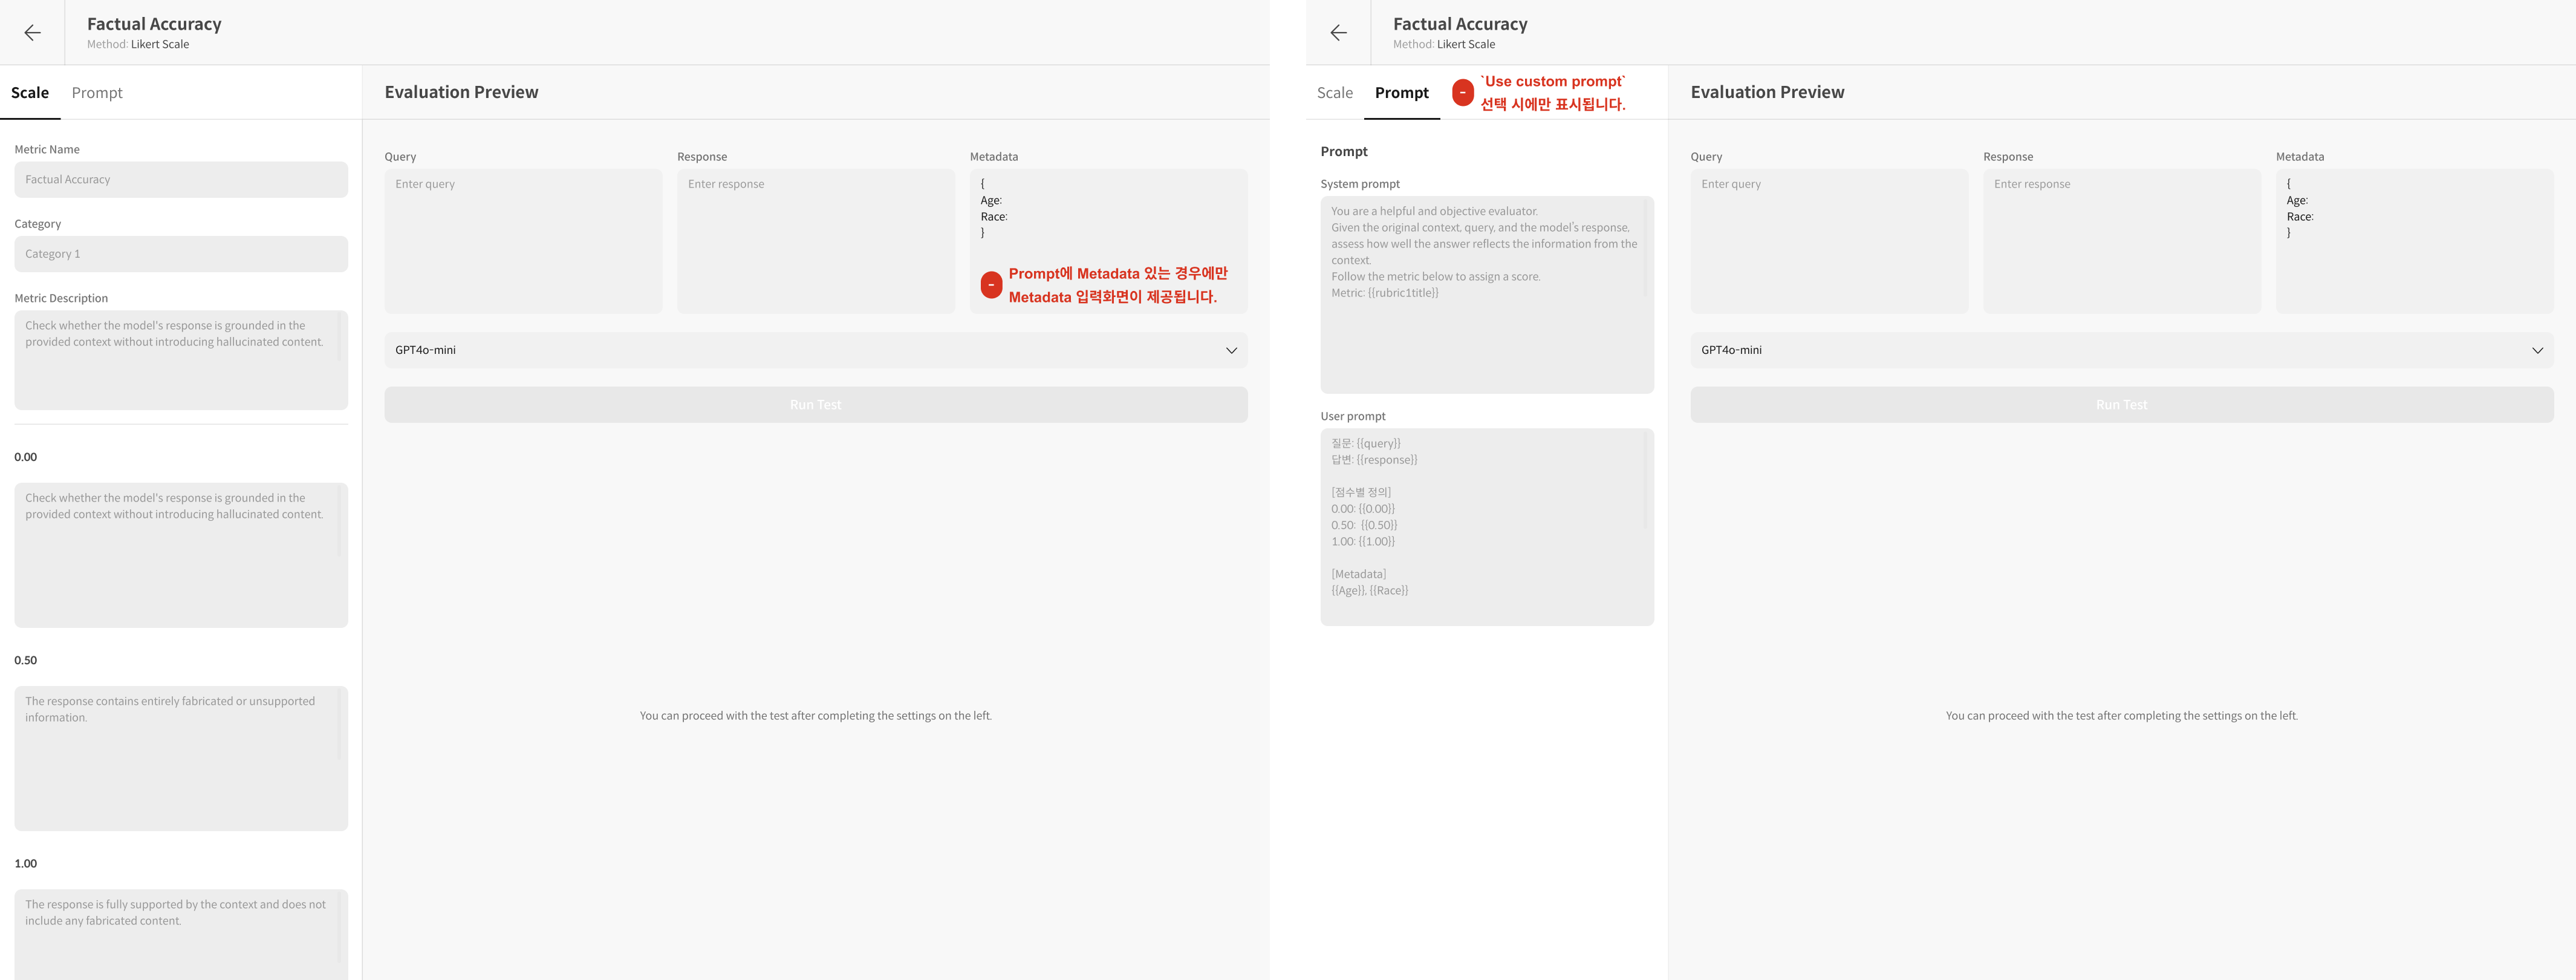
2-1. Scale Tab
-
Metric Name: Enter the name of the metric to be created.
-
Category: Metrics grouped by category as a classification standard can have their average scores checked on the dashboard.
-
Metric Description: Add a metric description. The description for the metric will be displayed on the dashboard. -e.g., "This metric is an indicator for evaluating the model's accuracy."
-
Prompt Description: The Prompt description is a required field. Write the definition of the prompt to be used when evaluating the metric. This description is reflected in the metric rubric and is used when questions for evaluation are automatically generated. -e.g., "This metric evaluates the accuracy of the model's response, based on the correctness of the answer to the user's request."
-
Scale: This is the area for designing the score scale (rubric). -Score 1: The scale entered into the prompt is automatically entered as an integer from
1 to n. The final score displayed on the dashboard can be checked asevaluated as 0.00. -description 1: Enter a detailed description for the rubric. You can check whether it is reflected in thePromptandScale Prompt. -+ Add scale: If you have a rubric system other than a binary rubric, please add a scale to set up the rubric.
-
-
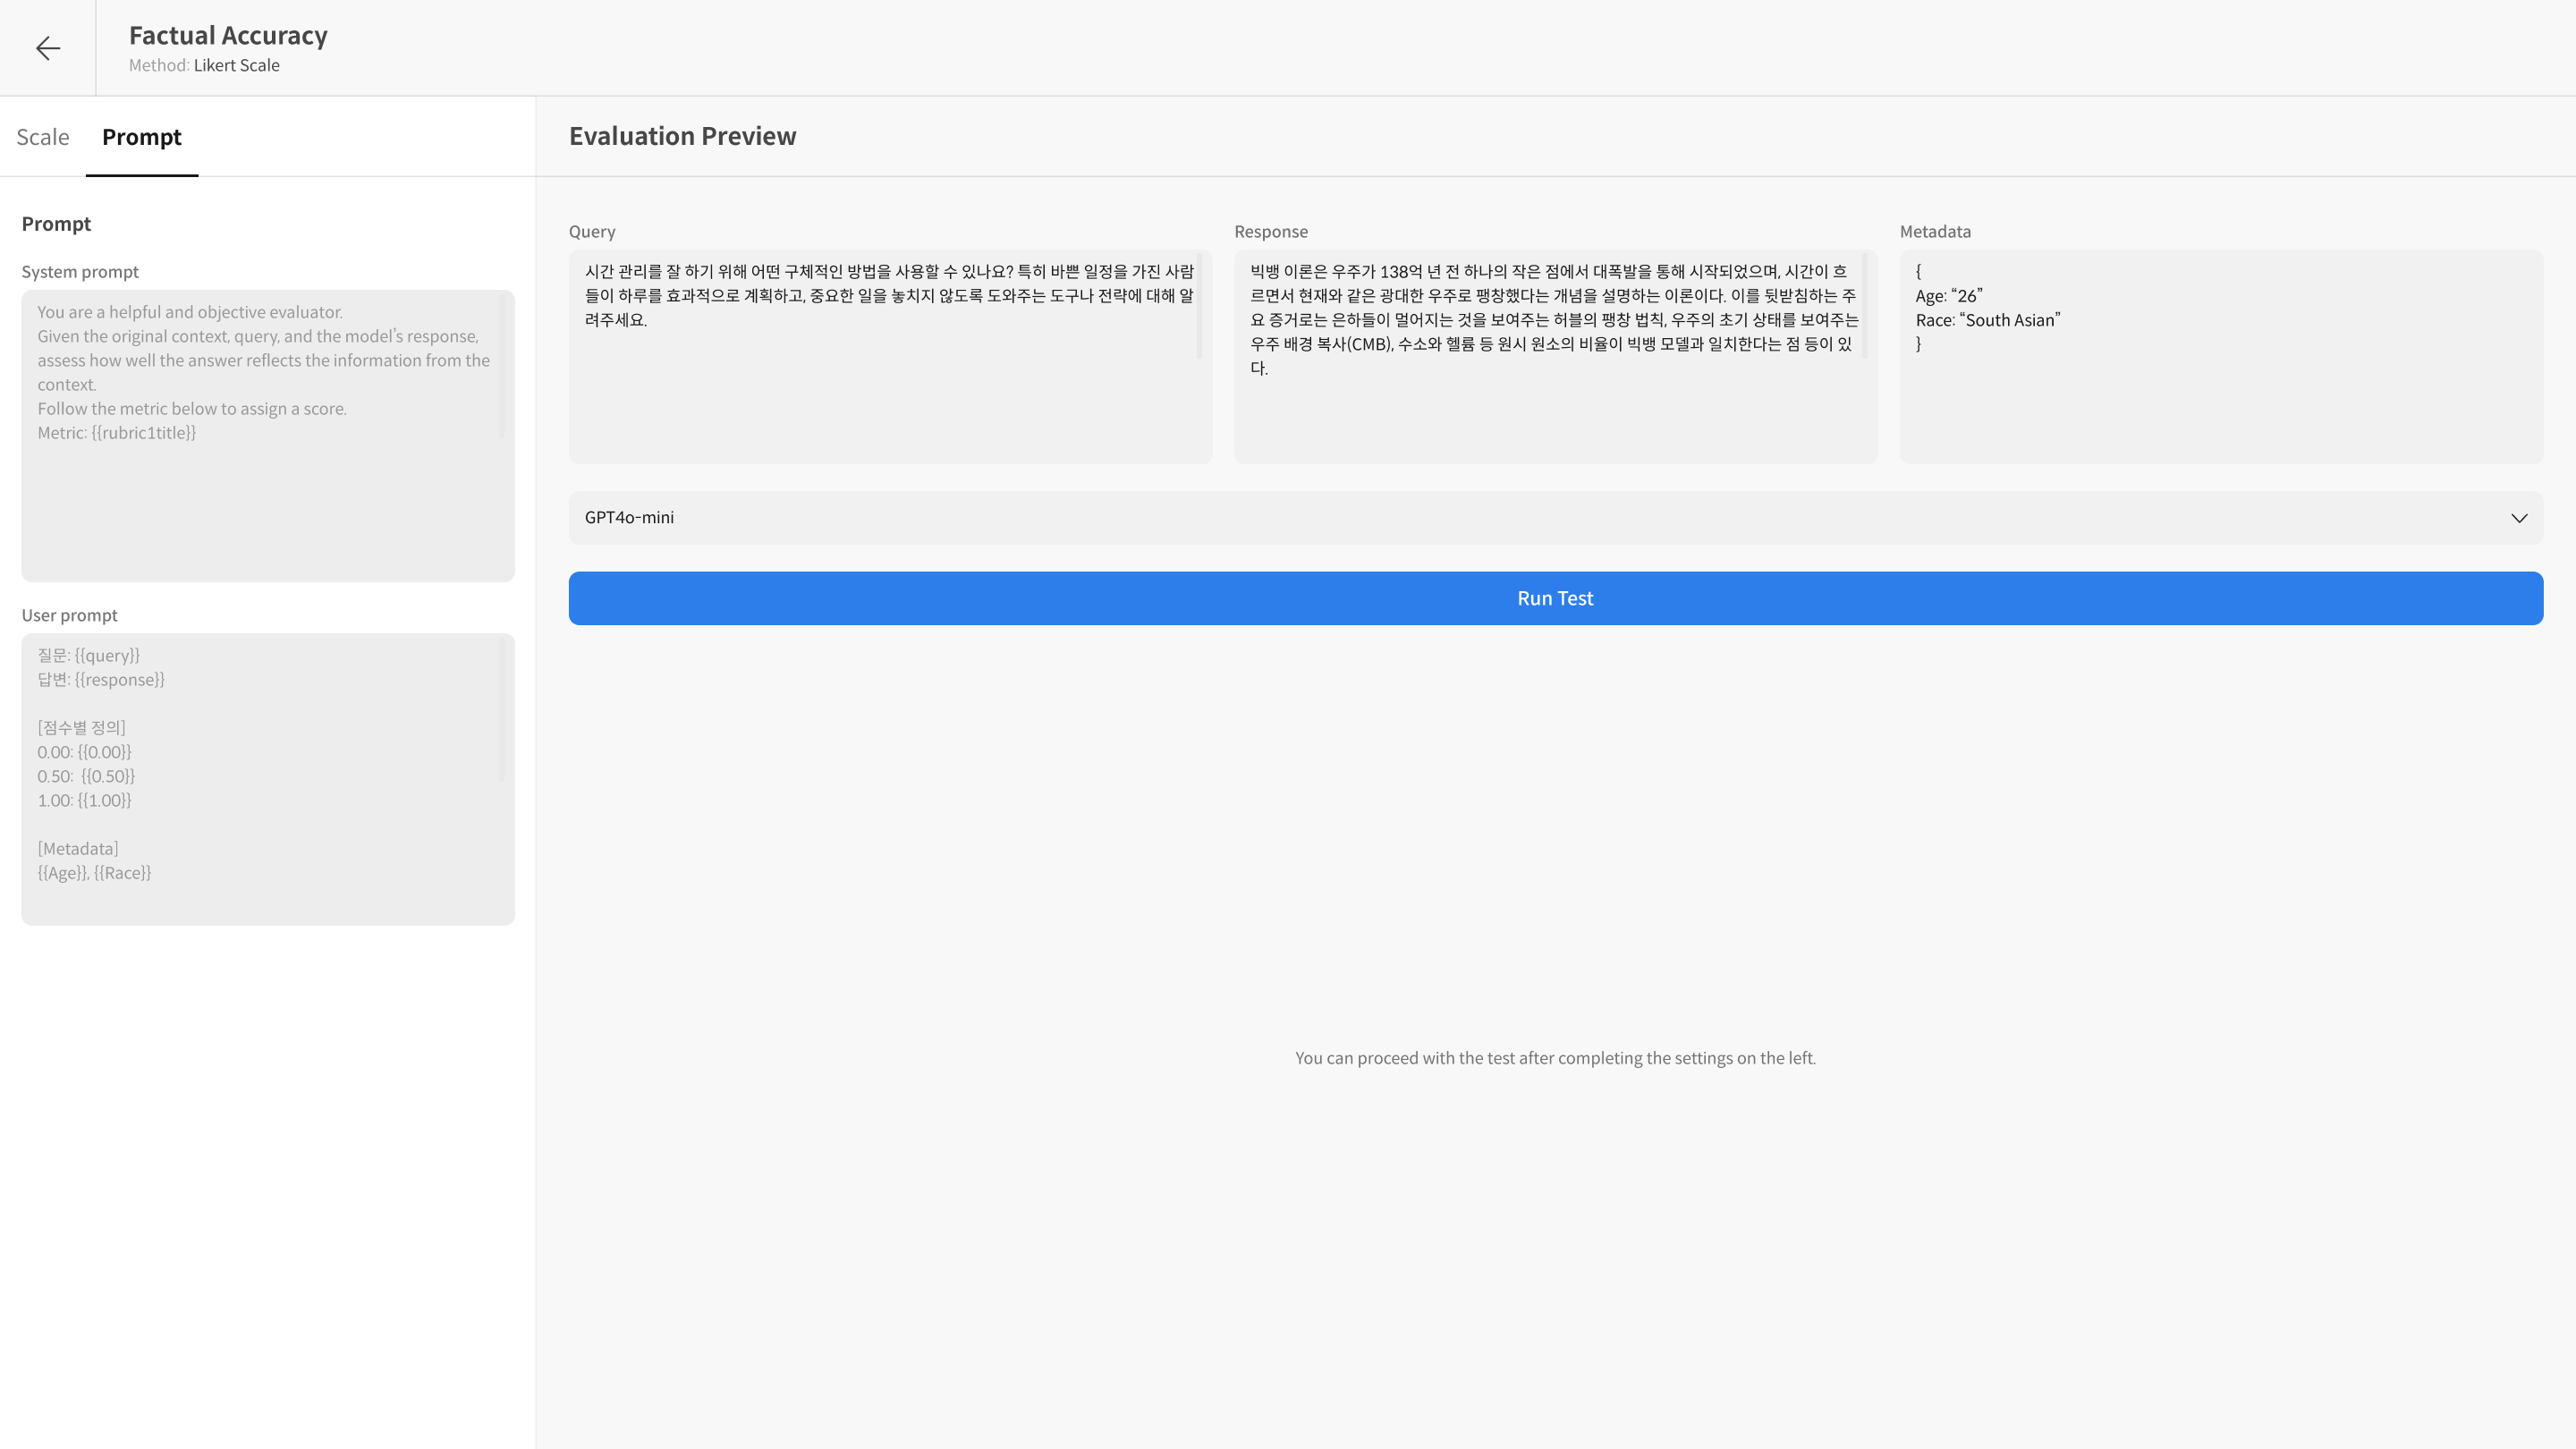
2-2. Prompt Tab: Detailed Prompt Settings In this tab, you directly write and control the prompt that the Judge Model will use to evaluate the response. The prompt consists of a System Prompt and a User Prompt.
-
System Prompt
- Role: Defines the role or persona of the evaluation model. This prompt is an important guideline that tells the model from what perspective to perform the evaluation.
- Example:
You are a fair and objective AI assistant, designed to evaluate text based on a given set of criteria.
-
User Prompt
- Role: Sets the data and evaluation criteria to be used for the actual evaluation. Use
{{variable_name}}to reflect the dataset values in the prompt. - Required Values:
{{query}}: The question data used for evaluation.{{response}}: The response of the model to be evaluated.{{desc}}: The definition of the rubric (evaluation criteria) defined in the Prompt description. It is automatically reflected by simply entering the variable.
- Optional:
{{context}}: The reference context referred to when generating the question.{{retrieved_context}}: The retrieved document used in RAG evaluation, etc.
- Writing Example:
### Instruction
Please evaluate the provided "Response to Evaluate" based on the "Query" and the "Evaluation Criteria (Rubric)". If "Retrieved Context" is available, consider it to assess for issues like hallucination.

### Query
{{query}}

### Retrieved Context
{{retrieved_context}}

### Response to Evaluate
{{response}}

### Evaluation Criteria (Rubric)
{{desc}}
- Role: Sets the data and evaluation criteria to be used for the actual evaluation. Use
-
Scale Prompt (Not editable)
- This prompt is not written separately, but shows the result of the rubric definition set in the Prompt description on the Scale tab being automatically inserted into the User Prompt through the
{{desc}}variable. This allows you to check how the score scale of the rubric is applied.
- This prompt is not written separately, but shows the result of the rubric definition set in the Prompt description on the Scale tab being automatically inserted into the User Prompt through the
-
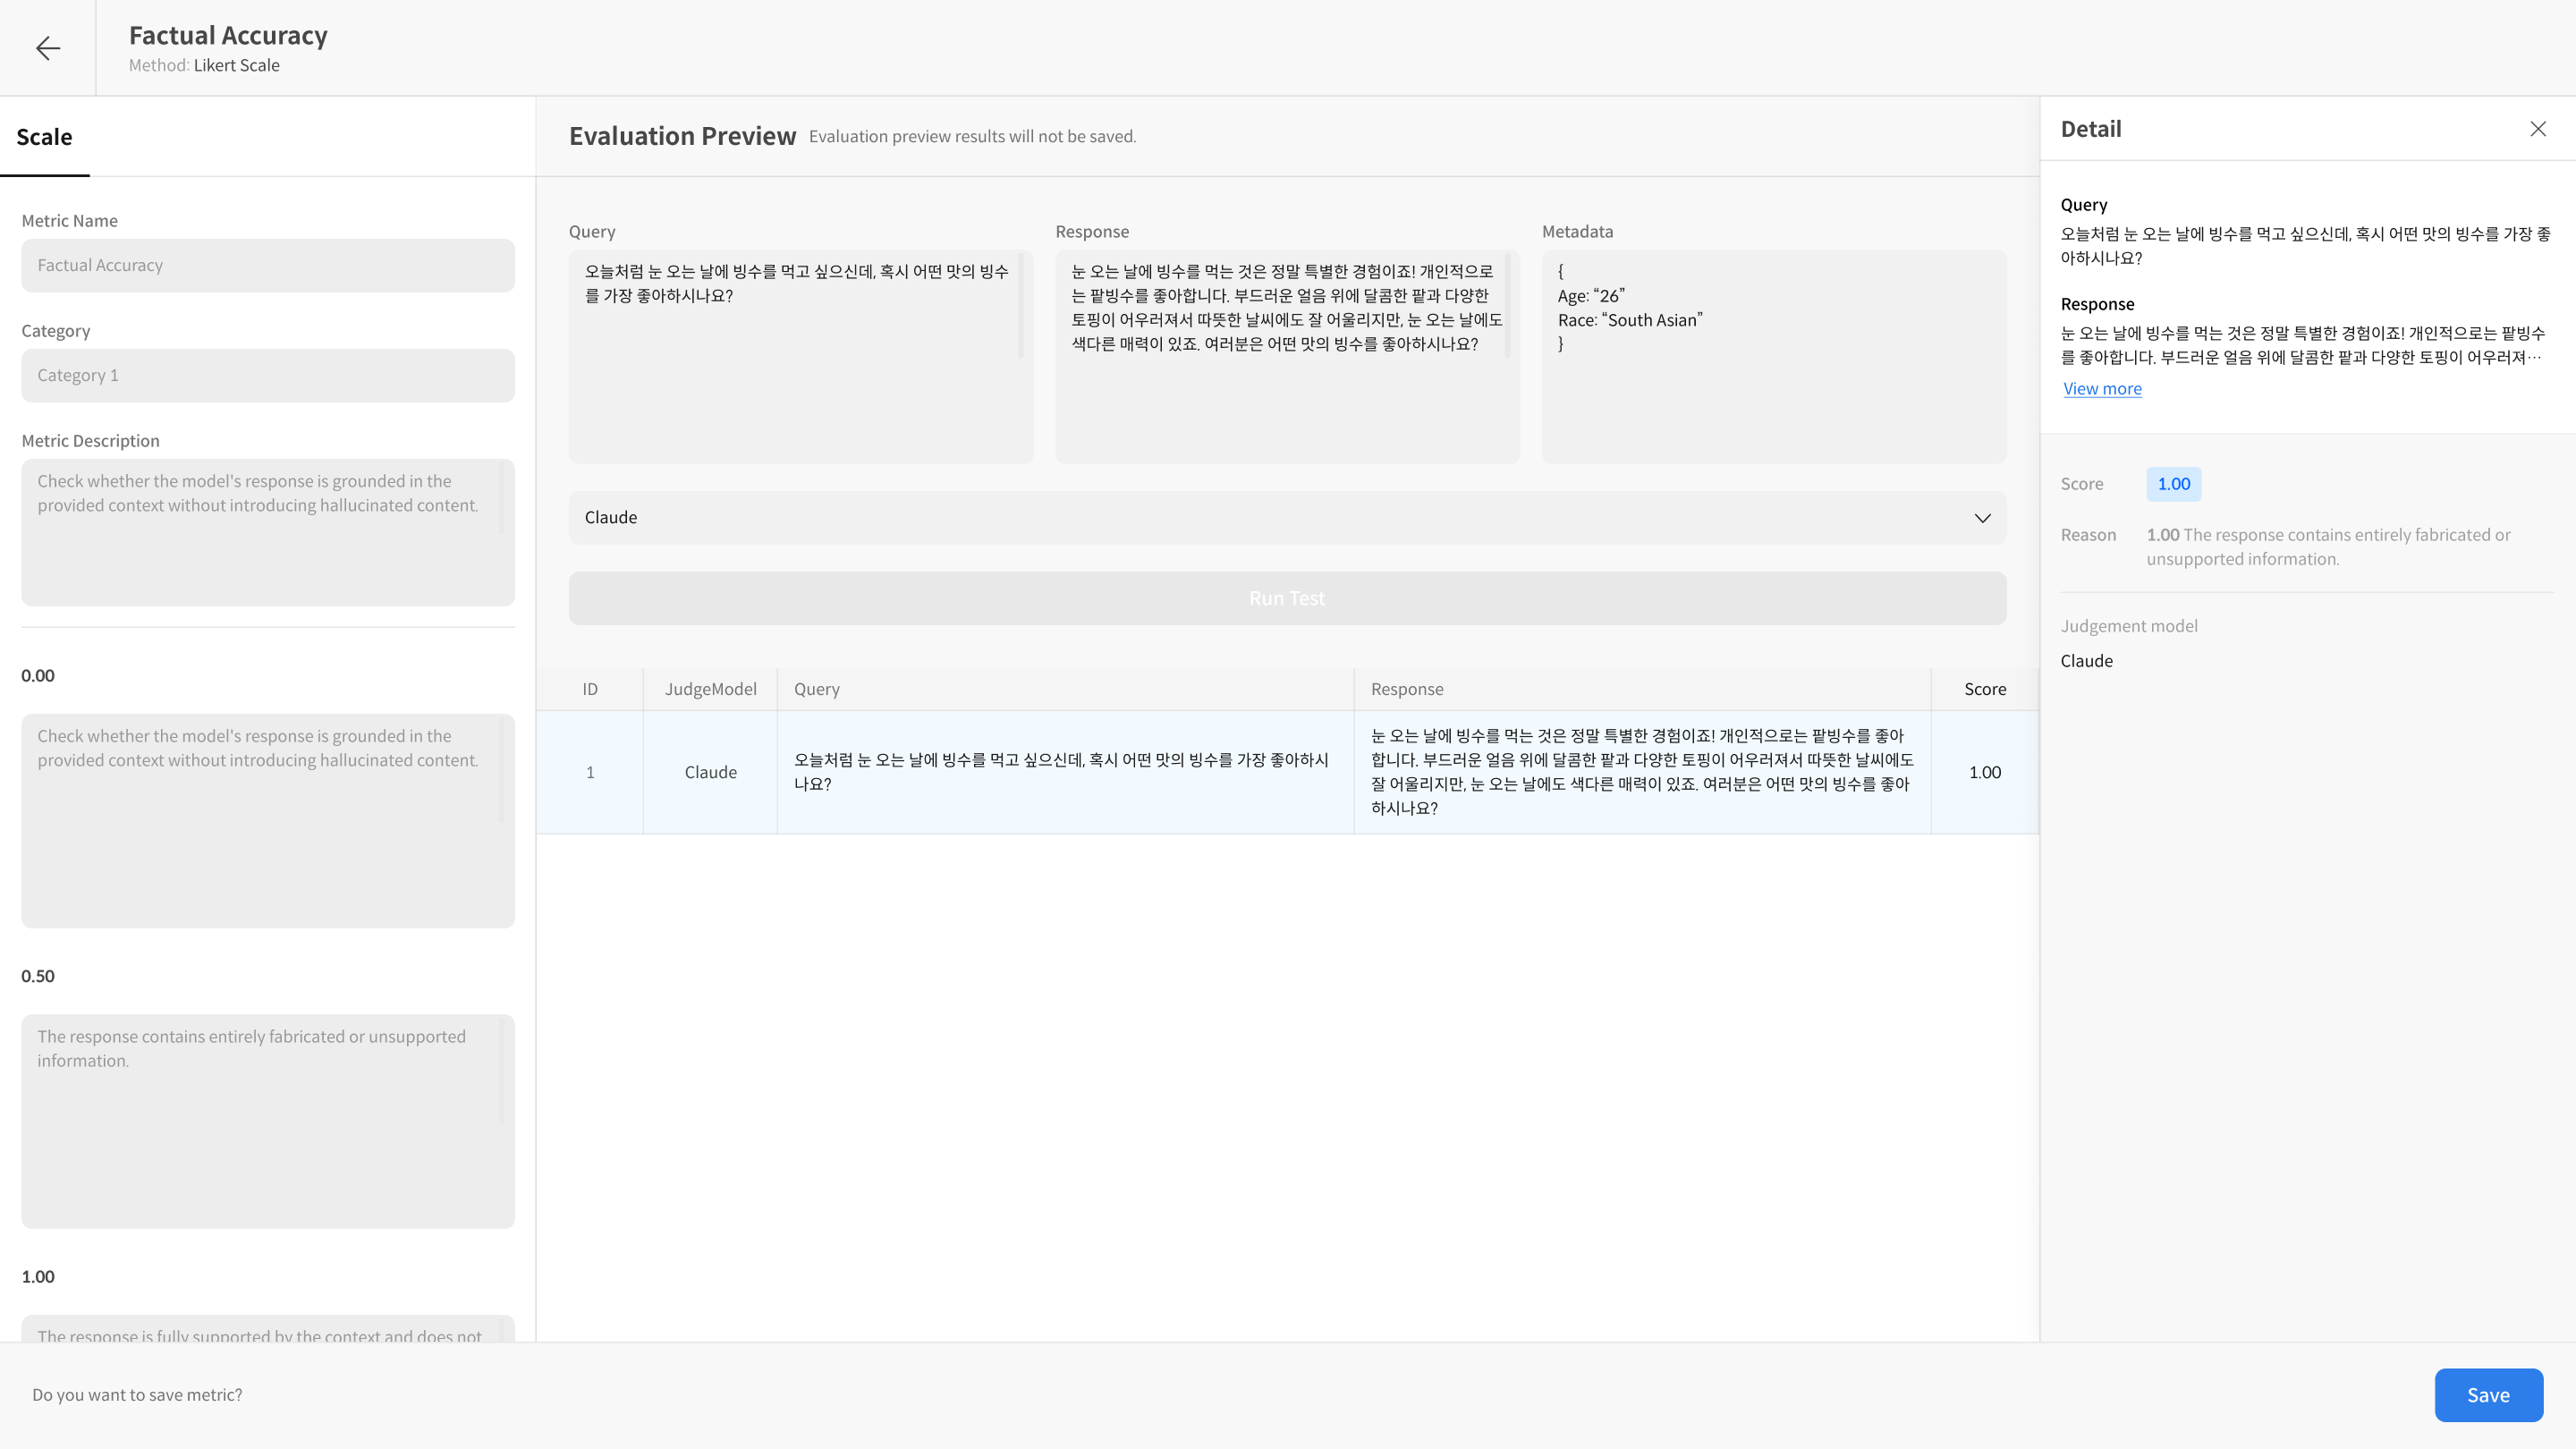
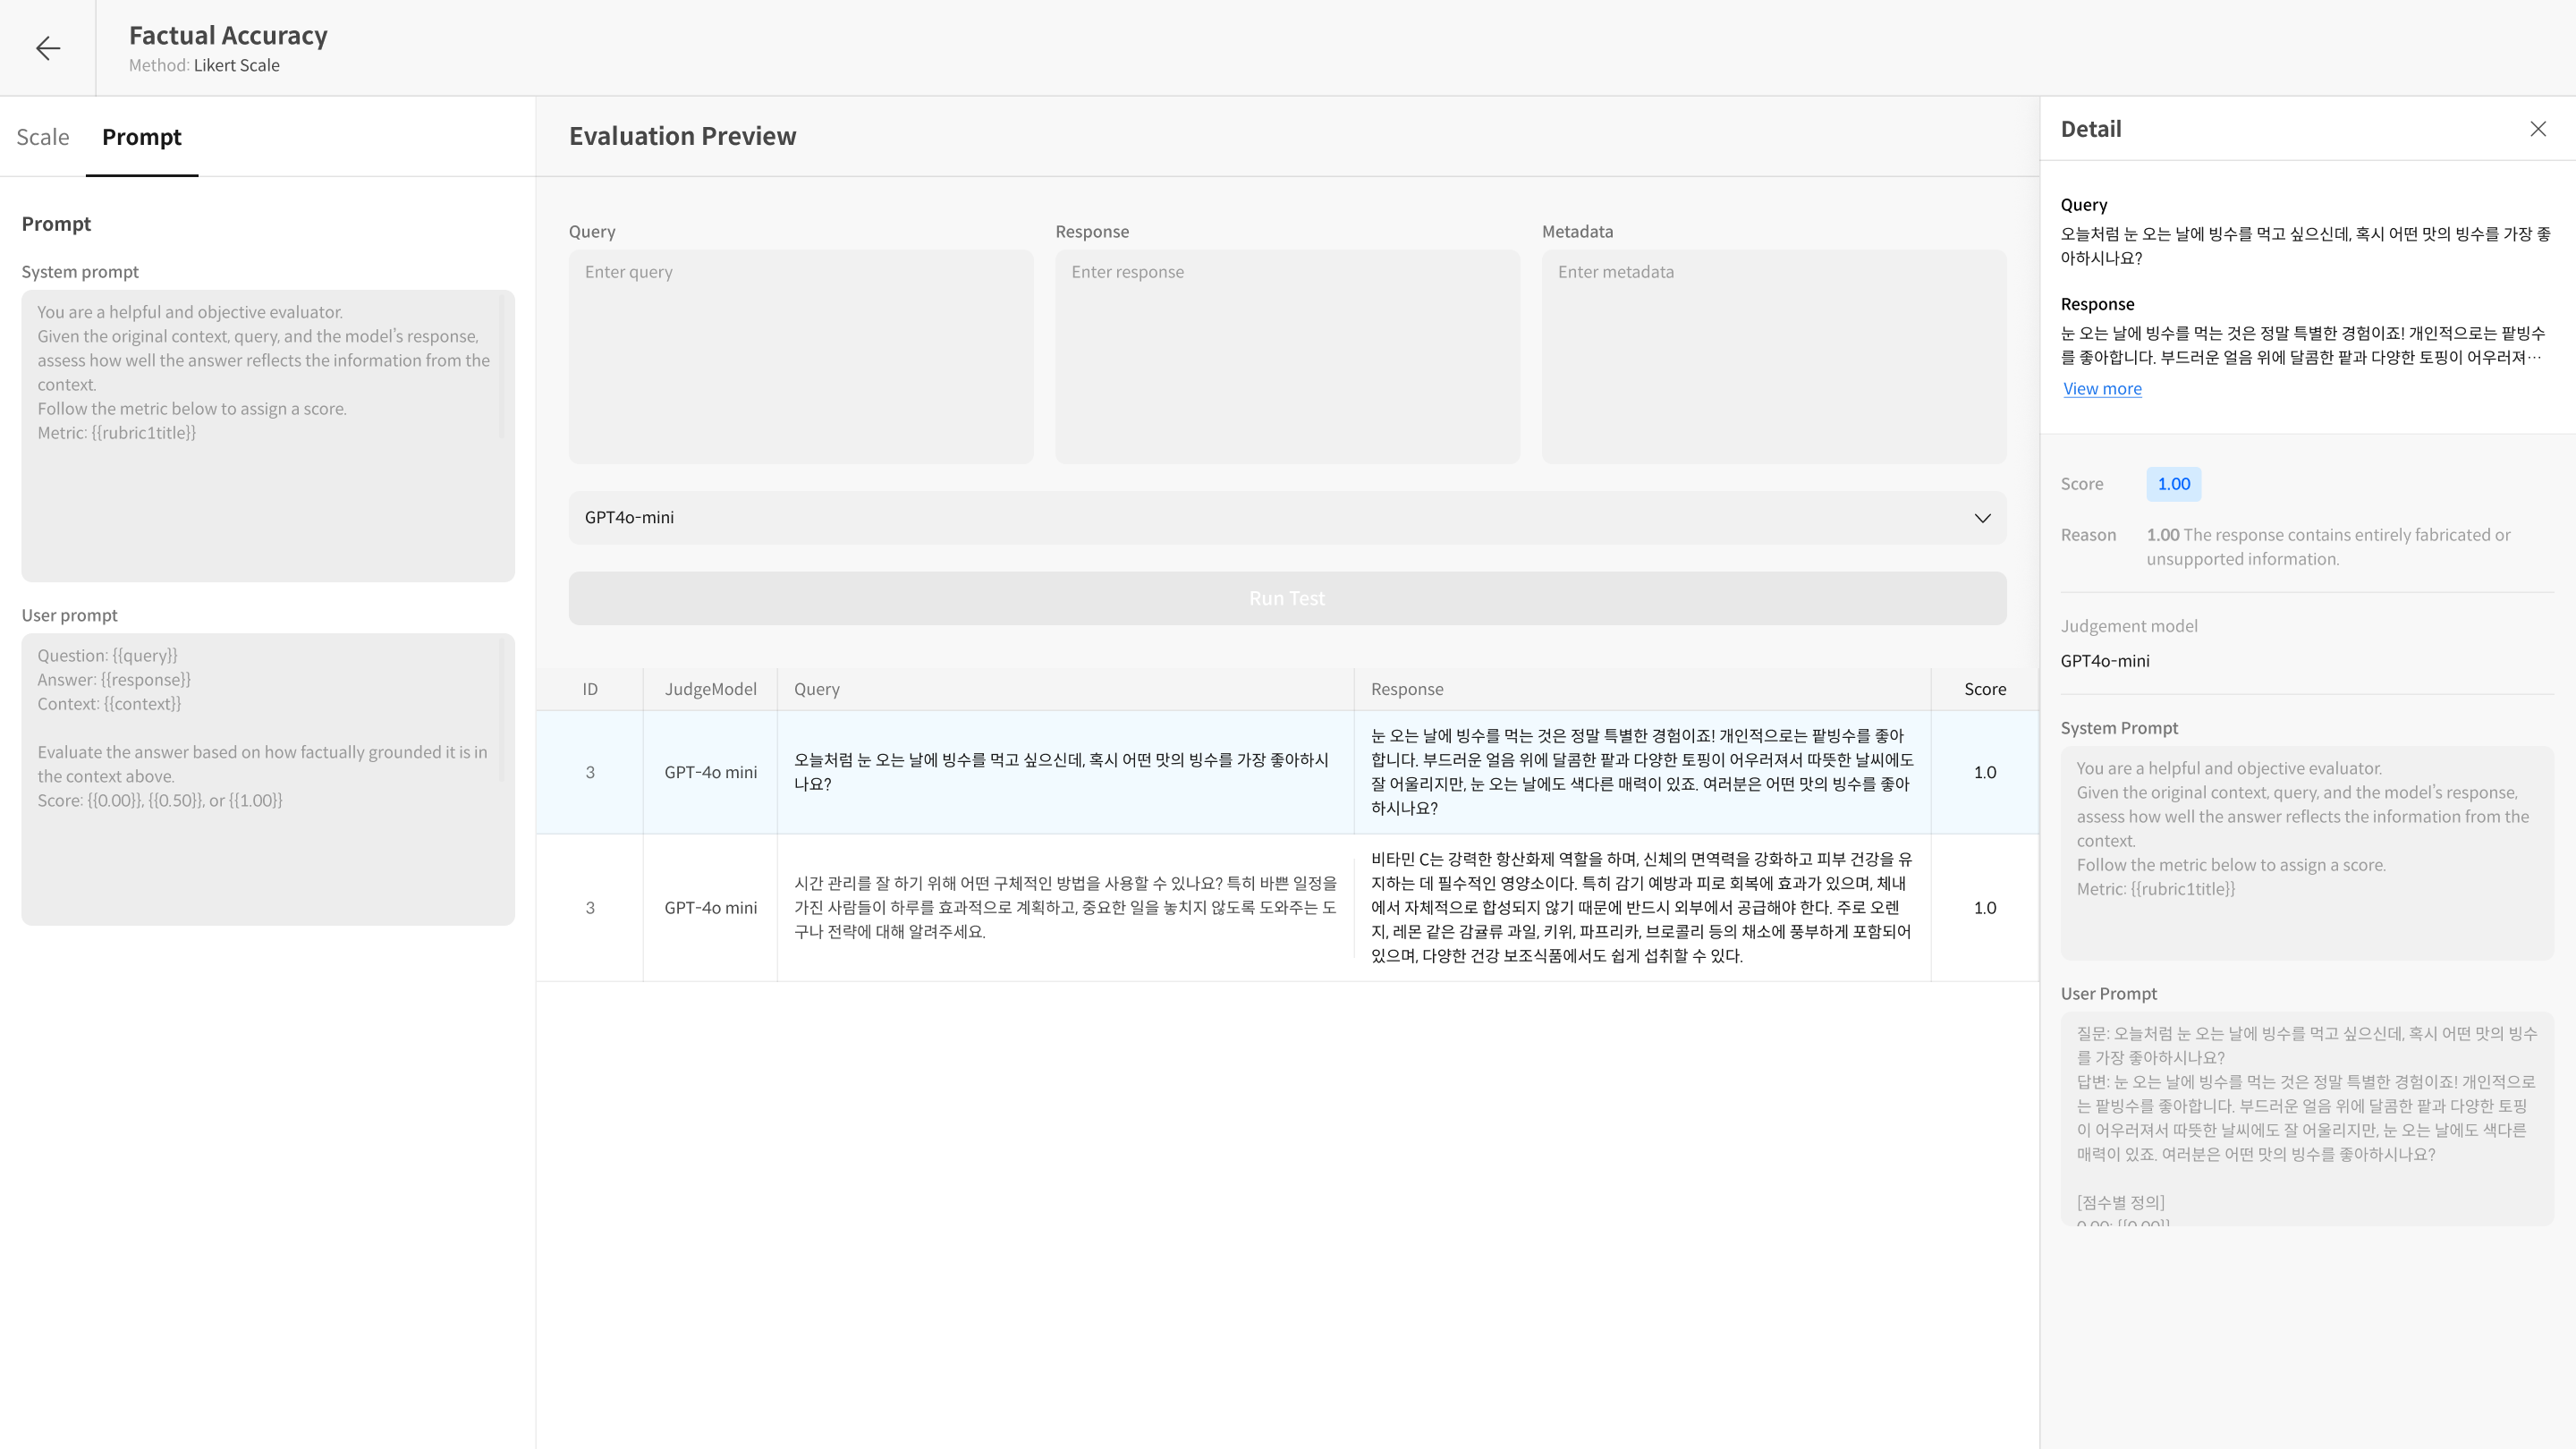
③ Verify with Run Test
To check if the entered prompt works correctly, you can see how it is actually input to the model in Detail after Run Test. Run Test is a function that tests the created Metric to check if the prompt and settings work as intended.
- It shows the score for each item, along with the applied prompt content and the model's reasoning.
- You can repeat the test while modifying the prompt.
- Evaluation Preview Tab
④ Save
After completing the prompt settings, you can save and apply the Metric to use it in actual evaluations. After saving, the created Metric can be checked on the dashboard and used in subsequent evaluations.
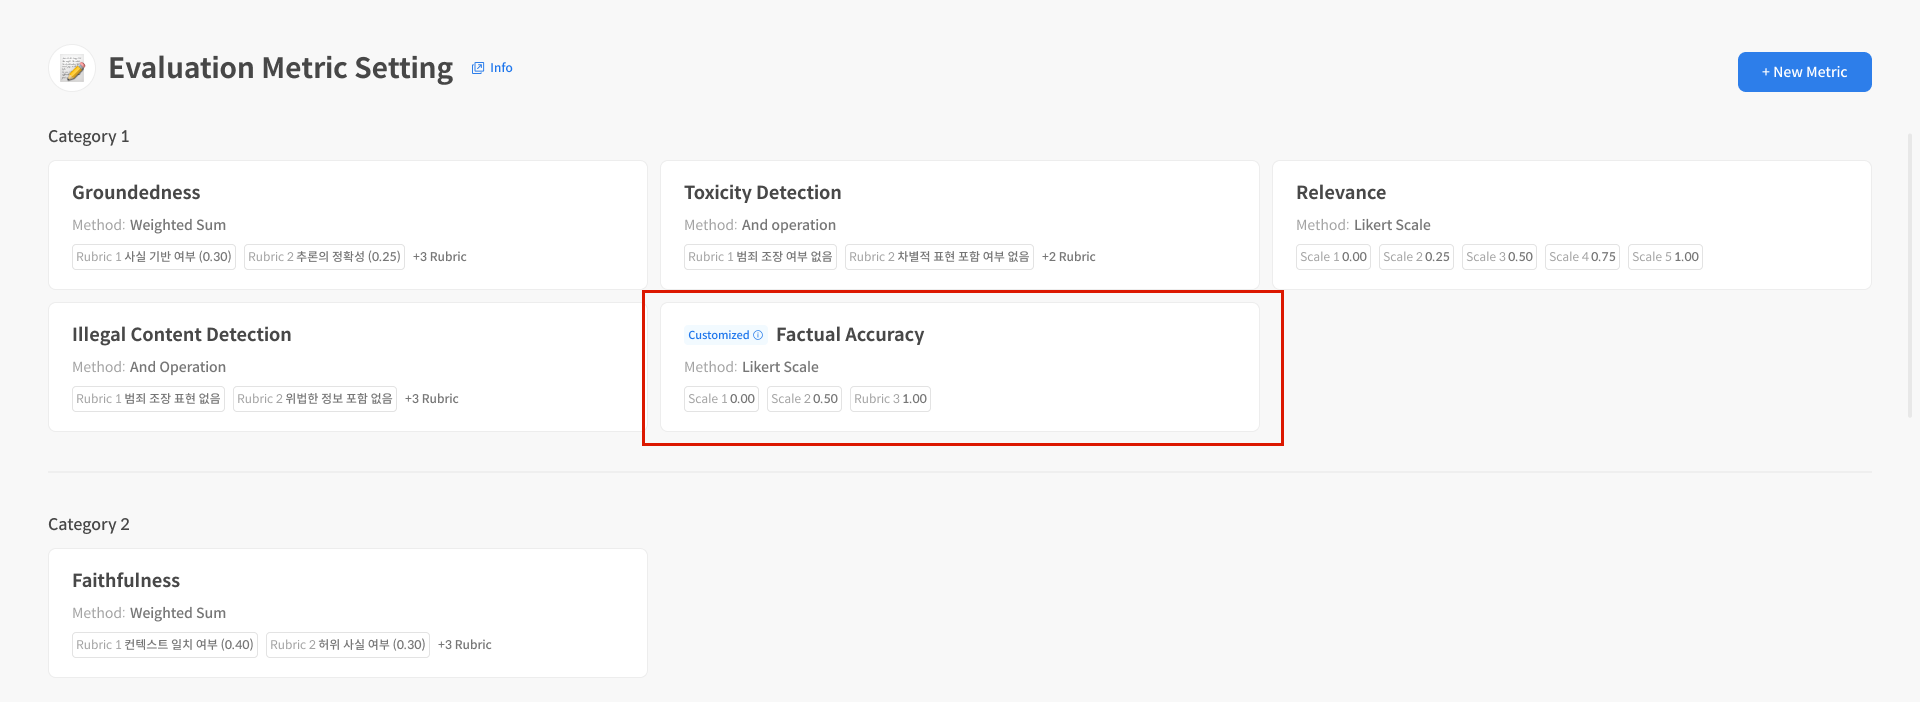
Step 3. Metric Management Features
When you select a created Metric, you will be taken to the detail page for that Metric. On this page, you can use the following features:
- Metric Detail screen explanation
- Delete Metric
- Preview Run Test
① Metric Detail Screen Guide
Use custom prompt was used when creating the Metric.② Preview Run Test
You can run a preview evaluation (Preview Run) for each Metric. You can check the test results before the actual evaluation, so you can verify that the set evaluation criteria are working well.

- Before running Run Test, you must enter Metadata values if necessary.
- You can test the set evaluation criteria through
Preview Run.
For evaluated data, you can check not only the score but also the detailed evaluation reason when selecting the data.
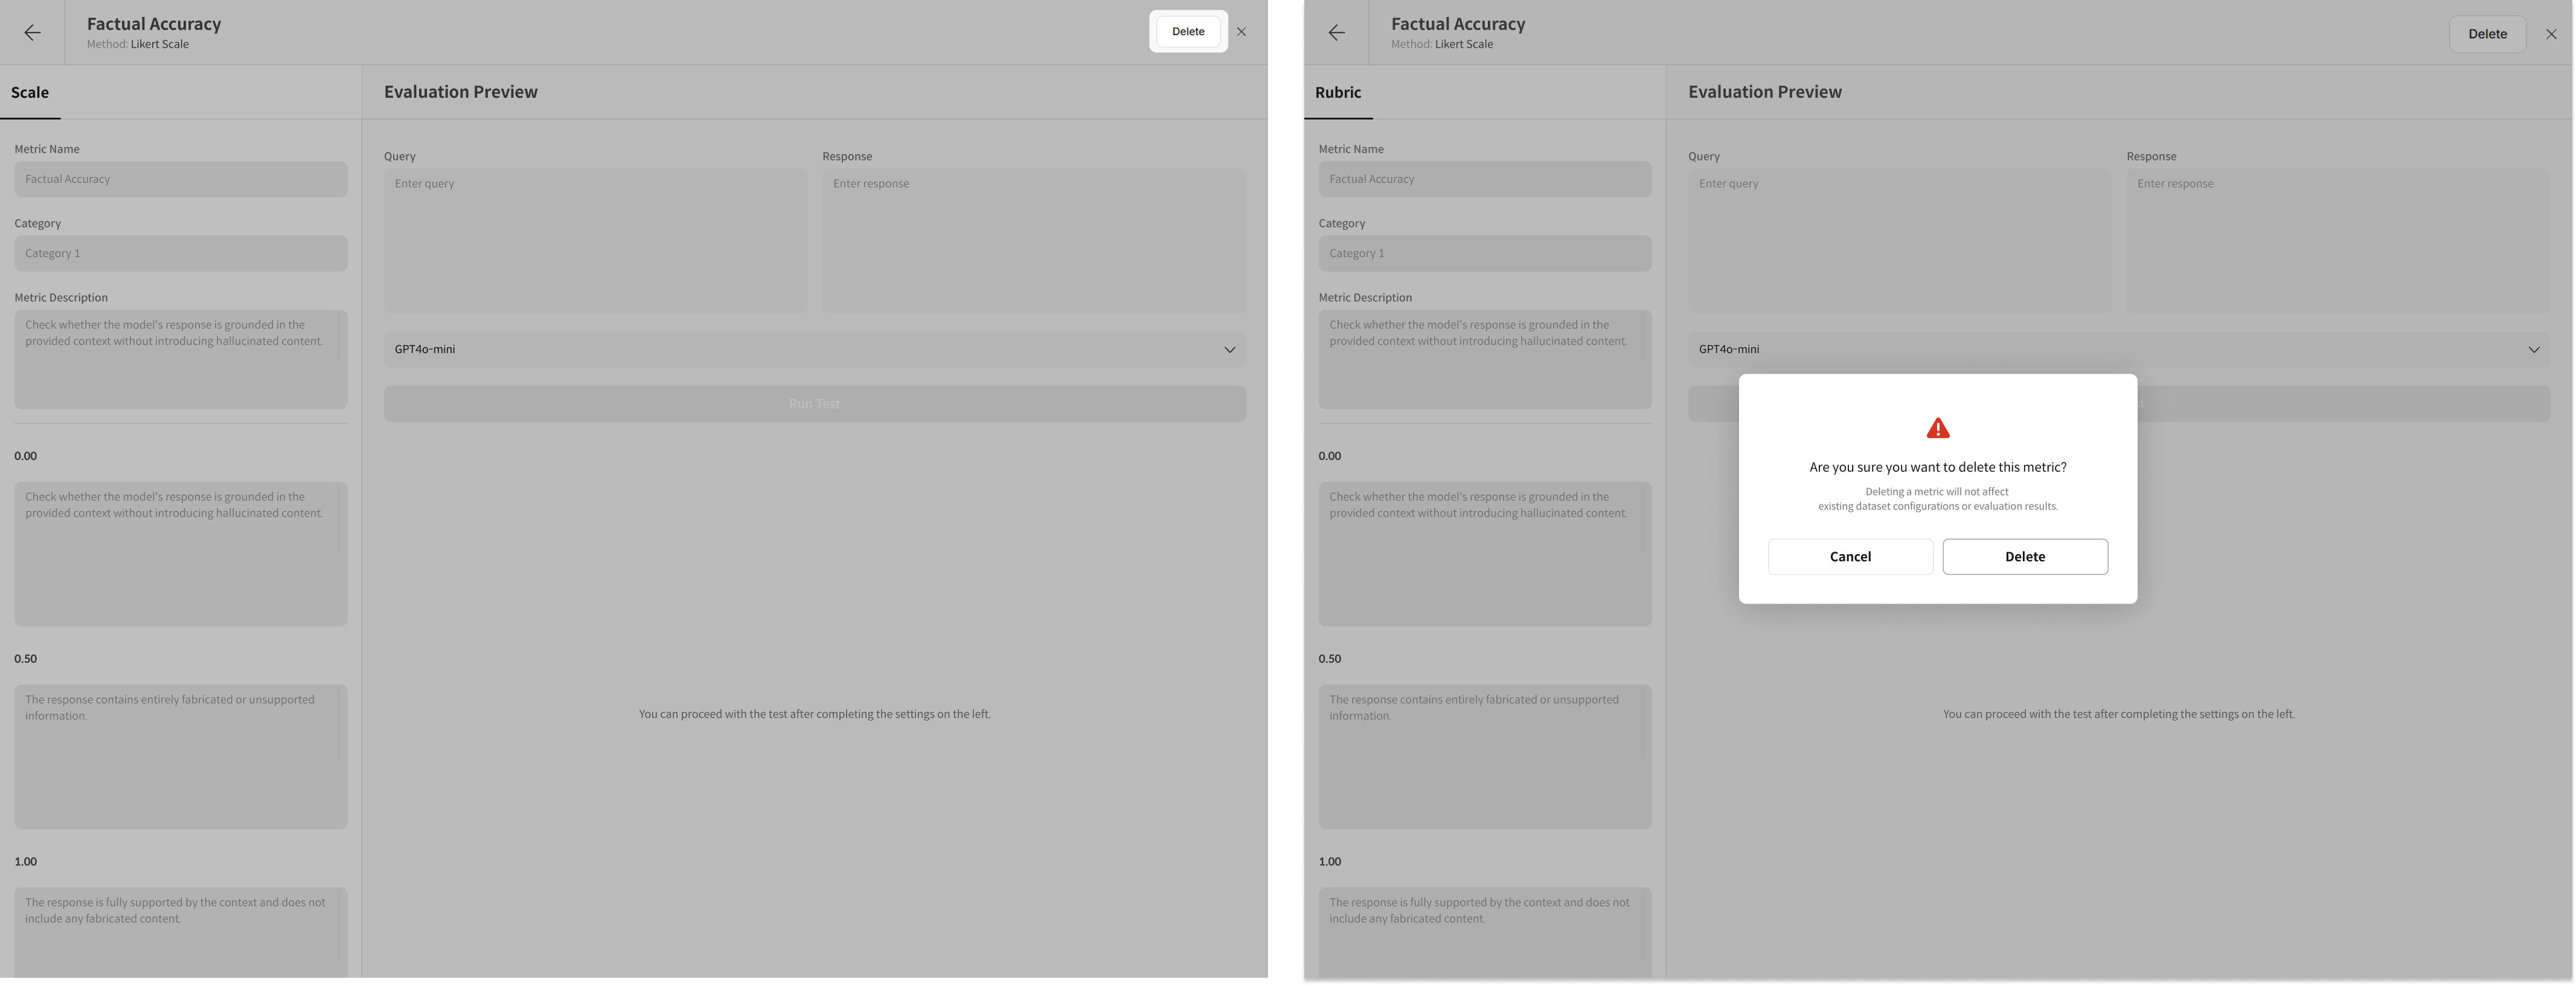
③ Delete Metric
You can delete created Metrics individually from the list. Be careful as deleted Metrics cannot be recovered. However, it does not affect the results of evaluations that have already been performed.