Workspace User Management
This page provides a consolidated guide to workspace invitations by the On-Premise Super Admin and user permission management by Admins.
In the SaaS environment, the Super Admin role is not available. Workspace creation and initial invitations are handled directly by SelectStar.
- SaaS: Workspace creation and invitations are managed by SelectStar. Admins can only modify or remove permissions.
- On-Premise: The organization’s Super Admin creates global accounts and directly manages workspace invitations.
Step 1. Invite Users to a Workspace (Super Admin only)
💡 Only users already registered in the Global User List can be invited.
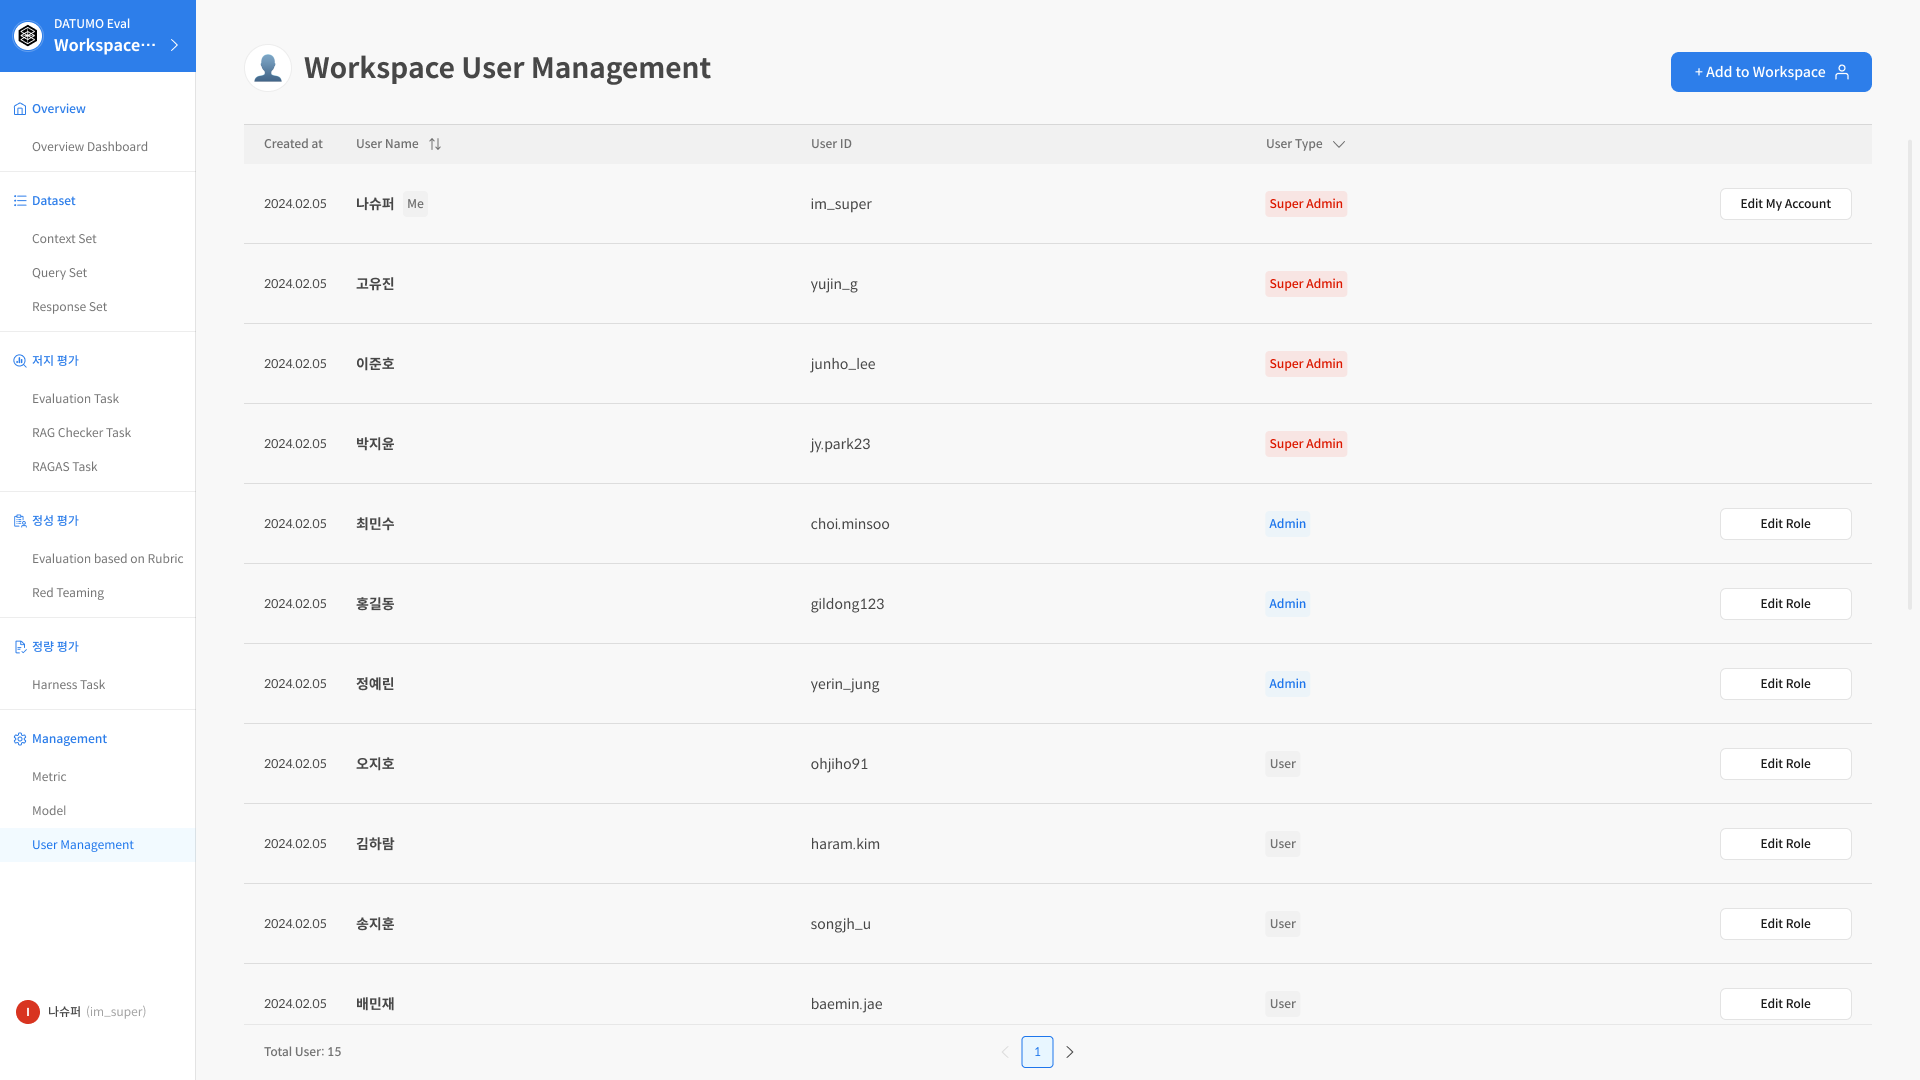
① Open the [User Management] menu
View the list of users in the current workspace.
② Click [+ Add to Workspace]
Search for the user to be invited and select them.
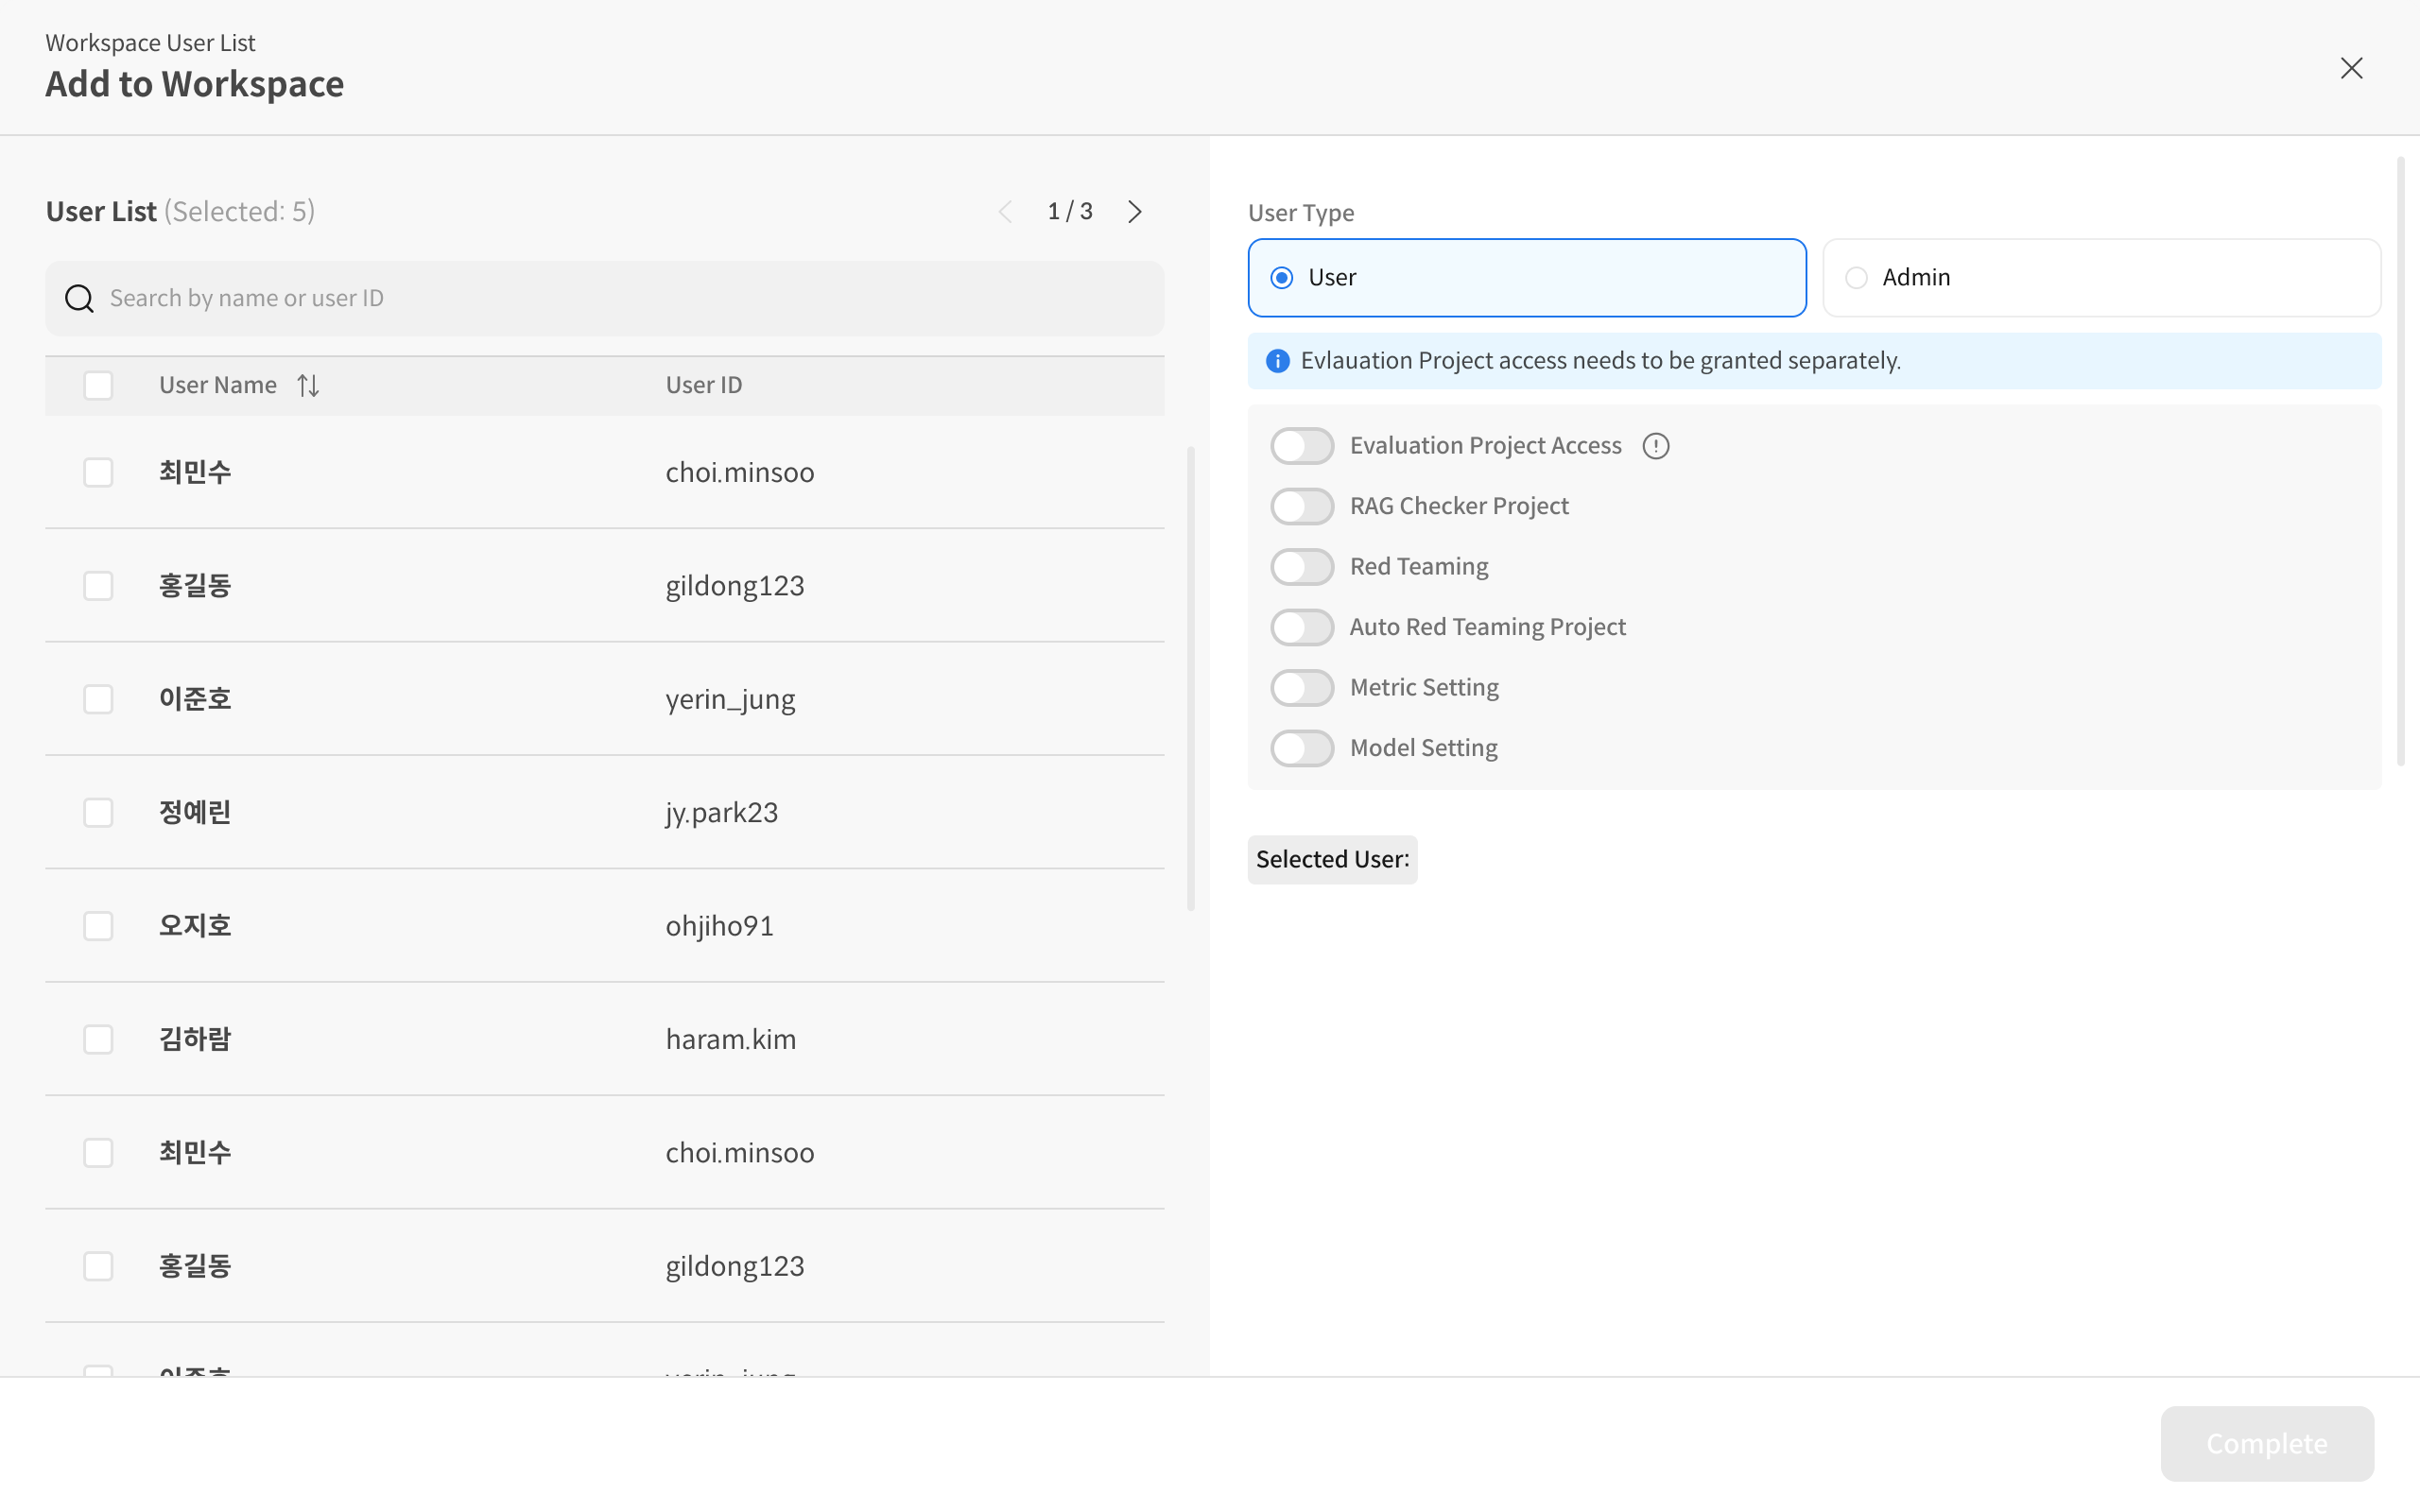
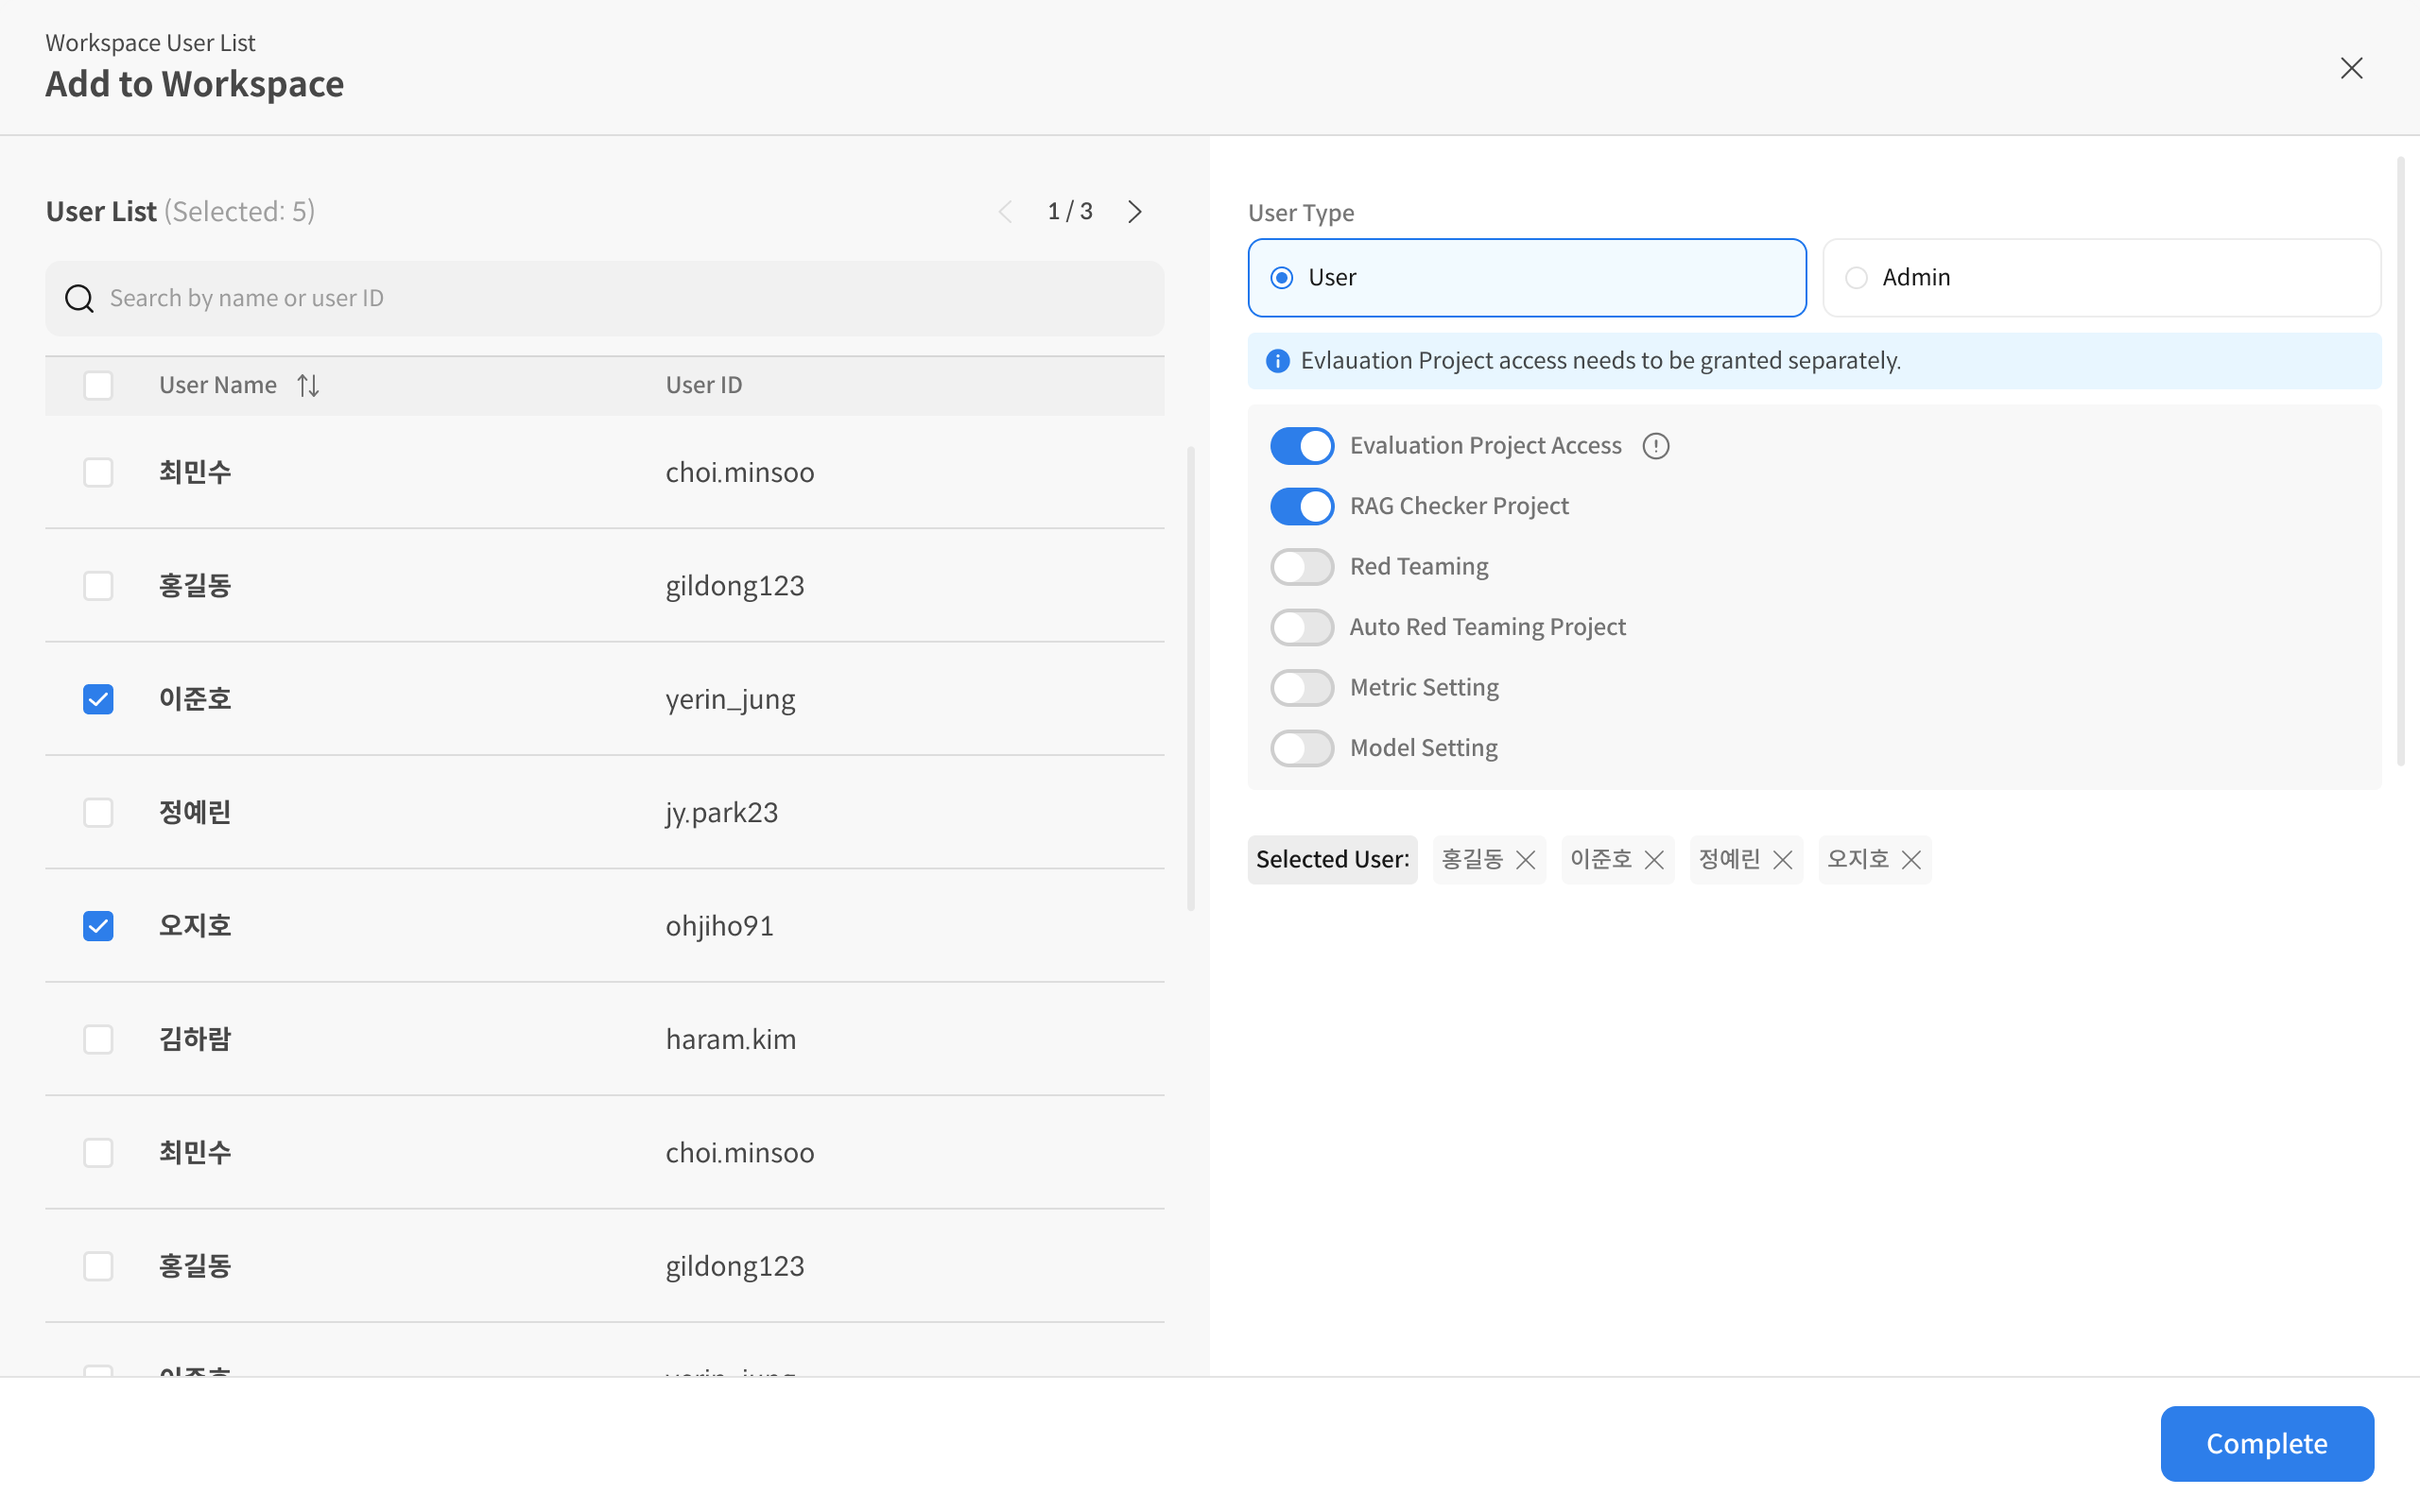
③ Assign a role and complete the invitation
Specify the user’s role and, if necessary, initial access permissions. Click [Complete] to finalize the invitation.
🔎 Checklist
- Confirm the account exists in the Global User List
- It is recommended to start with the minimum role (User)
- Project-level access permissions can be refined later if required
Step 2. Manage User Permissions (Available to Admins as well)
💡 Both Super Admins and Admins can modify or remove permissions for already invited users.
Admins cannot invite new users.
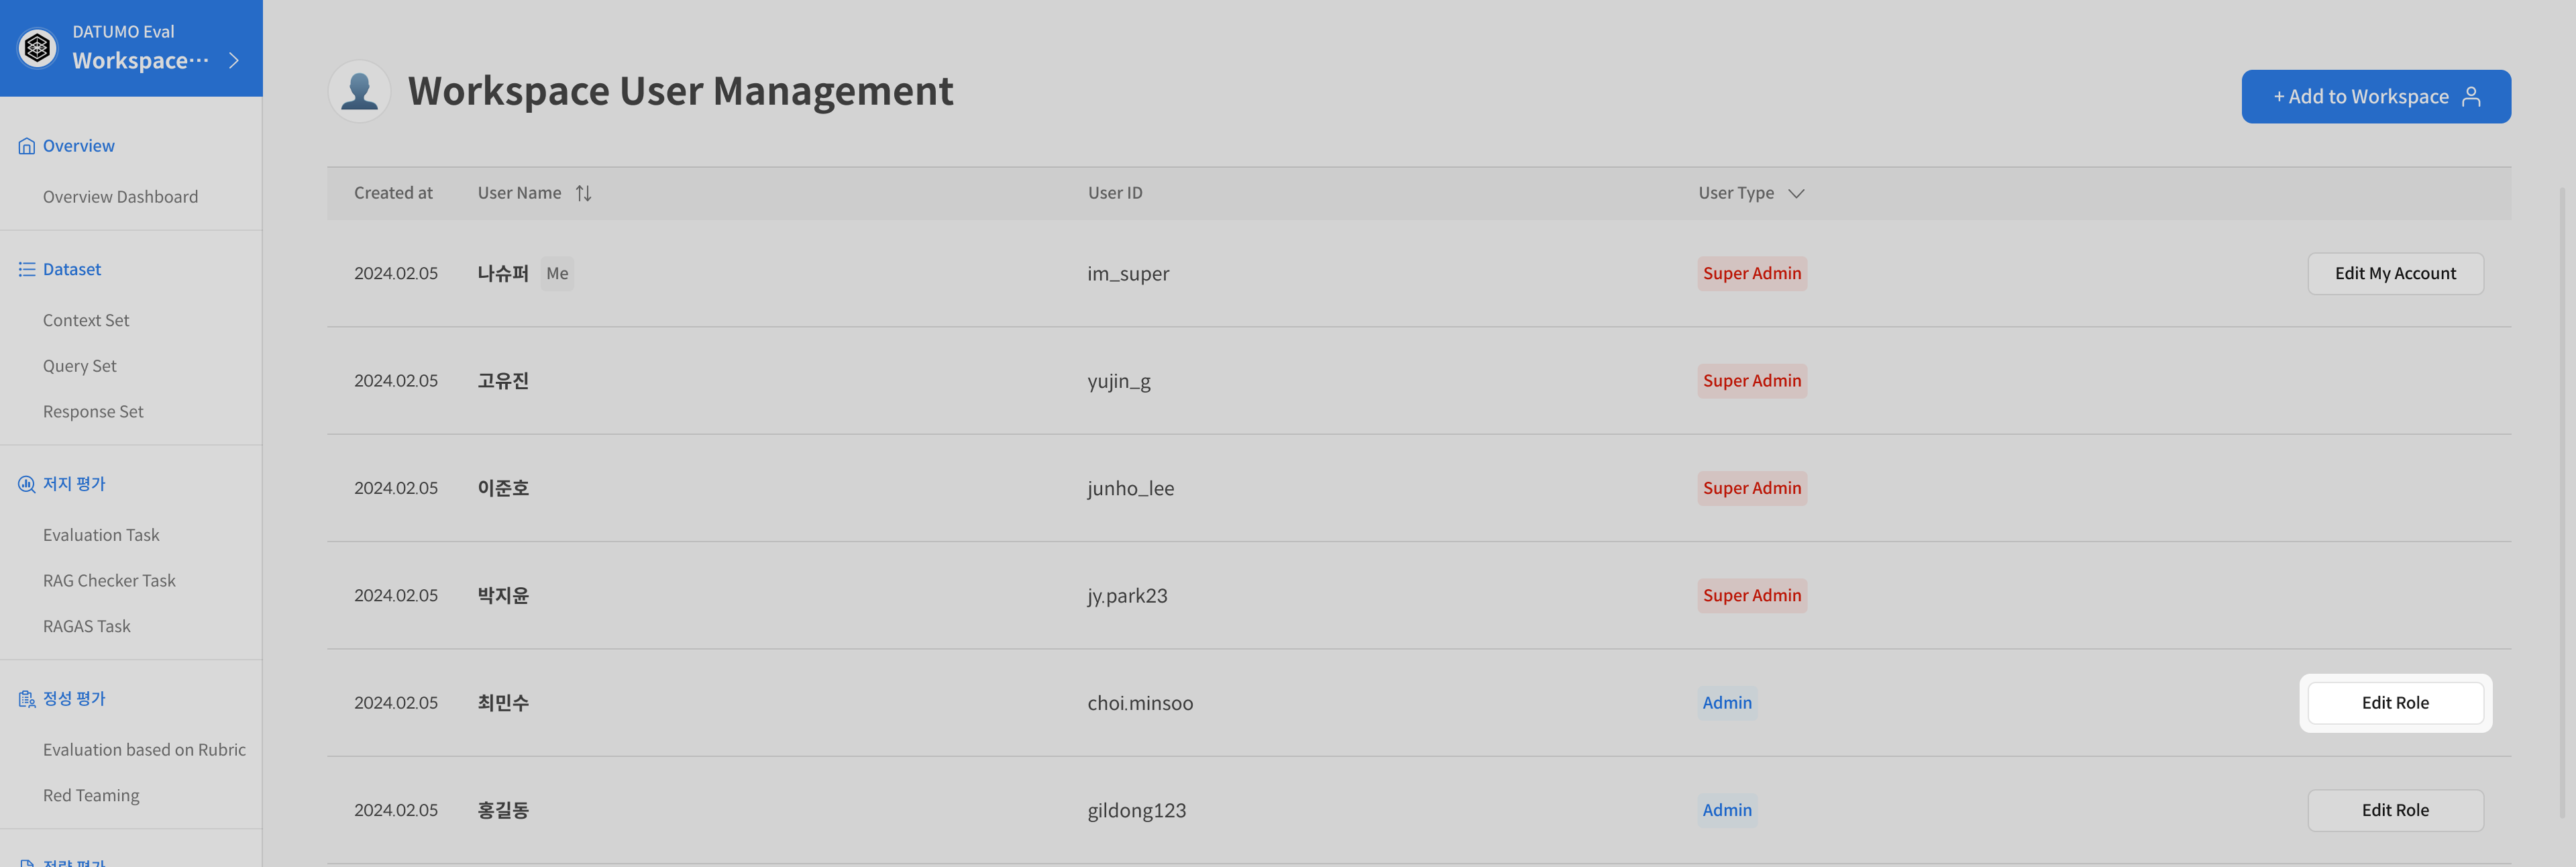
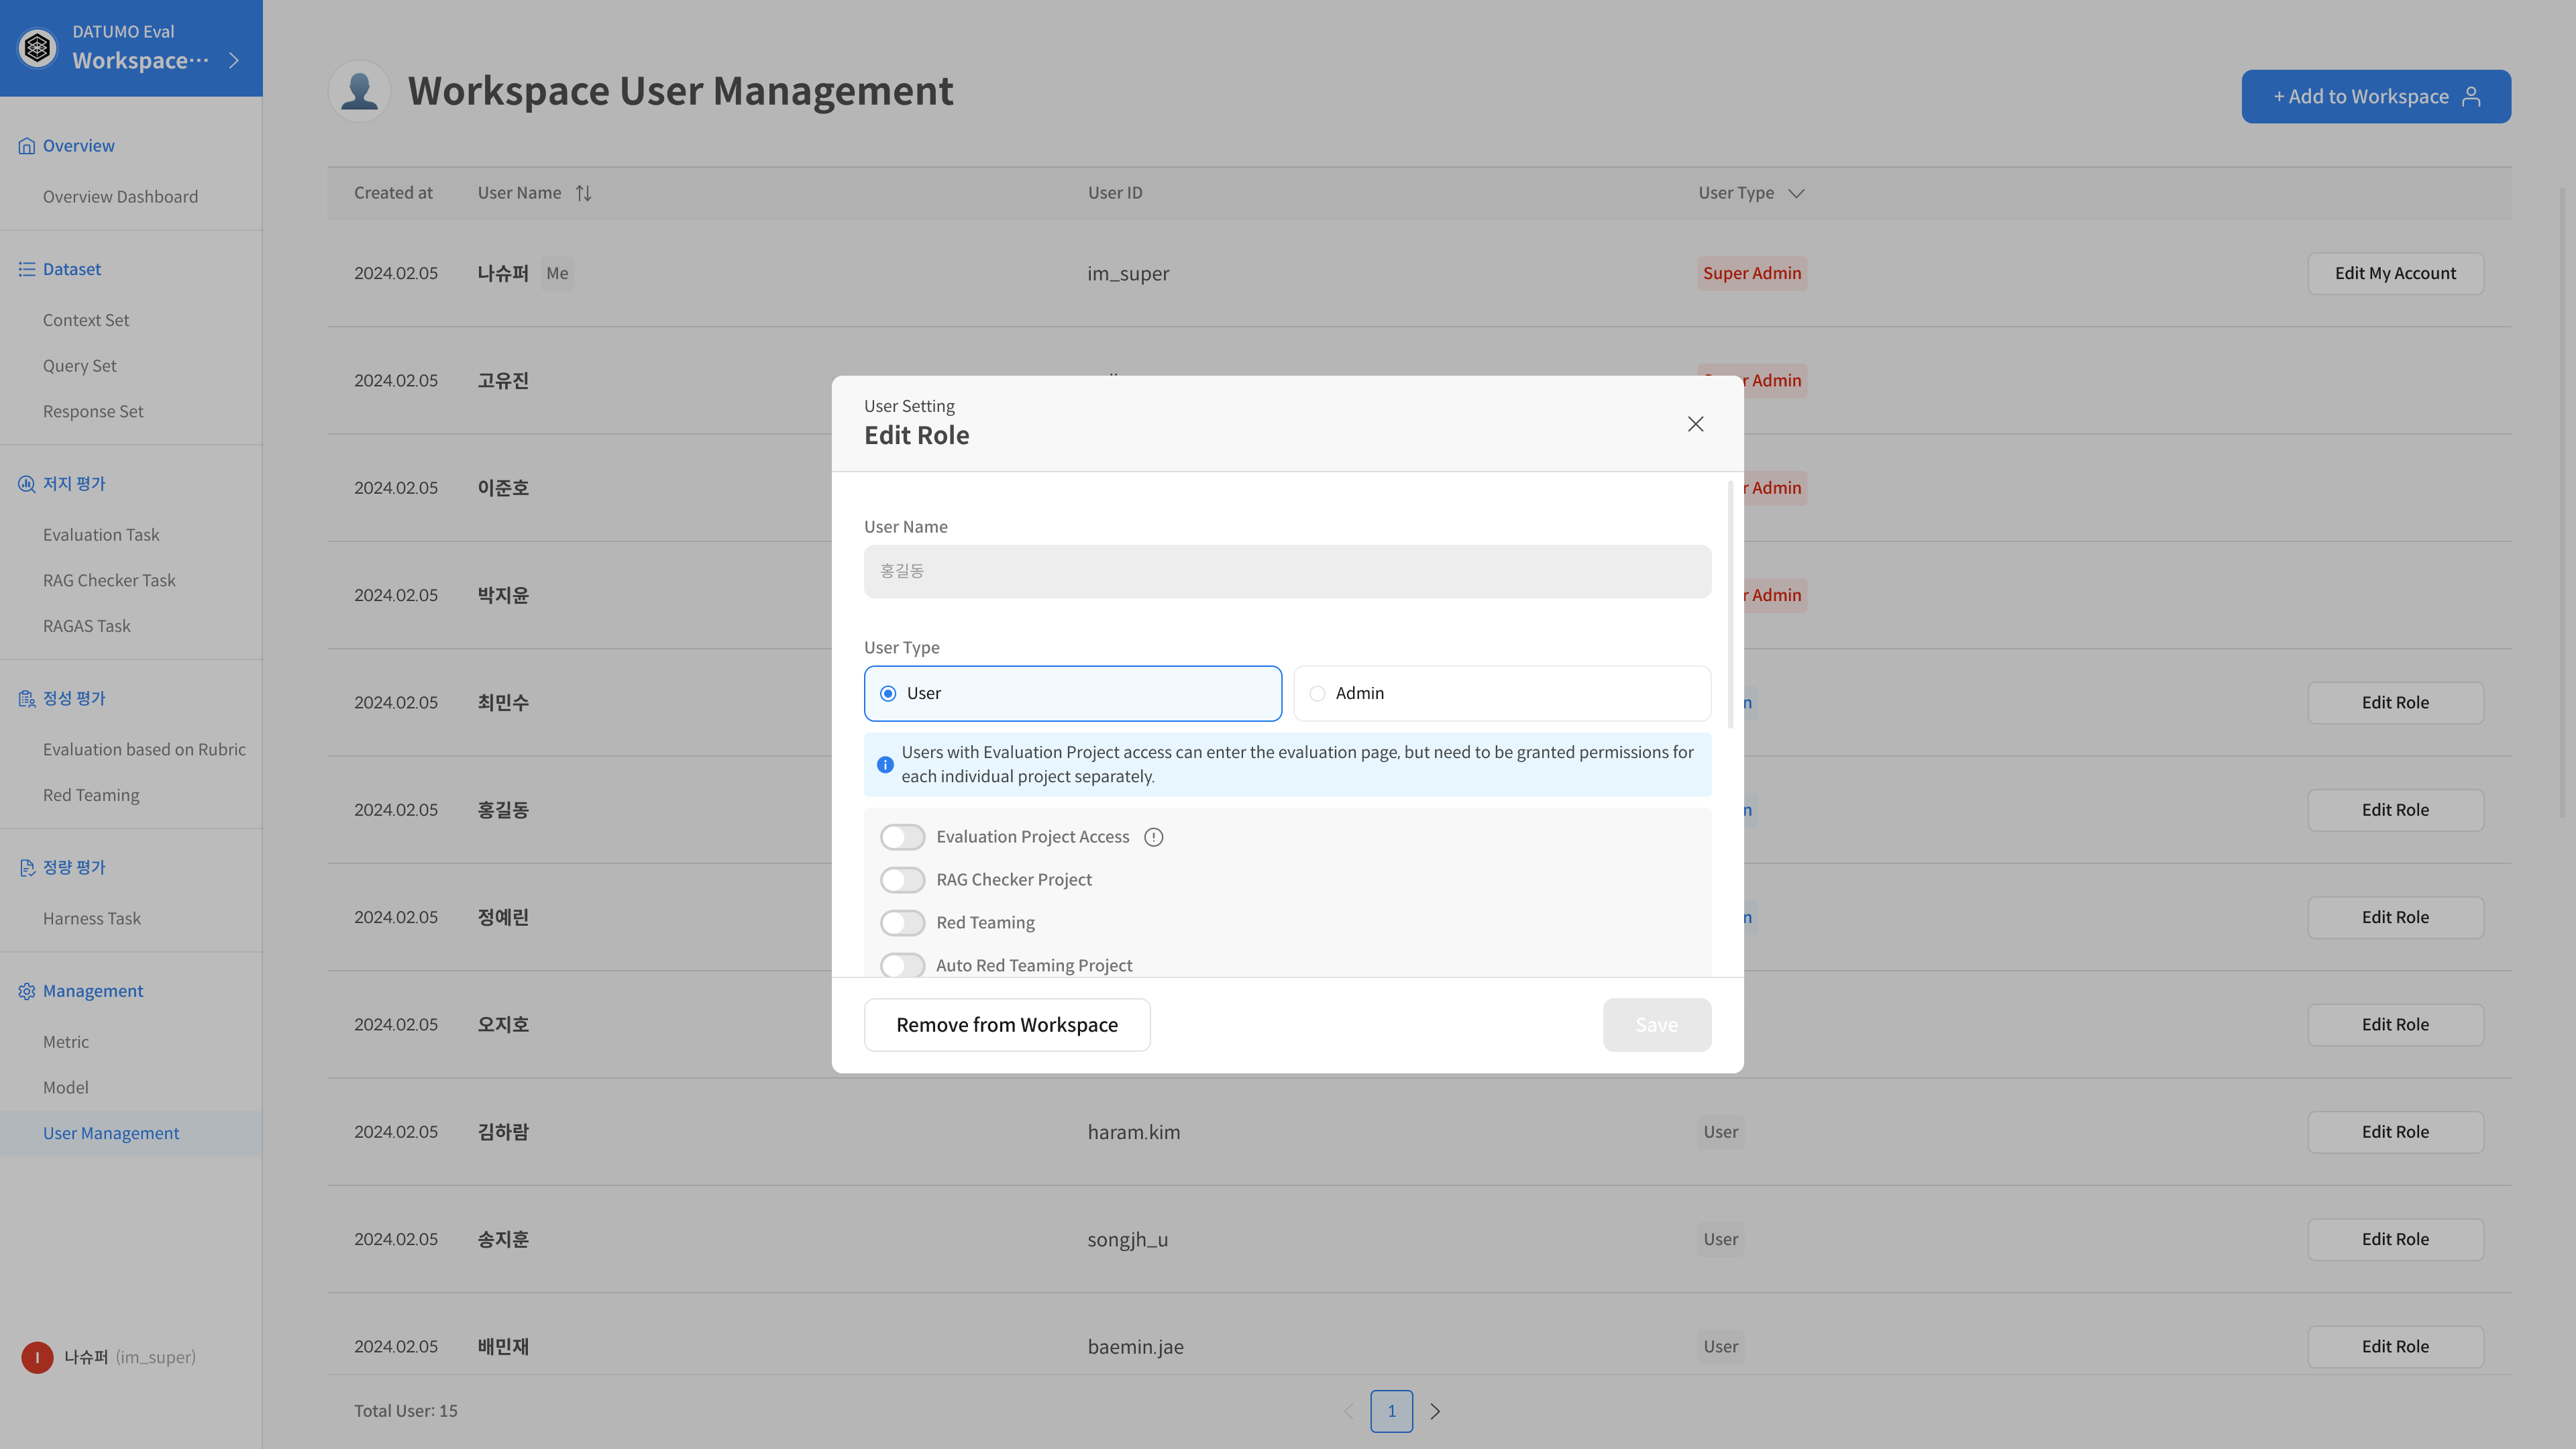
① Use the Edit function
Select the user to update and click [Edit].
② Modify access permissions
Change Role: Switch between User ↔ Admin. Fine-tune feature-specific permissions if needed.
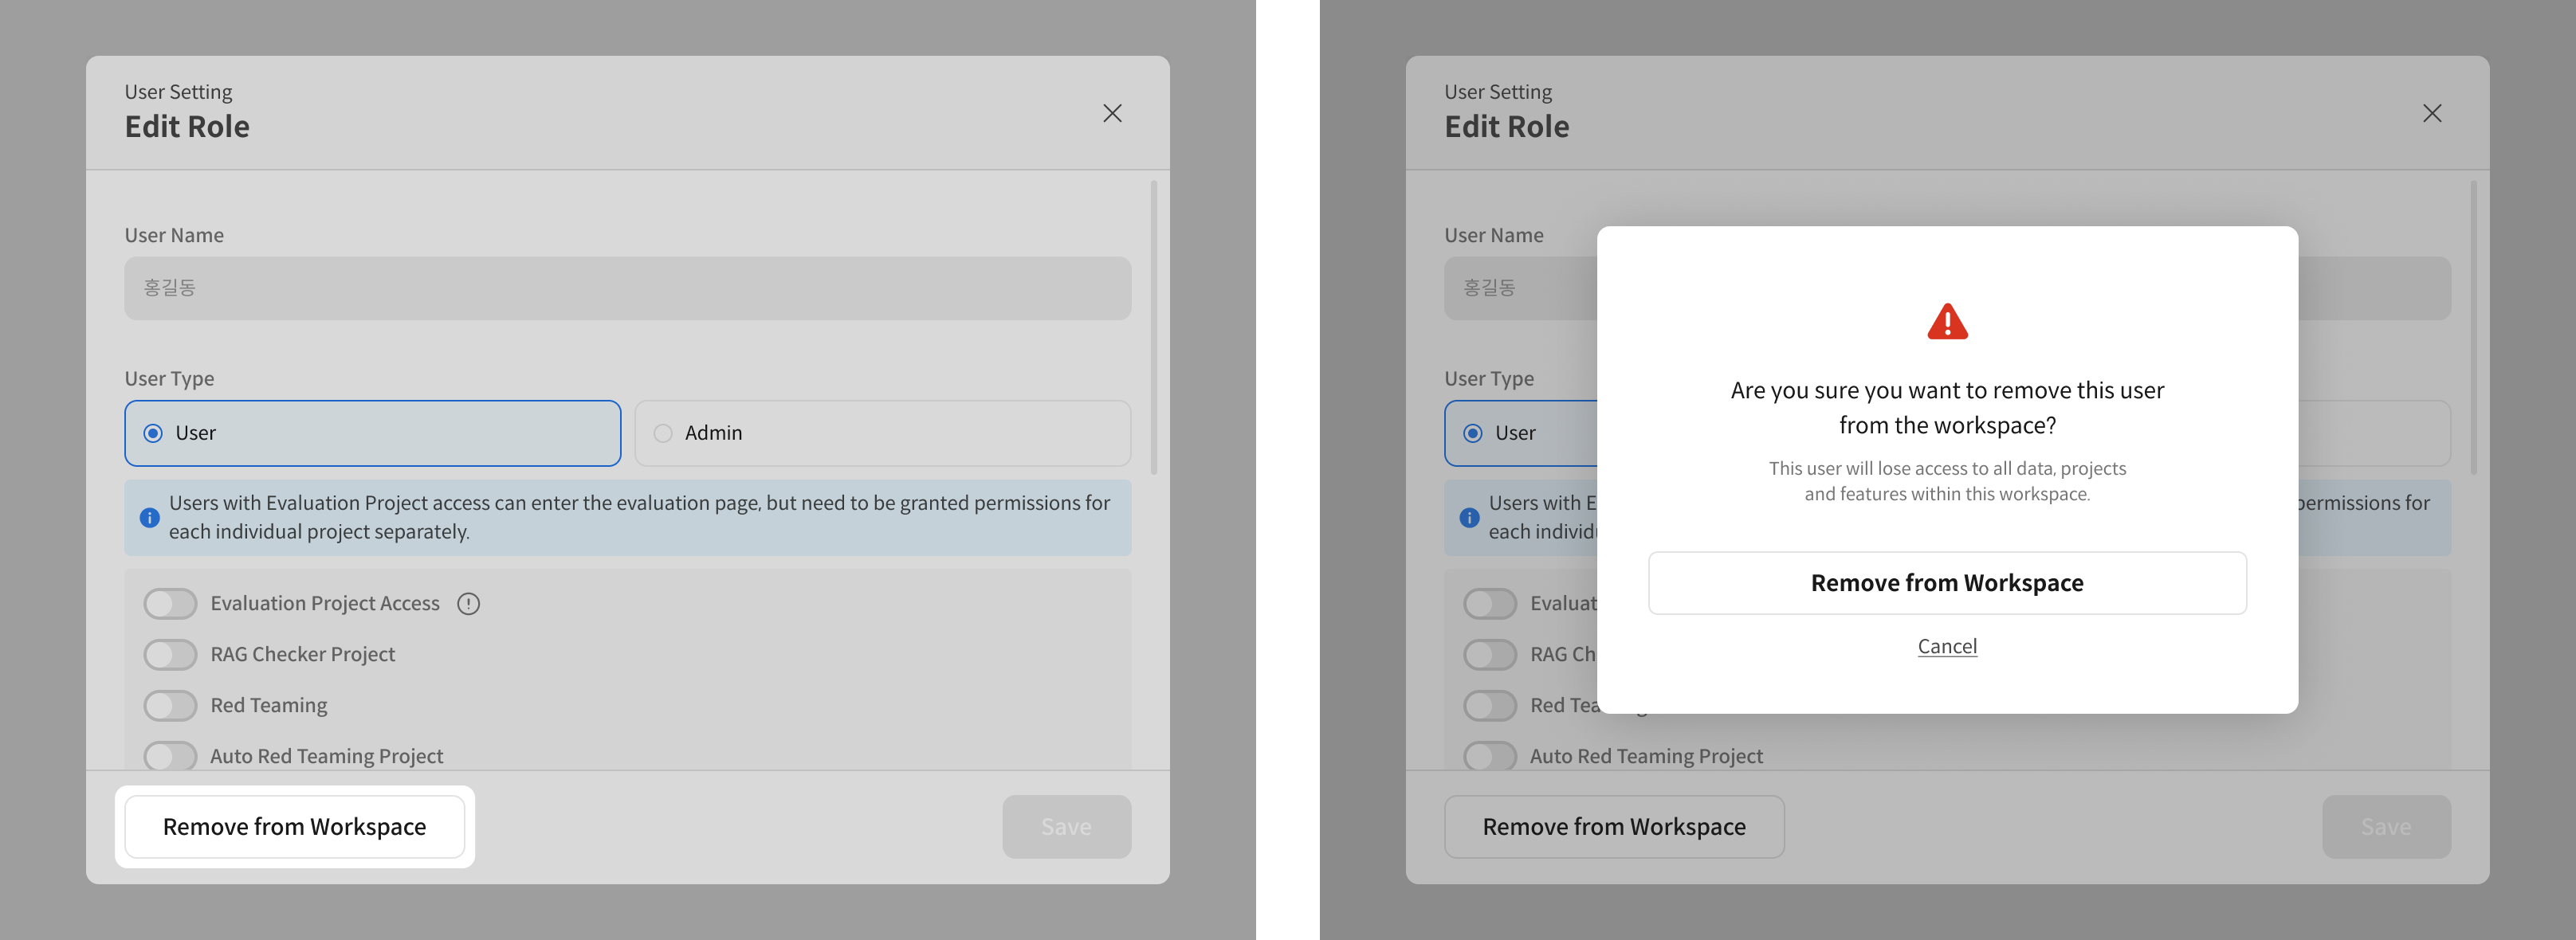
③ Remove a user from the workspace
Click [Remove from Workspace] to remove access to this workspace while keeping the account active.
- Always start new invitations with the minimum role (User) and elevate only when project needs require it.
- When a project ends or a user’s role changes, be sure to revoke permissions or remove the user from the workspace.