Set Up Custom API
You can register external APIs as Target Models/Agents to perform model evaluations and automate response collection in Datumo Eval.
The core process consists of two steps:
- Configure API call behavior
- Map the final model response location from the API response (JSON)
Workflow Summary
- Register Custom API
- Pass
user_messageto the Request Body - Test the actual API call
- Map the final response location (JSONPath) from the response JSON
- Save and use in evaluations
The following sections will guide you through the process sequentially.
Create Custom API
1. Start Creating Custom API
① Create Model/Agent
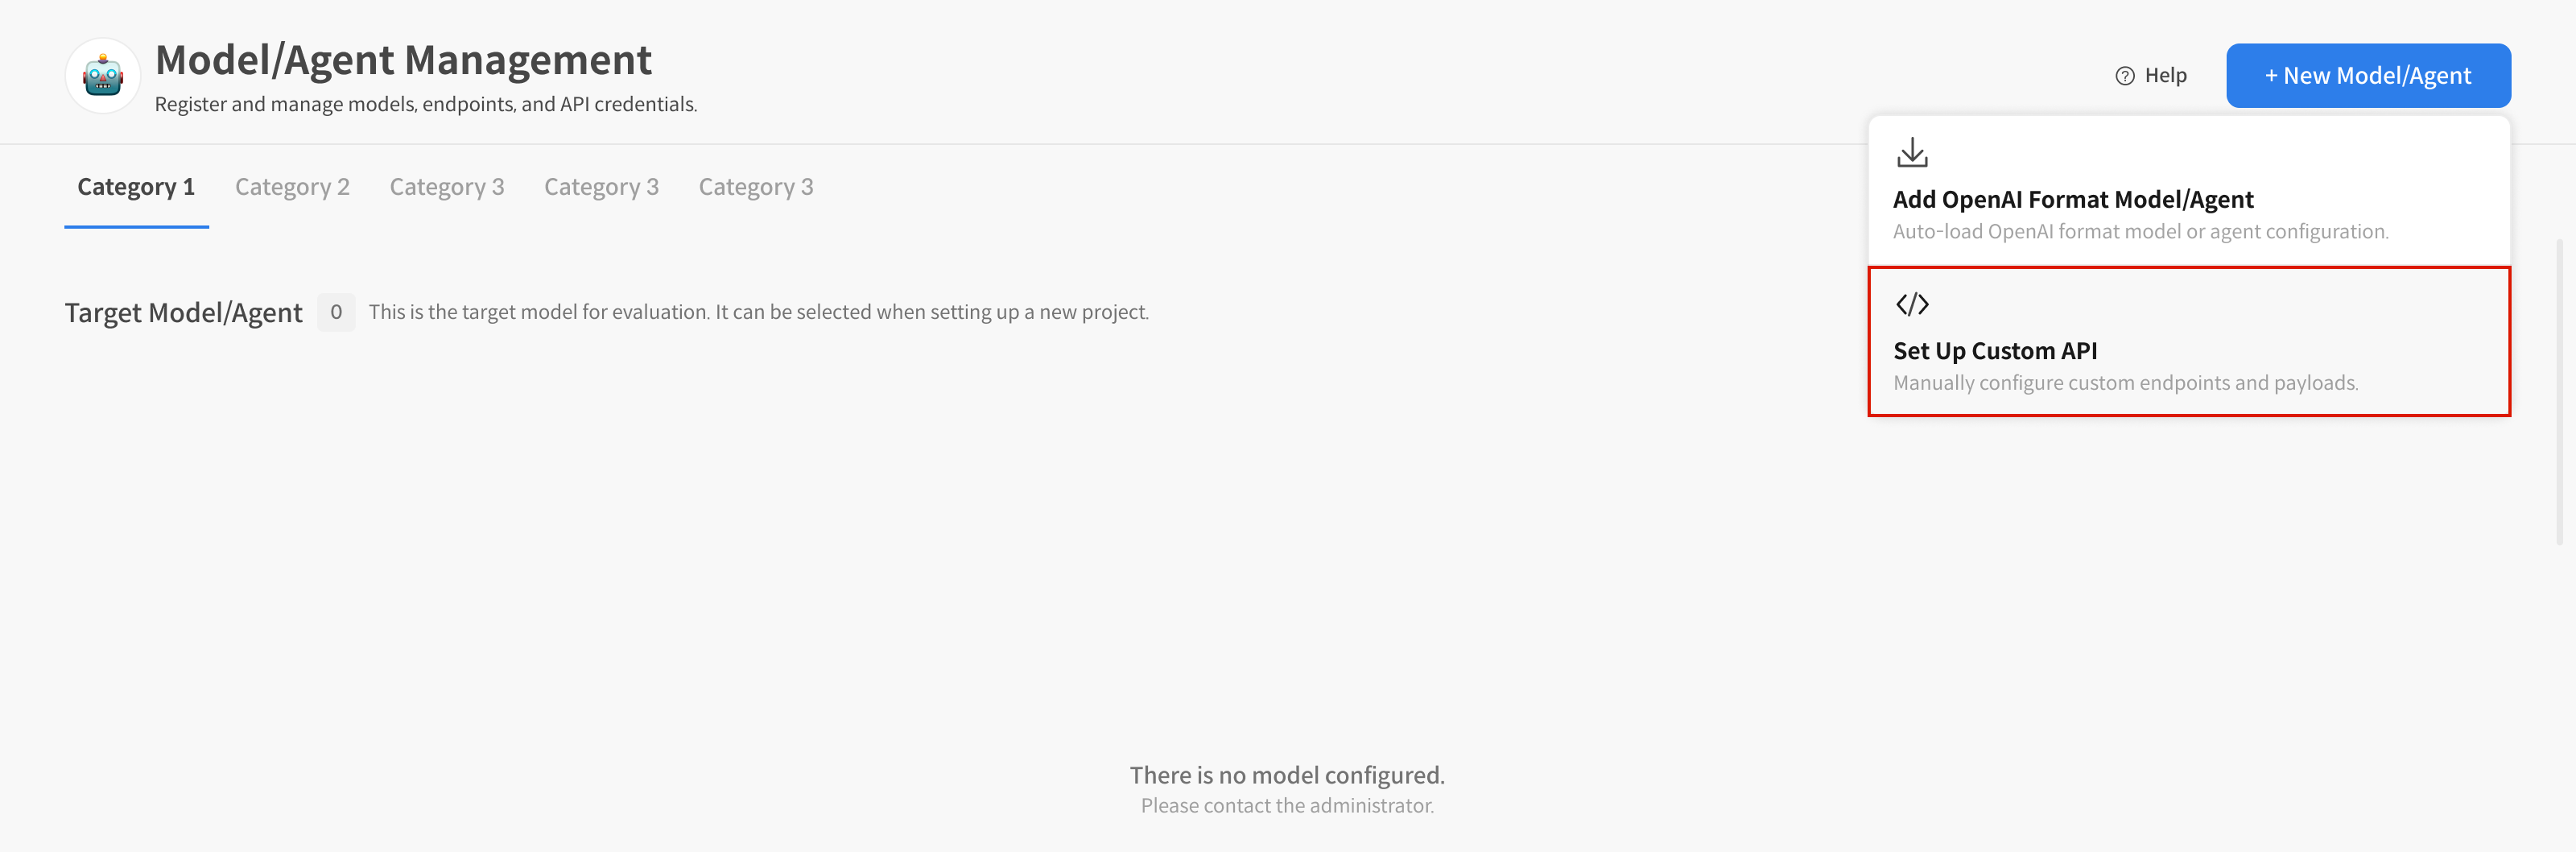
On the Model/Agent Management screen, select the [+ New Model/Agent] button.
② Select [Set Up Custom API] to Start Registration
Choose Set Up Custom API from the two options to begin registering a custom API.

2. Enter Basic Information
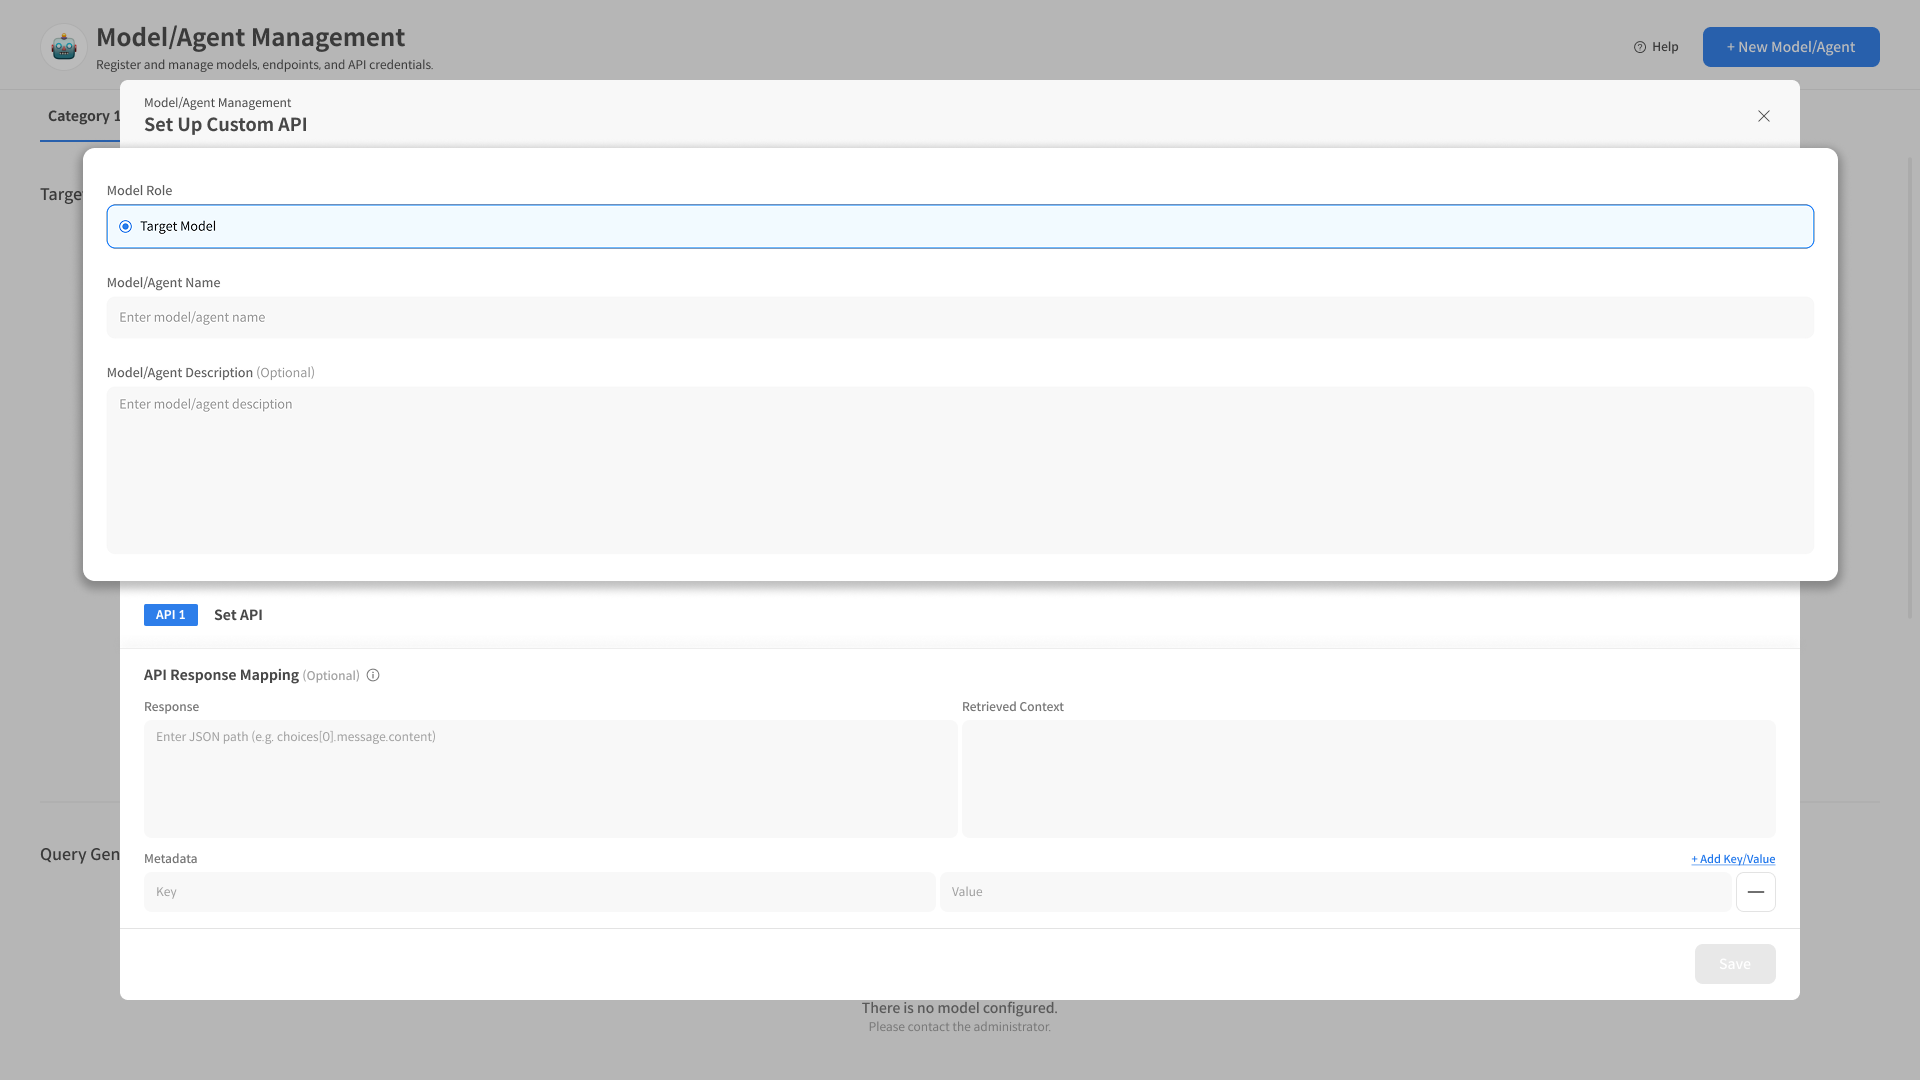
① Select Model/Agent Role
Custom API can only be registered as a Target Model/Agent.
To fully utilize the Target Model/Agent functionality,
it is recommended to specify the location of the model's final response in the API Response Mapping.
② Enter Model Name/Description
Specify a name along with a brief description.
3. Configure API Request
3-1. API Request Setup
Configuration Order: URL → Method → Header → Parameter → Body
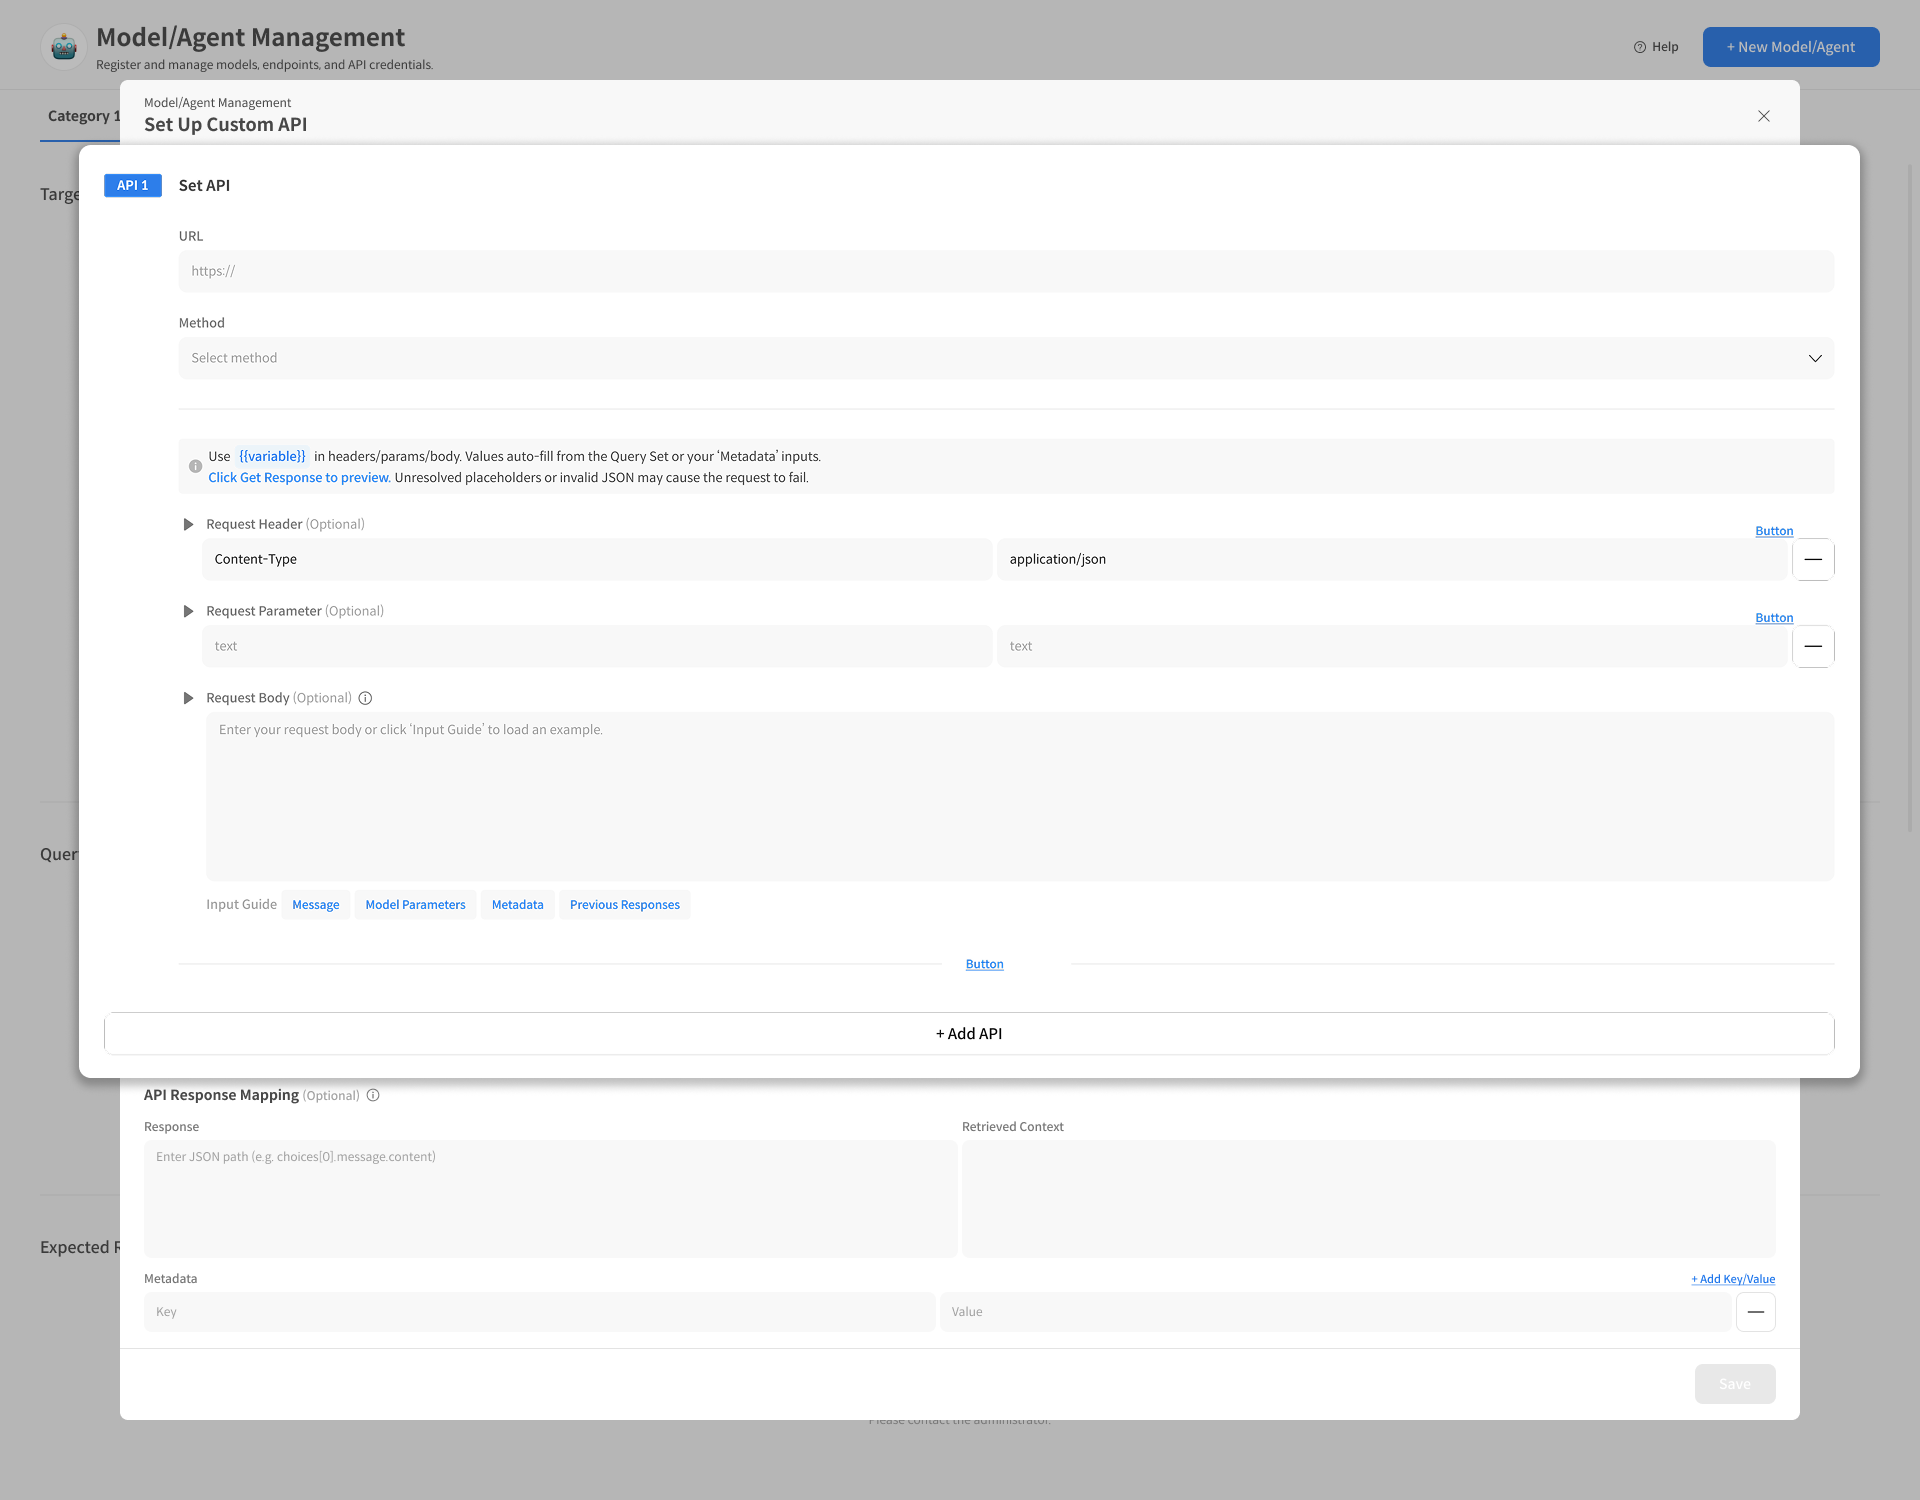
① Enter API URL
Enter the endpoint URL of the external API to connect to.
② Select the HTTP Method.
- Supported Methods:
GET,POST,PUT,DELETE

③ Enter Header/Parameter: Required values like authentication info
Enter necessary authentication values or fixed parameters for the API call.
- Examples:
Authorization,model,api-key, etc. - You can add multiple Headers/Parameters using the [+ Add Key/Value] button.
Each item is used as a Request Header or Query Parameter.
④ *Write Request Body
In the Request Body, define the JSON structure expected by the API,
including values passed from Datumo Eval (e.g., user_message).
- Example:
{
"model": "your-model",
"messages": [
{ "role": "user", "content": "`{{user_message}}`" }
]
}
Custom API does not support multi-turn. In Interactive Eval, only the last user message is passed to the API.
Request Body Tips
Using an OpenAI-compatible format allows you to explicitly configure roles (system, user, assistant), which is advantageous for prompt design and model switching.
If additional variables like system_message or context are needed,
you can define them as Custom Parameters and insert them in the format {{system_message}}.
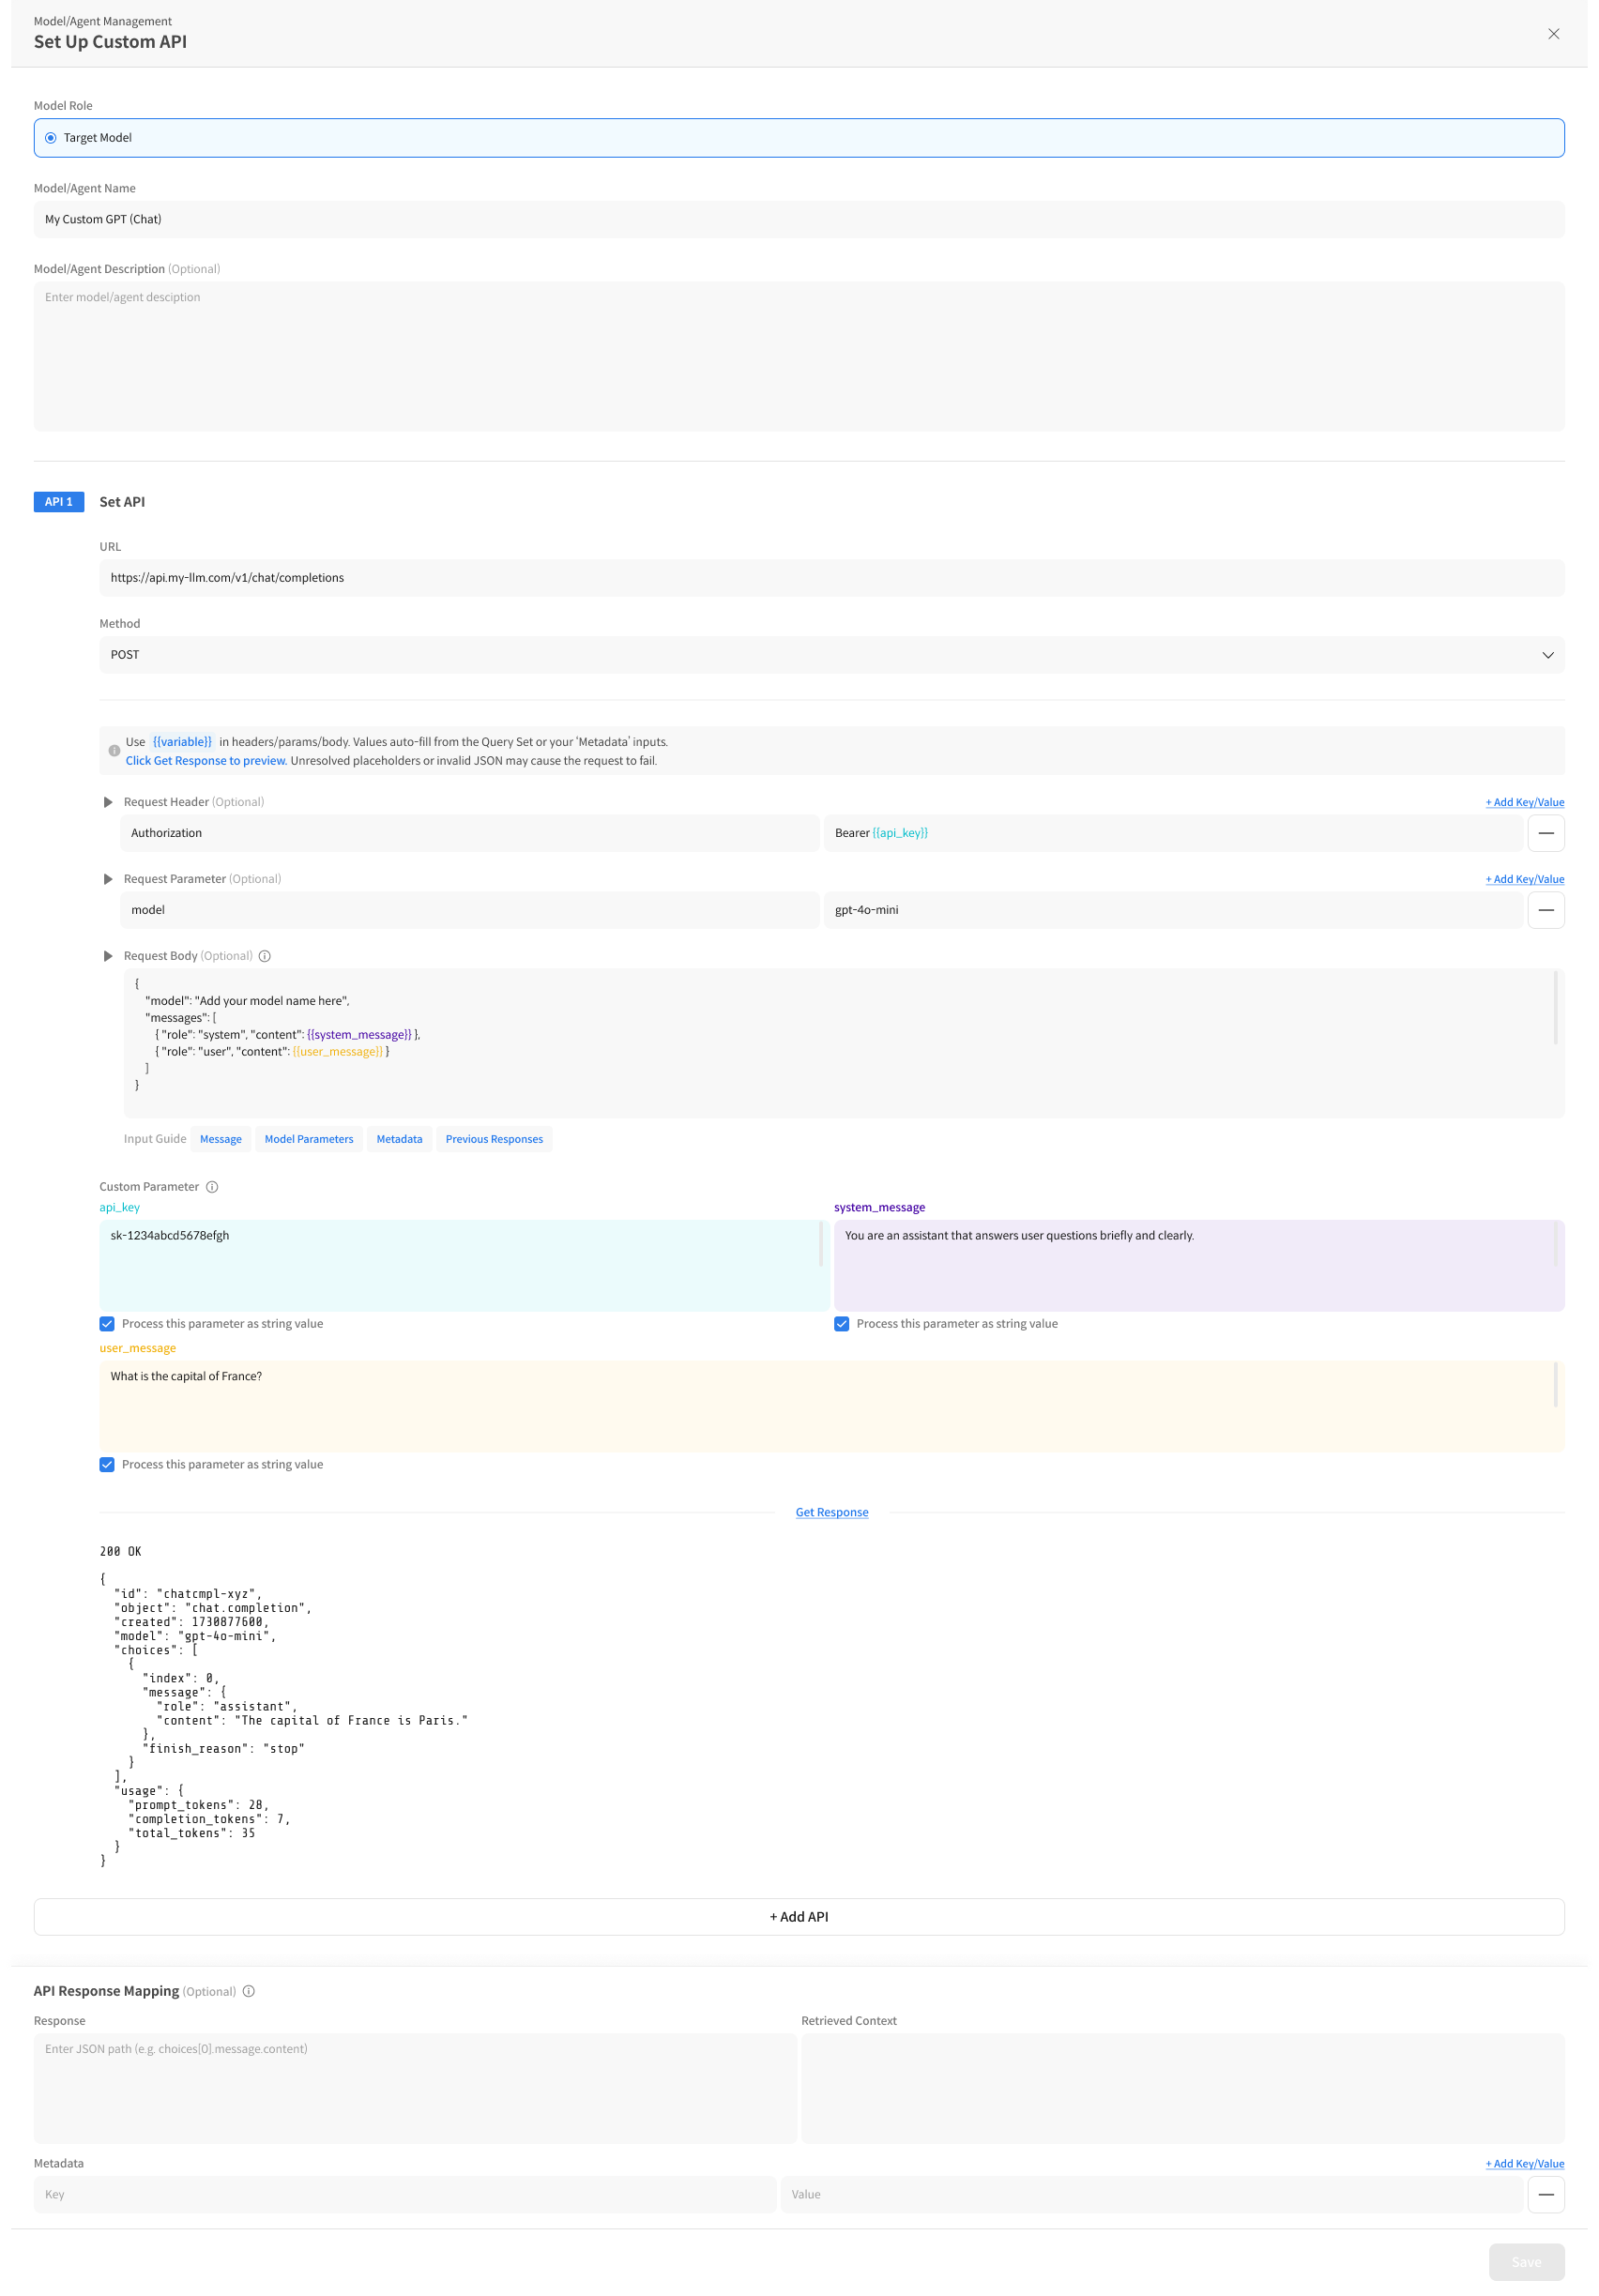
3-2. Configure Custom Parameters
Custom Parameters are reusable variables for the Request Body, Header, Query Parameters, etc.

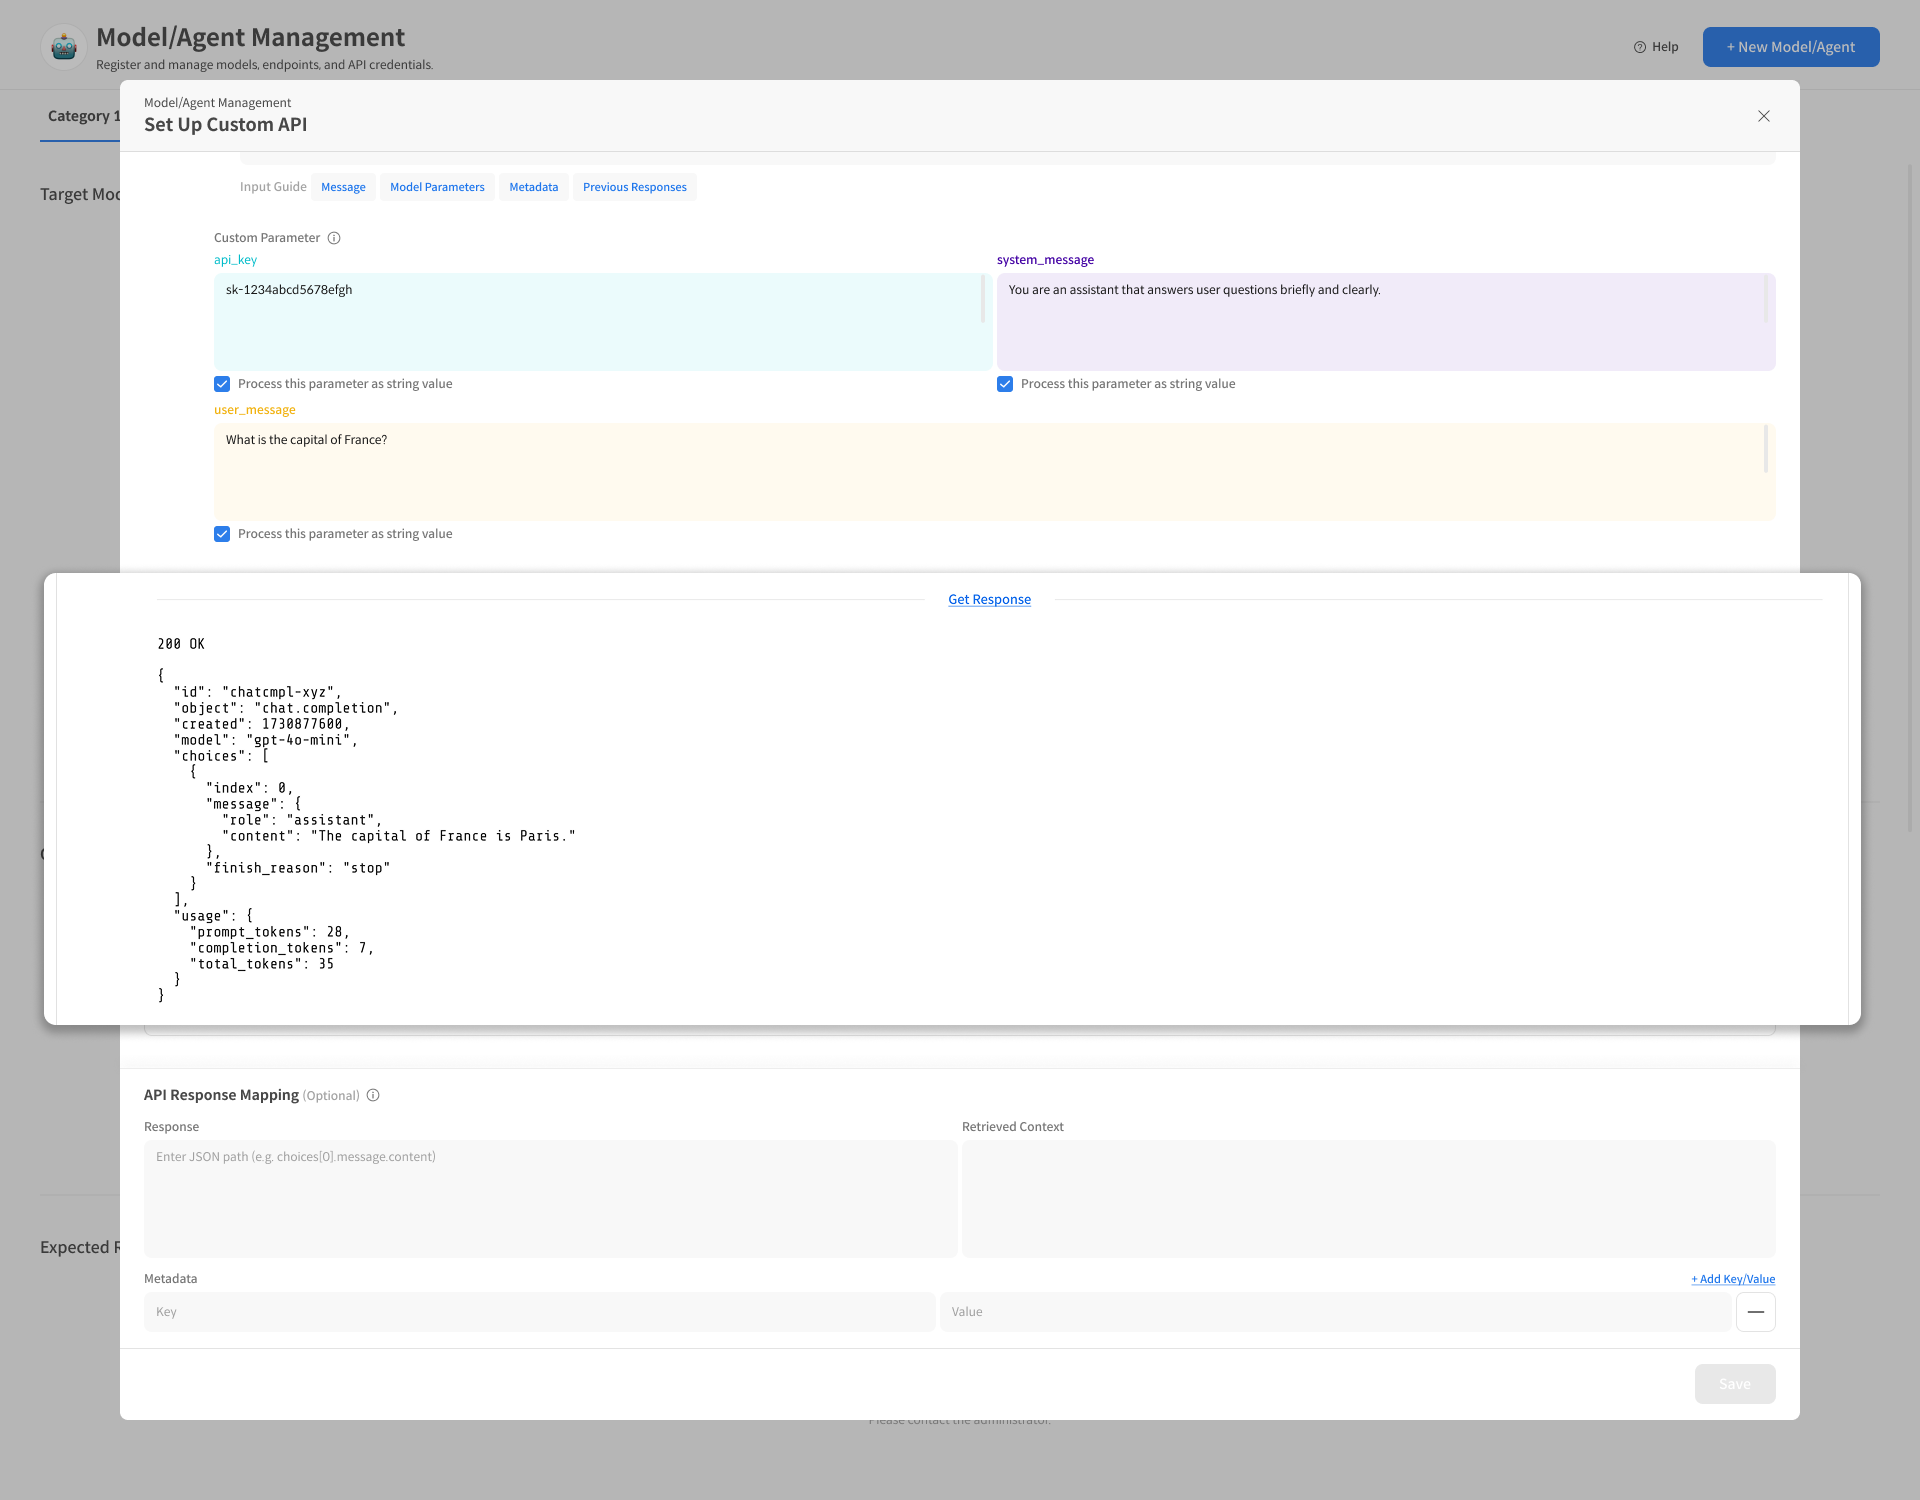
① Example of Parameter Definition
api_key→ Used in Header for Authorizationuser_message→ Inserted into the Request Body messagesystem_message→ Inserted into the system message
② String Processing Option
If a parameter is being passed as an empty value, you may need to force it to be treated as a string.
If necessary, wrap the parameter directly in the Request Body with " " or
select the "Process this parameter as string value" option in the Custom Parameter input screen to treat it as a string.
3-3. Test API Response (Recommended)
You can send an actual request to verify that the entered API settings work correctly and preview the response.
- Execute the actual request with the [Get Response] button.
- If an error occurs, check for JSON validity or missing placeholders.
Checking the response structure at this stage will be convenient for the subsequent Response Mapping setup.
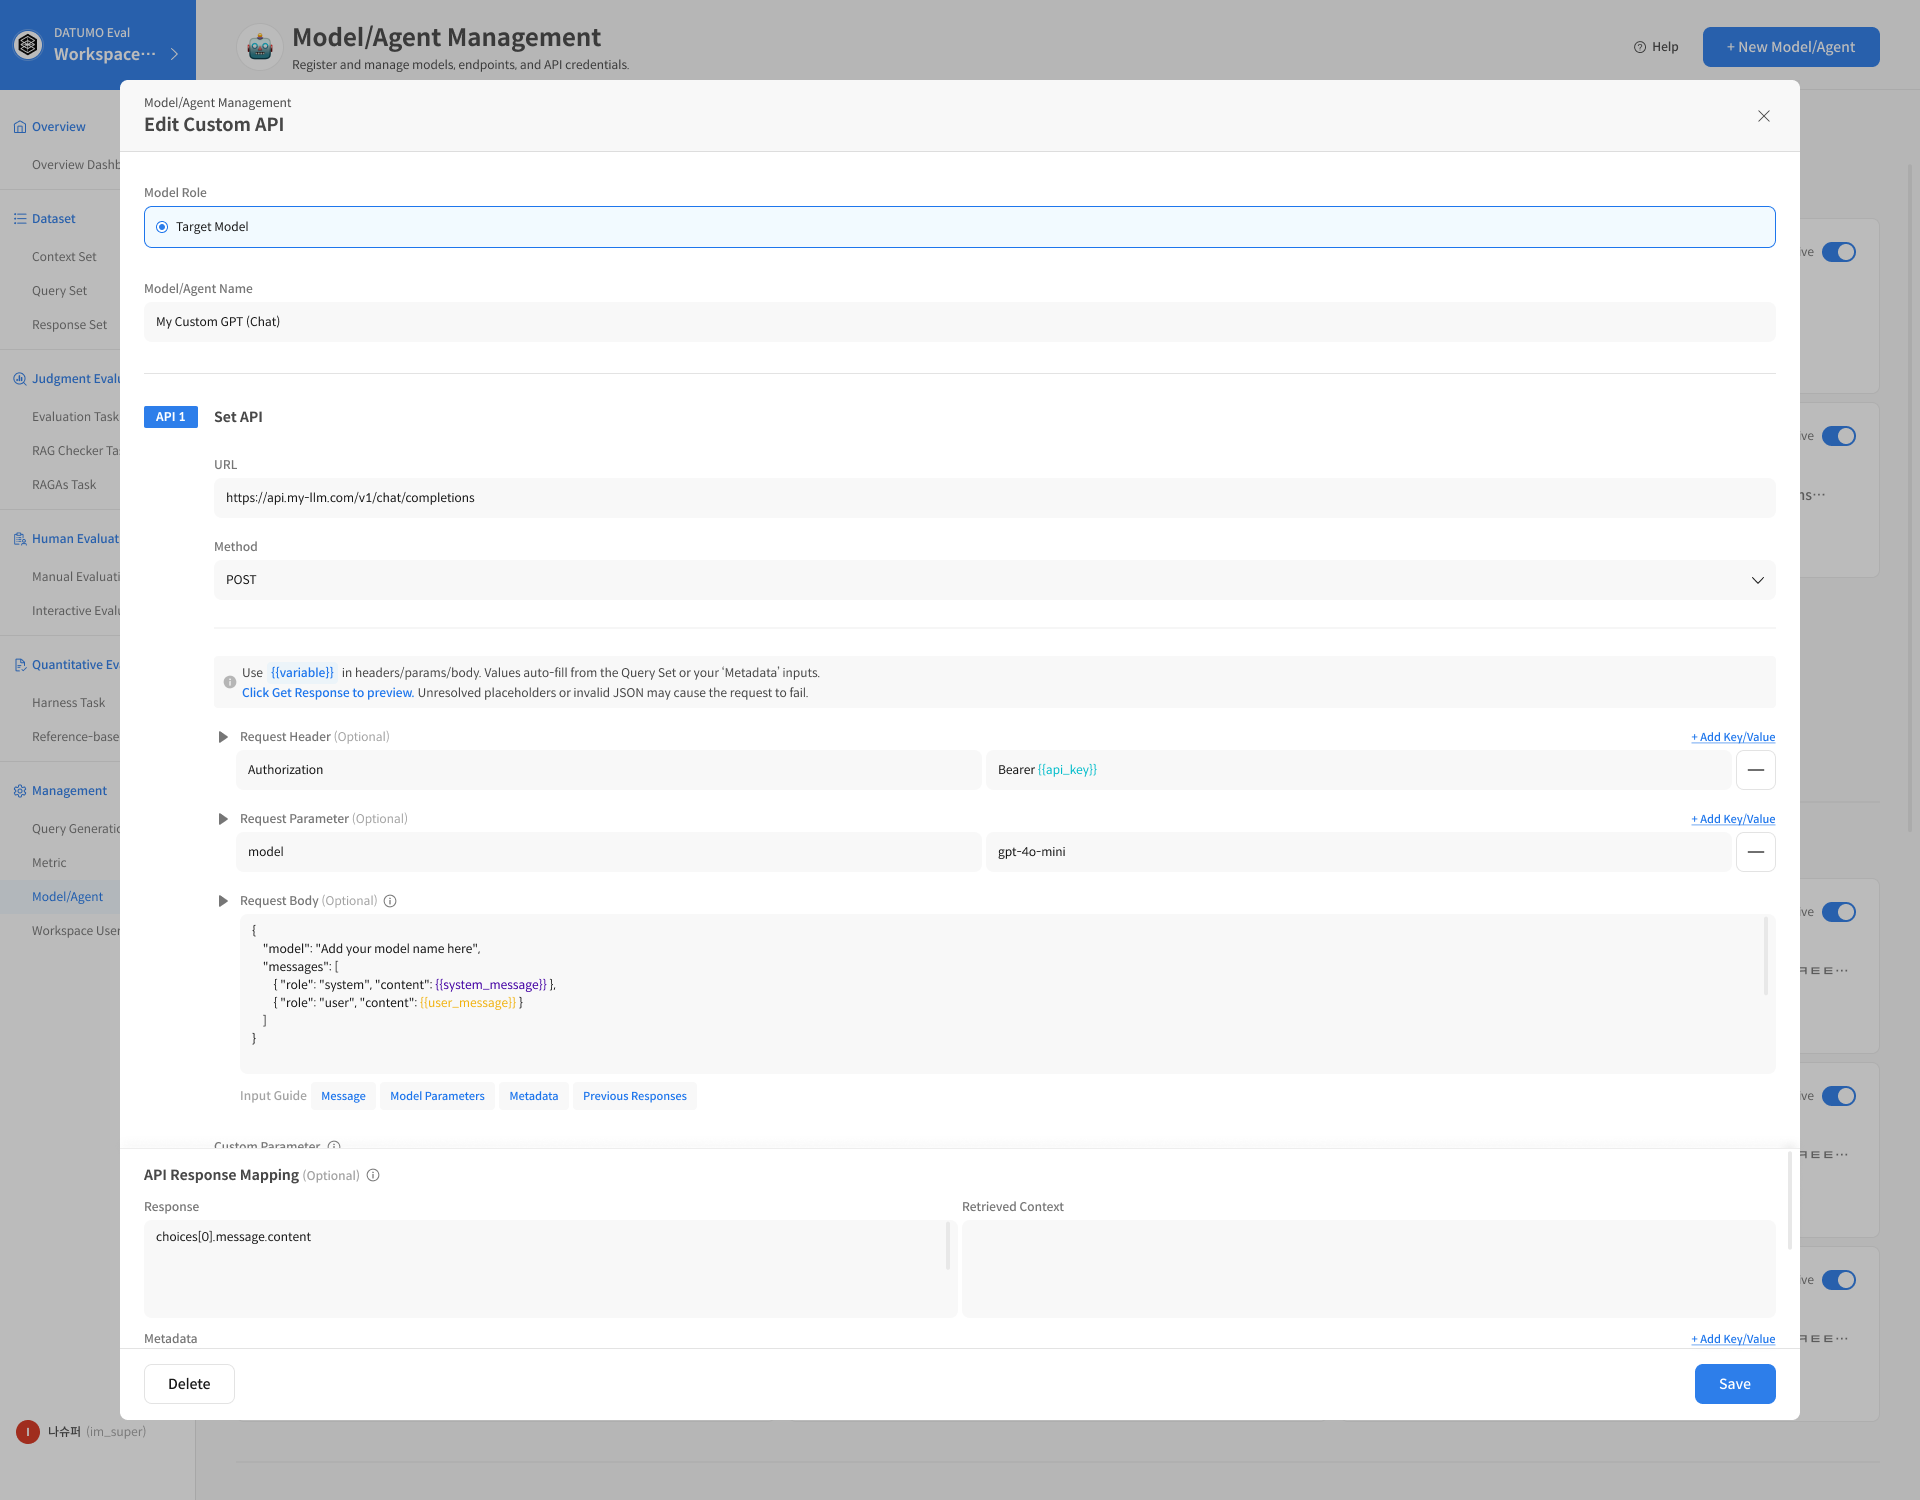
4. API Response Mapping (Recommended)
When registering a Custom API, you need to define how to extract necessary data from the external API's response. API Response Mapping is a setting that specifies the extraction location for the model's answer and related information so that Datumo Eval can find the necessary values in the response (JSON).
Set Datumo Eval to read the following three values from the Custom API response JSON.
- Model's final answer (response)
- Retrieved Context (used for search/document-based responses)
- Response metadata (responseMetadata)
4-1. Mapping Field: response
response: This is the path to extract the final response text from the LLM.
Example 1: OpenAI Compatible API
- API Response:
{
  "choices": [
    {
      "message": {
        "role": "assistant",
        "content": "Hello! How can I help you?"
      }
    }
  ]
} - Mapping Path:
response_1.choices[0].message.content - Extraction Result: "Hello! How can I help you?"
Example 2: Simple Structure
-
API Response:
  {
    "data": {
      "answer": "The weather in Seoul is sunny."
    }
} -
Mapping Path:
response_1.data.answer -
Extraction Result: "The weather in Seoul is sunny."
Example 3: Last Element of an Array
- API Response:
{
  "messages": [
    { "role": "user", "content": "Hi" },
    { "role": "assistant", "content": "Hello!" }
  ]
}
- Mapping Path:
response_1.messages[-1].content - Extraction Result: "Hello!"
[-1]refers to the last element of the array.
4-2. Mapping Field: retrievedContexts
Example 1: Extracting a Document Array
- Response:
{
  "answer": "Python is a programming language.",
  "sources": [
    { "title": "Intro to Python", "content": "Python is a language created in 1991." },
    { "title": "Python Features", "content": "Python has easy-to-read syntax." }
  ]
} - Mapping Path:
response_1.sources[*].content - Extraction Result:
[
  "Python is a language created in 1991.",
  "Python has easy-to-read syntax."
]
Example 2: Nested Search Results
- Response:
{
  "result": {
    "documents": [
      { "id": 1, "text": "Content of the first document" },
      { "id": 2, "text": "Content of the second document" }
    ]
  }
} - Mapping Path:
response_1.result.documents[*].text - Extraction Result:
[
  "Content of the first document",
  "Content of the second document"
]
Example 3: Formatting with Template Strings
Besides simply extracting values, you can also use template strings to format the context as desired.
- Response:
{
  "search_results": [
    { "doc_id": "DOC001", "title": "Python Basics", "content": "Python is an easy-to-learn language." },
    { "doc_id": "DOC002", "title": "Python Applications", "content": "Python is widely used in data analysis." }
  ]
} - Mapping Path:
Document (you can also enter text directly): {{response_1.search_results[*].content}} - Extraction Result:
[
  "Document: Python is an easy-to-learn language.",
  "Document: Python is widely used in data analysis."
]
4-3. Mapping Field: responseMetadata
Stores additional metadata included in the response as key-value pairs.
Example 1: Simple Example
-
Response:
{
  "answer": "This is the answer.",
  "model": "gpt-4",
  "processing_time": 1.23,
  "session_id": "abc-123"
} -
Mapping Settings:

-
Extraction Result:
{
  "model_name": "gpt-4",
  "latency": 1.23,
  "session": "abc-123"
}
5. Save and Use
① Save
Once all settings are complete, click [Save] to save the Custom API.
② Use for Dataset Evaluation
A Custom API set as a Target Model/Agent can be selected in the following places:
- When running response fetching based on a Query Set (creating a dataset/response-set)